If you’re lucky enough to have a mulberry tree in your backyard, now is the time to put those delicious berries to good use! In this video, we demonstrate an 18th century recipe for a mulberry pudding that’s surprisingly simple and absolutely delicious.
We are using a recipe from Hannah Glass’s classic 18th century cookbook, “The Art of Cookery.” The recipe features a recipe for an apple pudding that can be easily adapted to use any type of berry, including mulberries. The recipe calls for making a “good puff paste”, which we simplify to a standard pie crust. The berries are mixed into a ball made from the pie crust, tied up in a cloth, and boiled for about 2 hours.
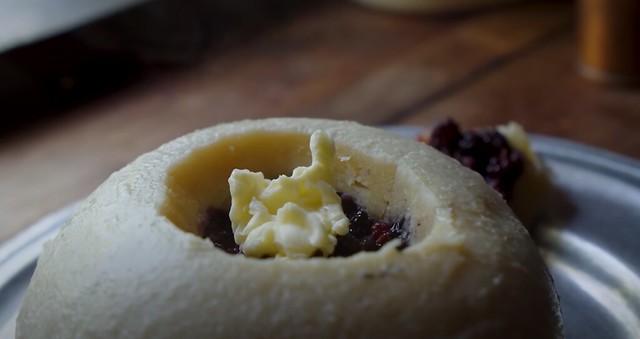
Once the pudding is cooked, we poured in a generous amount of butter and sugar, creating a sweet and fruity treat that’s perfect for any occasion. We suggest serving the pudding hot, with slices of the crust and berries dished out to each guest.
The recipe is adaptable to any type of berry, making it a versatile and seasonal dessert. So, next time you’re looking for a sweet treat to make with your freshly picked mulberries, give this recipe a try!
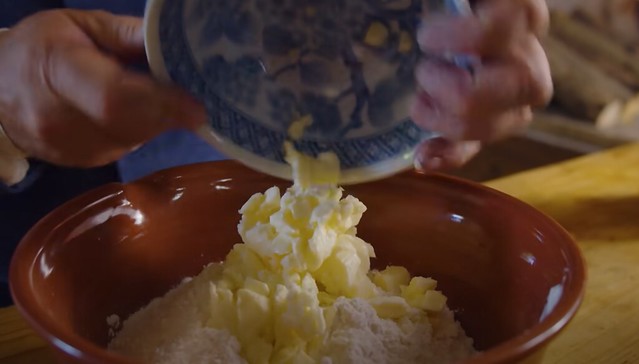
Chop up your butter, cold, and mix it in with your flour. Avoid over handling, as you do not want your butter to melt.
The ratio, by weight, should be 1-part butter to 3-parts flour, and will differ based on how large you’d like your pudding.
3. Once your butter is mixed in, add small amounts of cold water and mix until it forms up into a dough.
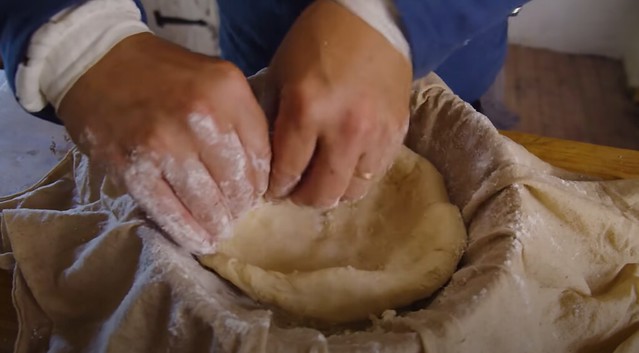
4. Flour the inside of your pudding bag, and place in a mixing bowl.
5. Form your dough into a bowl shape and place in the open pudding bag.
6. Fill the dough bowl with the berries, and carefully pinch the dough up and together to cover them. Take care to ensure the crust is totally sealed. Any holes will ruin the pudding while boiling.
7. Close your pudding bag, and boil for 2 hours. 8. Remove the pudding bag from and dip it in cold water before taking the pudding from the bag. 9. Cut open the top to add sugar and butter (to taste).
Hannah Glass tells us to, “serve it up warm.” You can put the lid back on, bring it to the table hot, and cut slices to serve with a portion of the crust and berries for each guest. The texture will be that of a “ball of cobbler.” Enjoy!
Why not grab your slice of mulberry pudding, and maybe a scoop of ice cream (we won’t tell), and head over to Townsends Plus to check out the Townsends Plus original “Unpacking the Pantry: Fixing Herb Pudding.” In this episode, we try to salvage a seemingly cursed pudding recipe, and we get a peek behind the curtain to see the temperamental nature of historical cooking. This, and more original episodes are available exclusively over on Townsends Plus, along with ad free versions of the Townsends content you already love!
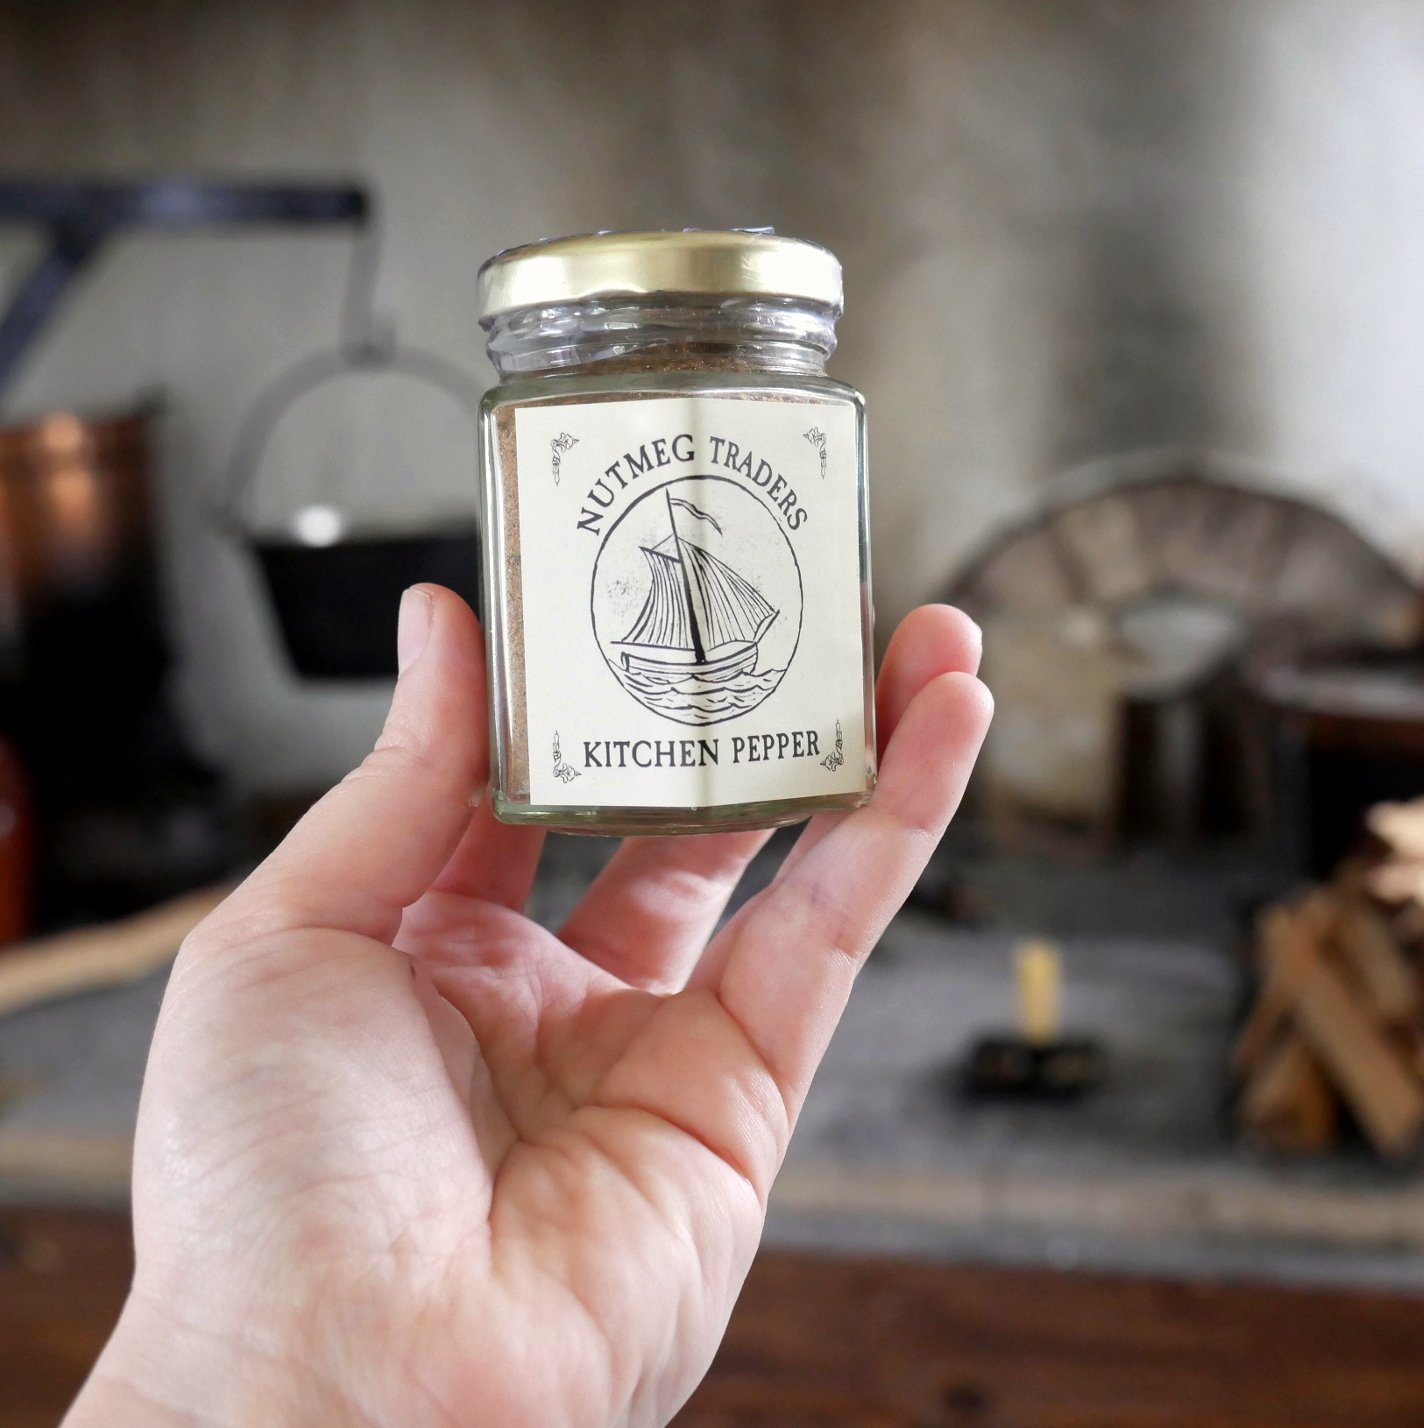
Kitchen pepper is one of those things that shows up in 18th-century cookery books. It sounds good and it sounds handy to have around. You can make your own or you can try our new Kitchen Pepper!
Pemmican is the ultimate survival food from the 18th and 19th centuries, originally made by indigenous peoples in North America. Buffalo was the obvious selection for large scale pemmican production. Many native peoples of America depended on pemmican for their survival. It kept well and it was an excellent food source, especially during hard winter months. Pemmican was also an important food source for many voyagers, frontiersmen, explorers, and fur traders. At the height of its production, from the late 18th century to the mid-19th century, the vast majority of it was made with bison, although at times deer, moose and elk were used depending upon availability.
The Metis were a unique group of people with their own cultural identity who originated from the descendants of French voyageurs and their Native American wives. They were responsible for most of the pemmican that was sold and traded throughout the northern regions of North America. The Metis developed an entire societal structure based upon the buffalo hunt. They conducted two hunts per year, one in the spring and one in the fall. A single Metis hunting party could have up to a thousand ox drawn carts in tow and could return from the hunt with up to a million pounds of pemmican and dried meat, and there were multiple Metis hunting parties.
While the men hunted buffalo, the women processed them. Period accounts say that a skilled Metis woman could dismantle up to 10 buffalo carcasses a day leaving very little behind for the wild animals to scavenge. A single bison cow, when processed properly, would produce about 250 pounds of raw meat or about 50 pounds of dried meat. This same cow would also produce about 50 pounds of rendered tallow.
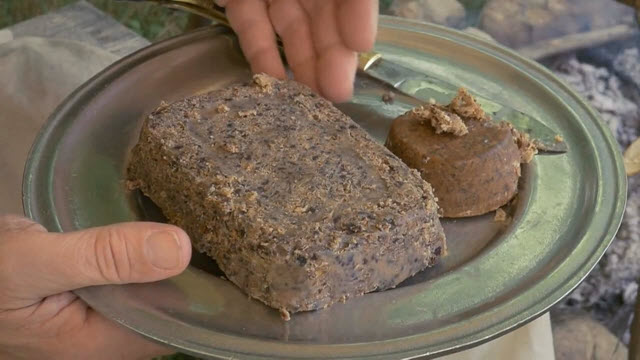
Once the useable portions of the animal were harvested, they’d be processed over the next few days. The meat was cut into thin strips and laid out on wooden racks to dry near the fire and in the heat of the sun. The skins were stripped of their hair and sewn into rawhide bags that would be used to store the pemmican. Suet was melted and refined into tallow and the bones were cracked and the delicate marrow extracted. The dried meat was then pulverized and placed into rawhide bags. Sometimes dried berries were mixed in. Then the liquid suet was poured in over the top and mixed in well and the bag was sewn shut.
Pemmican, produced and stored in this fashion, would last a long time. Some reports suggest 10, 20, even 30 years. About half of the pemmican produced by the Metis was kept and used by them to get them through the hard winter. The remaining pemmican was sold to the Hudson Bay Company or its competitor The North-West Company. The pemmican sold to these companies would provision vast crews of voyageurs that used to transport their goods. It was also sold to other backwoodsmen and to outlying military posts. Competition between these two companies was so fierce that battles broke out between the employees of these companies and became known as the pemmican war. The British government eventually had to step in and settle the matter by forcing a merger between the two companies.
During the late 1700’s, great buffalo herds extended from just west of the Appalachian Mountains all the way to the Rockies, as far south as what is now Mexico to arctic Canada, but the demand for pemmican put a tremendous strain on the buffalo herd. Today, only about 500,000 bison still live in the wild across North America.
Pemmican can be easily made in a modern kitchen so you can use it at your next historical reenactment, survival outing, or even camping trip. It can also be stored long term for times of shortage.
Slice your meat very thin and against the grain. Place in your oven preheated to the lowest possible temperature. If you wish to use a dehydrator, I recommend baking your meat strips in your oven at 200 degrees for about a half hour first. Your meat should be completely dry and brittle in about 10-12 hours. For every pound of raw beef, you should end up with about a quarter pound of dried beef. It is best not to use beef jerky for this process, because it is typically very highly salted, highly spiced and also contains nitrates. These all add up to a very concentrated flavor which isn’t good in pemmican. The other problem is that jerky is cut with the grain instead of against the grain, so it’s very difficult to break up into powder.
Once the meat is dry and brittle, melt an equal amount by weight of suet in a saucepan. While your suet is melting, grind your meat into a coarse powder using a mortar and pestle or your food processor. Mix together your meat powder and melted suet. If you are using dried berries, now would be the time to add them, though it will cause your pemmican to not keep as well. A common version in the time period called seed pemmican had ground up choke berries.
You can eat your pemmican raw or you can use it to make other delicious dishes.
Transcription of Videos:
Pemmican – The Ultimate Survival Food – Episode 1
This is pemmican. It’s food from the 18th and 19th centuries, originally made by indigenous peoples in North America and then used by voyagers, frontiersmen, and explorers alike. It is a highly condensed nutritious form of food. It’s in fact, the ultimate survival food. Over the next few episodes, we’re going to talk about exactly what pemmican is, how it was made historically, how you can make it in your modern kitchen and also how we can cook with it, whether it’s at home, at an historical event or in your next survival outing. I want to thank you for joining us today on 18th Century Cooking with Jas Townsend and Son.
Pemmican was traditionally made of just two or three ingredients; dried meat, animal fats, and dried berries. At the height of it’s production, from the late 18th century to the mid 19th century, the vast majority of it was made with bison, although at times deer, moose and elk were used depending upon availability.
A group of people called the Metis were most famous for their pemmican. The Metis were a unique people group with their own cultural identity. They originated from the descendants of French voyageurs and their Native American wives. They were responsible for most of the pemmican that was sold and traded throughout the northern regions of North America.
The Metis people developed an entire societal structure based upon the buffalo hunt. While the men hunted buffalo, the women processed them. Period accounts say that a skilled Metis woman could dismantle up to 10 buffalo carcasses a day leaving very little behind for the wild animals to scavenge.
Once the useable portions of the animal were harvested, they’d be processed over the next few days. The meat was cut into thin strips and laid out on wooden racks to dry near the fire and in the heat of the sun. The skins were stripped of their hair and sewn into rawhide bags that would be used to store the pemmican. Suet was melted and refined into tallow and the bones were cracked and the delicate marrow extracted.
A single bison cow when processed properly, would produce about 250 pounds of raw meat or about 50 pounds of dried meat. This same cow would produce, also, about 50 pounds of rendered tallow. The dried meat was pulverized and placed into rawhide bags. Sometimes dried berries were mixed in. Then the liquid suet was poured in over the top and mixed in well. Then the bag was sewn shut.
Pemmican produced and stored in this fashion would last a long time. Some reports suggest 10, 20, even 30 years. It was the ultimate survival food. In our next episode, we’ll show you how you can make this authentic pemmican at home.
If you haven’t already, please subscribe to our YouTube channel. You can also visit our website and you can request a print catalog. I want to thank you for joining us today as we savor the flavors and the aromas of the 18th century.
Pemmican – The Ultimate Survival Food – Episode 2
In our last episode, I showed you how pemmican, the ultimate survival food, was made in the 18th and 19th centuries. Today, I’m going to show you how you can easily make it in a modern kitchen so that you can use it at your next historical reenactment, your survival outing or even your next camping trip. Thanks for joining us today on 18th Century Cooking with Jas Townsend and Son.
Large quantities of pemmican was made with bison. Today we’re using beef. If you have access to bison, or perhaps a venison, you may use that instead.
Bison was the obvious selection for large scale pemmican production. Now, today the wild bison herd is very small, but during the late 1700’s, great buffalo herds extended from just west of the Appalachian mountains all the way to the Rockies, and as far south as what is now Mexico, all the way north to arctic Canada.
Many native peoples of America depended on pemmican for their survival. It kept well and it was an excellent food source, especially during hard winter months. Pemmican was also an important food source for many voyagers and fur traders.
The demand for pemmican put a tremendous strain on the buffalo herd. There is one particular group of people call the Metis. They were descendants of early voyageurs and their Native wives. The Metis produced and supplied most of the pemmican. They conducted two hunts per year, one in the spring and one in the fall. A single Metis hunting party could have up to a thousand ox drawn carts in tow and could return from the hunt with up to a million pounds of pemmican and dried meat, and there were multiple Metis hunting parties. About half of the pemmican produced by the Metis was kept and used by them to get them through the hard winter. The remaining pemmican was sold to the Hudson Bay Company or it’s competitor The North-West Company.
The pemmican sold to these companies would provision vast crews of voyageurs that used to transport their goods. It was also sold to other backwoodsmen and to outlying military posts. Competition between these two companies was fierce. So fierce that battles broke out between the employees of these companies. These battles became known as the pemmican war. The British government eventually had to step in and settle the matter by forcing a merger between the two companies.
Now back to our meat. I’m slicing this meat very thinly.
I’m going to put this in my modern oven, preheated to the lowest temperature possible. You can use a dehydrator too if you wish. If you do, you ought to bake your meat strips first in your oven at 200 degrees for about a half an hour and then you can place them into the dehydrator to dry up.
The process will take between 10 and 12 hours. Your meat should be completely dry and brittle when it’s done. For every pound of raw beef, you should end up with about a quarter pound of dried meat.
Now some of you are probably thinking, Jon why don’t you just use beef jerky instead of dried beef in this recipe? Well, typically is very highly salted, it’s highly spiced and it also contains nitrates. These all add up to a very concentrated flavor which isn’t good in pemmican. The other problem is, it’s cut with the grain instead of against the grain, so it’s very difficult to break up into our powder.
Once our meat is dry and brittle, I’m going to melt in a saucepan an equal amount by weight of suet. Today, I’m using Atora’s suet in this recipe, which is available online on our website. Now you can render your own tallow from raw suet, but make sure to watch our previous episode on suet that’ll give you instructions on how to do that.
Now I’m going to take my dried meat and I could use a mortar and pestle, or even easier, I could use my food processor at home. Reguardless, I want to end up with a coarse powder. I’ve got about 8 ounces of dried beef here. I’m going to mix in about an ounce of dried berries, those are optional, along with 8 ounces of melted suet.
A common version in the time period had ground up choke berries. These you can find online. If you add dried berries to your pemmican, it will not keep as well. This version is called seed pemmican. Let’s see what this pemmican tastes like raw.
You know, there’s not a lot of flavor right up front. After you chew it for a while, you get a nice little beefy flavor. The texture might turn off some, but hey, if you’re tired and you’re hungry, this will keep you going.
And here it is, authentic pemmican. In our next episode, I’ll show you how to prepare easy, delicious dishes with this wonderful mixture.
If you haven’t already, please subscribe to our YouTube channel. You can also visit our website and you can request a print catalog. I want to thank you for joining us today as we savor the flavors and the aromas of the 18th century.
I have a friend who is an award-winning BBQ pit master. Follow your nose through my sleepy little hometown on any given Saturday, and that unmistakable aroma of meat on the grill will lead you straight to him. You can find him there in the grocery store parking lot from 9:00 a.m. until the food runs out (usually between 1:00 and 2:00 in the afternoon). For anyone unfamiliar with his product, it may seem kind of silly for a steady line of people to stand single-file in the blistering mid-day sun, or ankle-deep in a Noahic downpour, or huddled against each other in a blinding side-ways snowstorm. But those who have tasted his fall-off-the-bone ribs, buttery smoked pork chops, melt-in-your-mouth double-smoked bacon, and of course, his signature pulled pig piled high on a bun with his “spirited” sauce on the side…well, they get it. One bite is all it takes to be hopelessly hooked on this succulent smokey crack.
Some people like their BBQ smothered with sauce, and that is completely their prerogative. I like mine with sauce on the side. That’s not to say the sauce is bad. That sauce is seriously good stuff. I try to resist drinking it straight from that little Styrofoam cup. Keeping the sauce on the side, however, heightens my meal to a sensual experience. I’m better able to fully experience the layering of flavors, from sauce, to smoke, to meat. And tucked somewhere in between is my friend’s secret blend of spices and seasonings.
Every BBQ pit master has his or her special blend of spices, the formulas of which often remain highly guarded secrets. Such spice blends are used to achieve a unique and consistent flavor profile that keeps BBQ fans line up for more.
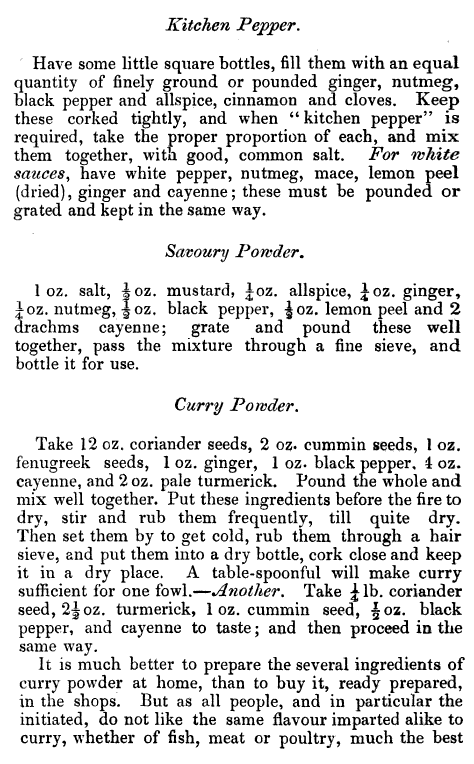
Spice blends have been used for hundreds of years long before BBQ came ashore on this continent, so let’s set BBQ aside just for now. “Powder Blanch,” “Powder deuce” (sweet powder) and “Powder fort” (strong powder) were used in medieval English and French Kitchens to season a variety of soups, stews, and roasted dishes. By the end of the 17th century, kitchen blends began to take a more standardized form with nutmeg, cinnamon, ginger, and black pepper taking on predominate roles. Some were loaded with salt, some weren’t. I suspect their popularity was largely borne out of convenience. Spices were primarily sold in whole form and had to be ground or grated when needed. A pre-ground preparation of the more commonly used (and desired) spices made the seasoning of foods much easier.
By the end of the 18th century, these spice blends had acquired the common name “kitchen pepper.” For the most part, the various recipes included in the period cookbooks are very similar to one another. There were also a number of outright plagiarisms that food historians expect of the period. But as the popularity of kitchen spread into the 19th century, a broader variety of recipes began to appear on the published pages. Here are some of the recipes I found in my research.
From “A Lady’s Assistant,” by Charlotte Mason (1777)
From “The Practice of Cookery,” by Mrs. Frazer (1791)
From “A New System of Domestic Cookery,” by Maria Rundell (1808)
From “The English Housekeeper,” by Anne Cobbett (1835)
This recipe is called a French Salad and it comes from Maria Rundell’s 1808 cookbook, “A New System of Domestic Cookery”, but even though it is a 19th century recipe, it is very similar to a number of different 18th century recipes for salads.
2 or 3 Anchovies
1 Chopped Shallot
¾ cup chopped Parsley
1 Tbsp. Olive or Almond Oil
2 Tbsp. Lemon Juice
2 Tbsp. Distilled Vinegar
1 tsp. Mustard of choice
Salt to taste
Pepper to taste
¾ pound Roasted Chicken completely cooled
Mince your anchovies and mix with the shallot and parsley. In another bowl, mix your oil with the lemon juice, vinegar, mustard, salt and pepper and whisk together, then add it back to the other bowl and mix well. Next, break your chicken up into small pieces or strips and add it to the vinaigrette, completely coating the chicken. Cover your bowl and set aside in a cool place like your refrigerator for about 3 hours.
This would traditionally have been served on toast, but can also be served as a sandwich or even straight out of the bowl.
Transcription of Video:
Today I’m going to be demonstrating a simple and refreshing chicken salad right out of the 18th century. Thanks for joining us today on 18th Century Cooking.
Today’s recipe is called a French Salad and it comes from Maria Rundell’s 1808 cookbook, “A New System of Domestic Cookery”. I know, 1808, now that’s the early 19th century isn’t it, but it turns out that this is very similar to a number of different 18th century recipes for salad. Salads have been around for hundreds of years, even thousands of years. We know that the Romans had salads and especially in the 17th and 18th century, the French and Italians were known for their salads.
Now the salads, this one’s called a French salad, and that’s quite likely because the English were so fond of French cooking and in fact they imported French cooks to cook for them and so salads were kind of known as a French dish in the English culture.
In the 18th century, salads took on many different forms. Of course, they had their cabbages and their lettuces. In fact, today we know this as Romain lettuce, in the 18th century it was just Roman lettuce. They also had a variety of vegetables. Endive, radish tops, leeks, and green onions were commonly used. Some vegetable salads were raw and some were cooked or even boiled. Other salads used meats or pickled fish. They also used herbs in their salads, not just as accents, but as major ingredients. Things where we might never put into a salad.
Now many people think of flowers in a salad as a new thing, but in fact in the 18th century, flowers were very common in salads. They had periwinkle and violets, nasturtium, those were all in 18th century salad recipes. Sometimes they were fresh and other times they might be candied. They were favored for, not only their color, but their flavor also. Ivy did a video a year ago on how to candy violets. If you haven’t seen that video, I invite you to watch it. I’ll make sure to put a link down in the description of this video.
Now what we’re making today is a meat salad. Now the common element that seems to tie all these kinds of salads together was the dressing which was usually some kind of vinaigrette and that’s where we’re going to start.
I’m going to mince 2 or 3 anchovies and put those in a large bowl, mix them with 1 chopped shallot and about ¾ of a cup of chopped parsley. The recipe calls for oil, about a tablespoon of oil and I’m using olive oil here. Now occasionally they would have used, say an almond oil also in an 18th century recipe like this and that might be an interesting variation you could try.
So now let’s add the acid. We need about twice as much acid. The recipe calls just for vinegar. Now likely what they mean is a malt vinegar in the time period. I’m not using malt vinegar today, but actually half lemon juice, about 2 tablespoons, and half distilled vinegar. To this I’ll add a teaspoon of, say the mustard of my choice, along with a little bit of salt, a little bit of pepper and I’m going to whisk this together.
Now it’s time for the meat. I have here some roasted chicken. It’s about ¾ of a pound that I had from earlier. It’s completely cooled and I can start to add this to our vinaigrette. This needs to be covered and set aside for about 3 hours so that the flavors can blend. I suggest you store it in a cool place like your refrigerator.
So, let’s give this a try.
Mmm, wonderful blend of flavors. They’re all right there. You can get a little bit of that lemon juice, but it’s not overpowering and it works so well with that oil. It all blends together so well and those flavors are just boom, they’re just right there. So this one is really good and they likely would have served this over toast or, you know, in a modern context this would go really good on a croissant although they didn’t have anything quite like that in the 18th century, but still, and you could just eat it just like this, just right out of a bowl. It is great.
Well, there you have it, a delightful 18th century chicken salad. Really good, very simple. You should try this one out. You know, I really want to encourage you to share this video. If you enjoyed it please share it on Facebook or the social network of your choice. Whenever you do that, it is so helpful, so thank you for that and if you’re interested in living history, in reenacting, we’ve got this great little getting started course. It’s a free 7 or 8 episode course and it’s kind of fun. You’ll learn a lot, so definitely check that out. I’ll put a link down in the description section of this video and I want to thank you for coming along as we try out these really interesting recipes from history, as we savor the flavors and the aromas of the 18th century.
If you’re new to our channel, I want to welcome you. You can subscribe by clicking the button right up here. Also, check out our related videos. Thanks so much for watching.
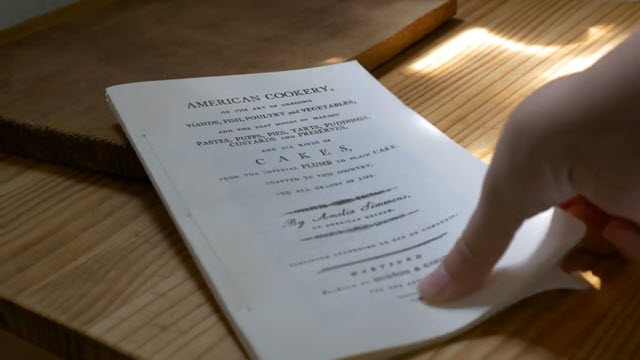
Paw paws are a small yellow fruit native to the Eastern United States, but has a very short harvest season of only a week. Because of this short harvest season, it is hard to find recipes for this delicious fruit so we have adapted a pumpkin pie recipe from Amelia Simons’ “American Cookery” cookbook.
Pie Crust
1 cup Paw Paw Flesh
1 cup Milk
1 Egg
2-3 tbsp. Molasses
1 tsp. Allspice
1 tsp. ground Ginger
Make sure to remove all seeds from the paw paw flesh and mash it up. Whisk in milk and egg getting the mixture as smooth as possible. Mix in your molasses and spices. This mixture will be a little thin but will thicken up as it cooks.
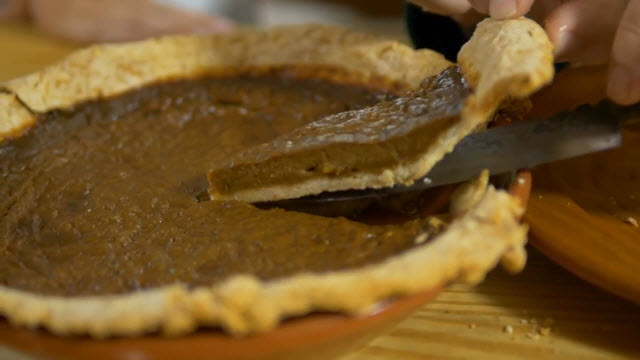
Pour the mixture into your pie crust and bake at 350 degrees for 1 hour 20 minutes. Allow to cool completely, probably even overnight before slicing.
Transcript of Video:
[Ivy] Hey dad, look what I found!
[Jon] Ah, let’s take a look! Wow, I’ll bet this is the leaf from the tree they came from?
[Ivy] What are they?
[Jon] These are paw paws. I’ve got an idea for these. Let’s take them to the kitchen.
[Jon] So paw paws are a strange exotic kind of fruit.
[Ivy] They look like a cross between a potato and an avocado.
[Jon] I mean, obviously, these really green ones, these aren’t done, but when they start to turn yellow, maybe with little brown spots like this, like a banana starts to get overripe, that’s when you know they’re getting ripe.
[Ivy] What do they look like on the inside?
[Jon] Well, on the inside, well, let’s cut this one open and we’ll find out. There we are, so look at that.
[Ivy] Wow, it’s yellow.
[Jon] Yeah, they’re very yellow on the inside and look at those seeds. Here you can pick one out.
[Ivy] They look kind of like beans.
[Jon] Definitely has an interesting fruity smell to it, like maybe some mango, that’s kind of what it looks like here, or apple flavor.
[Ivy] Mmm, that’s good.
[Jon] Is it like a sweet fruity flavor? Let’s see. Mmm, look at the texture though. It’s very soft and almost like a custard on the inside. A very soft and gentle flavor, but nice and sweet. You know they’re not very rare. They actually grow in most of the Eastern United States and all the way up into Eastern lower Canada, but the harvest season on these is very short. They’re really only ripe and ready to go for a couple of weeks, maybe only one week in the year and the forest animals can smell them and they’ll come and get them.
[Ivy] I can see why, they’re delicious.
[Jon] They do smell really good and you can tell how they could probably smell them from miles away. They also don’t travel well, so we’ll probably never find them in something like a grocery store. You might find them in a local farmer’s market or if you don’t find them there, you going to have to find them yourself in the woods.
[Ivy] Did people eat them in the 18th century?
[Jon] Actually they were eaten by the Native Americans and the settlers alike in the 18th century and you do find references to them, but you don’t really find them in any cookbooks, probably because they weren’t available all the time, so you never find a recipe until much later on in the 19th century. There’s also references to Louis and Clark feeding on these almost entirely at the very end of their journey’s in 1806. Louis and Clark were coming back and all their supplies were gone and so they had nothing but paw paws to survive on for a short period of time. So, let’s pretend we’re settlers and you’ve brought a whole bunch of paw paws to me, in fact you have brought a whole bunch of paw paws to me today and we can’t eat them all right away so what are we going to do with them?
[Ivy] I would find a recipe that I really liked that would preserve them.
[Jon] Right, but we don’t have any recipes that they had in the 18th century, so maybe we would…
[Ivy] I would adapt the recipe for something similar.
[Jon] And that’s exactly what they would have done in the 18th century. I’ve got a good idea for something that would probably cook up nicely. Hand me that little cookbook over there. So, this is Amelia Simons’ “American Cookery” cookbook. She did this one in 1796. It’s got a perfect recipe that I think will work with this. It’s called a pumpkin pudding. It’s really much what we would call a pumpkin pie, so we’ll adapt that recipe for these paw paws. Let’s get started.
[Jon] So, to get started, I’ve got a pie plate here with our pie crust in it and I’m going to set this aside and we’ll work on the filling. And the filling I’ve got here is about 1 cup of the paw paw flesh. We’ve got it taken out. I’m not sure if I got all the seeds, so I want you to mash that up and make sure we got all the seeds out.
[Jon] Good, that looks like we don’t have any seeds in there so go ahead and lift that out. I’m going to add in about 1 cup of milk. We’ll add that to it, and I’ve got 1 egg we’ll add to this. Pretty simple recipe. There’s our egg. And now we can whisk it. Now the trick with this is to get it ask smooth as we can. We don’t want it to be too lumpy. And this fruit can be a little stringy, you know, it changes its consistency, so we’re really going to have to get it mixed up well.
[Jon] Good, you’ve got that nice and smooth. We’ll add 2-3 tablespoons of this molasses and now we can add some spices. I’ve got a teaspoon of allspice and a teaspoon of ground ginger. We’ll add those in and keep mixing. Okay, it looks like you’ve got the consistency pretty well. There’s still a little lumpy but I don’t think it’s going to make any difference in this particular recipe.
[Ivy] It looks really runny.
[Jon] Well, you know, it is very, very thin, but I’ve made this recipe before and I thought at first, the first time I made it, that it was not going to work, but I baked it anyway, and it turned out perfect, so I’m going to trust that this will work out just fine, so let’s pour this into our pie plate, here we go.
[Jon] Okay, our pie plate is filled nicely. This looks good. It’s ready to go in the oven, so we’ll bake this at 350 degrees for maybe an hour and 20 minutes. I’ll put this in the oven.
[Jon] Before we slice this pie, we need to make sure that it’s cooled completely, probably even overnight.
[Ivy] I’m surprised how dark it is.
[Jon] You know, it is nice and dark. It looks very rich. Part of the color is going to be from the molasses and part of it’s just what’s happening with the paw paw. Let’s find out how it tastes.
[Jon] Well, boy, I’m really trying to find the flavor for this. It’s a wonderful flavor. It’s got a little bit of pumpkin pie in it but it’s much fruitier. It has an amazing little flavor to it. Boy, this is really good.
[Ivy] I can taste the allspice in it.
[Jon] Yeah, it’s wonderfully flavored. Thanks for bringing those paw paws in. They turned out to be tremendous in this dish and I want to thank you for coming along as we experiment. You never know what these things are going to turn out like, so as we savor the flavors and the aromas of the 18th century. And a special thanks to Jim Hoffman for his assistance in this episode.
If you’re new to our channel, I want to welcome you. You can subscribe by clicking the button right up here. Also, check out our related videos. Thanks so much for watching.
This is a wonderful variation of a plum pudding called hunter’s pudding that uses raisins for the plum. This dish was popular from the mid-18th century to the 20th century, found in British cookbooks and also popular in colonial America. Plum puddings were often associated with special occasions, served during certain holidays or when visitors came to visit. A hunter’s pudding was likely reserved for various special occasions such as a formal hunt, but that’s not to say ordinary people didn’t enjoy a hunter’s pudding on occasion. This recipe comes from “The Lady’s Assistant”, a 1775 cookbook published from Charlotte Mason’s manuscripts. This is a half batch, so if you want to make a full size batch, all you’ll need is double the ingredients and add an hour to the cooking time.
½ lb. Currants (dried, seedless, Corinthian Grapes)
4 oz. Raisins
2 tbsp. Candied Orange Peel
2 tbsp. Candied Citron
1 tsp. Nutmeg
3-4 tbsp. Brandy
4 Eggs
1 cup Cream
Preparing this pudding’s going to be very easy. We’re just going to add all of our dry ingredients plus our sweetmeats and mix well. Next whisk your eggs together in a separate bowl then combine your cream and brandy with the eggs. Once those are completely mixed, add them to your dry ingredients. This should make a pretty thick paste.
Now when you’re going to boil a pudding, there are a few things you have to have ready to go. You need a couple of pots of water boiling.
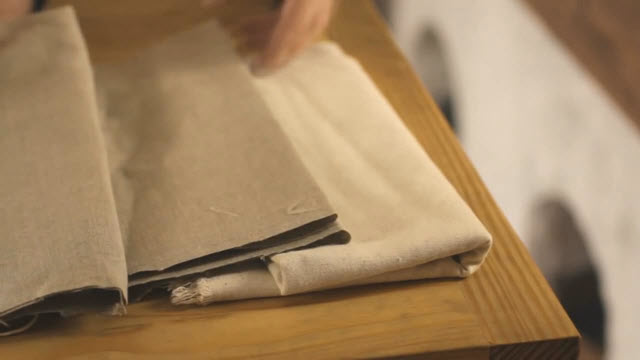
A large one will be for boiling the pudding itself. The smaller pot will be used to refill the water as it boils away in the larger one. You’ll also need a clean piece of cloth for each of the puddings you’re going to boil. Linen makes a really good pudding cloth, because the water makes the fibers swell up and the weave even tighter. You can also use cotton osnaburg. You’ll also need a stout cord to tie the cloth off with.
Put your cloth into your boiling water for a few minutes to scald, then dust the pudding side with flour and lay in a bowl. Place your pudding dough into the cloth then tie the bag tightly around the dough.
Place your pudding into the boiling water for 3 hours. Make sure to only replenish this water with boiling water. You want this water to not stop boiling at any time, because that will increase your cooking time.
Once your pudding has finished boiling, you will want to dip it in cold water for a few seconds to make it easier to remove the cloth without damaging the surface of your pudding.
If you don’t want to spend 4 or 5 hours boiling a pudding at your next event, you can cook these ahead of time. You can cook these the week before if you leave them in their pudding cloth, then you can take them to the event. When you’re ready to use them, you can either boil them for an hour right before you need them or you can slice them cold and then either fry them or broil them.
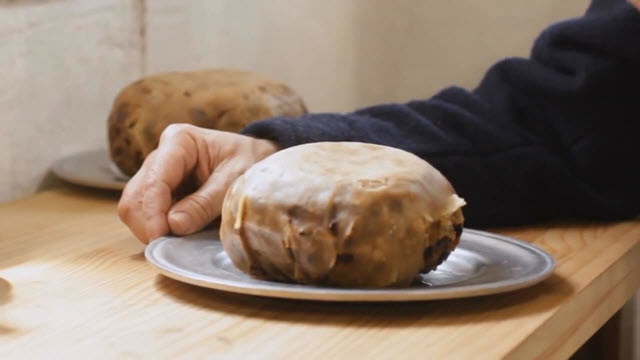
These puddings were usually served with a sauce. The most common type is equal parts of butter, sugar, and sac.
This pudding is very dense and rich. With all the raisins it’s very sweet. Compared to today’s palate, it was likely this would be the sweetest thing people of the 18th century would eat all year. This would make a great addition or finish to any celebration. You really should try these.
Transcript of Video:
Today I’m going to be doing something a little different. A dish that was popular all the way from the mid-18th century to the 20th century, found in British cookbooks and also popular in colonial America. We’re going to be making a hunter’s pudding. Thanks for joining us today on 18th Century Cooking with Jas Townsend and Son.
A hunter’s pudding is a type of plum pudding and a plum in this context means raisins. Plum puddings were often associated with special occasions, served during certain holidays or when visitors came to visit. The name hunter’s pudding may be a bit deceiving. We need to be careful about assuming that it was a favorite dish for backwoodsmen. Rather, a hunter’s pudding was likely a pudding that would have been reserved for various special occasions such as a formal hunt, but that’s not to say ordinary people didn’t enjoy a hunter’s pudding on occasion. Hunter’s puddings were popular from the mid 1700’s up until the beginning of the 20th century. Let’s get started.
We’re going to be making a recipe from “The Lady’s Assistant”, a 1775 cookbook published from Charlotte Mason’s manuscripts. We’re making half batches today, so if you want to make a full size batch, all you’ll need is double the ingredients. It will change the cooking time, so we’ll talk about that as we cook it, but to start, let’s look at the ingredients.
I’m using a half pound of flour and a half pound of suet. Now when I say suet, I mean kidney fat. In a previous episode, we explored the difference between suet and hard muscle fat and when it comes to making puddings, there’s a huge difference, so if you go to your butcher to ask for suet, make sure he gives you kidney fat. If you can’t find kidney fat to use or if you have neither the time nor the inclination to render it yourself, Jas Townsend and Son now carries Atora shredded suet. This suet is made from rendered kidney fat. It’s stabilized with a little flour. Because it’s rendered properly, it doesn’t need refrigerating.
In addition, we’re using a half a pound of currants. Unlike the fleshy red berries that go by the same name and are related to the gooseberry, these currants are small dried seedless Corinthian grapes. Also in our pudding we’ll be using about 4 ounces of raisins. Now raisins in the 18th century had seeds in them so they had to be cut open and seeds removed before they could be used in a recipe like this. There were different kinds of raisins in the 18th century. The best of the raisins were dried in the sun as opposed to dried in ovens. These were called raisins of the sun and most of the time they were imported in jars so they would be many times called jar raisins. The best of these raisins were called Malaga or Muscato raisins. They were grown in Spain and imported throughout much of Europe and North America. Our modern raisins are similar in quality to a midlevel jar raisin of the 18th century while having the convenience of being seedless.
Next we’re going to be adding a couple of tablespoons of candied orange peel and candied citron. Our recipe will also use about a teaspoon of nutmeg and 3-4 tablespoons of brandy. Now here’s something interesting about the addition of brandy into these puddings, it started to be added in the second half of the 18th century and in many of the recipes they find that the addition of the brandy helped in the preservation of the pudding and many times its noted that the puddings can be kept for up to 6 months if you keep the pudding still wrapped in its pudding cloth and kept up out of reach. This allowed cooks to make multiple puddings at once, serving one immediately and the others later on.
Finally, back to our recipe, we’ll need 4 eggs and 1 cup of cream. Now that’s it for the ingredients. Now that we’ve gathered them up, let’s put this pudding together.
Preparing this pudding’s going to be very easy. We’re just going to add all of our dry ingredients plus our sweetmeats.
And don’t forget to add the nutmeg.
That’s mixed quite well.
Okay, now that our dry ingredients are done, let’s move on to our wet ingredients. Let’s whisk our eggs together.
And then we’re going to add in our cream and our last wet ingredient, our brandy.
Now let’s add this to our dry ingredients.
It should make a pretty thick paste.
Now when you’re going to boil a pudding, there are a few things you have to have ready to go. You need a couple of pots of water boiling. Our large one will be for boiling the pudding itself. The smaller pot we’ll use to refill the water as the water boils away. You’ll also need a clean piece of cloth. One for each of the puddings you’re going to boil. Linen makes a really good pudding cloth. The water makes the fibers swell up and the weave even tighter. You can also use cotton osnaburg. Go ahead and scald these cloths.
You’ll also need a stout cord to tie the cloth off with. Remove the cloths from the boiling water and dust each with a little flour, then set each one aside, flour side up, into a bowl. Gather your pudding dough and place it on top of the cloth.
Tie the bag tightly around the dough.
Now it’s time to put this in the boiling water and boil it for 3 hours. You want to make sure to only replenish this water with boiling water. You want this water to not stop boiling at any time, because that will increase your cooking time.
Now like I said, this is a half size pudding. If you’re going to be doing a full size pudding, you’ll want to boil this for 4 hours.
Okay, the hunter’s pudding has boiled 3 hours. You’ll need a bucket of cold water on hand. By dipping the hot pudding in the cold water for a few seconds it will make it easier to get the cloth off without damaging the surface of your pudding.
If you don’t want to spend 4 or 5 hours boiling a pudding at your next event, you can cook these ahead of time. You can cook these the week before if you leave them in their pudding cloth, then you can take them to the event, when you’re ready to use them, you can either boil them for an hour right before you need them or you can slice them cold and then either fry them or broil them.
These puddings were usually served with a sauce and the sauce we’re using here is the most common type which is equal parts of butter, sugar, and sac.
Let’s give these a try.
And they’re a very dense and rich kind of food here. These are chalk full of raisins and they’re nice and sweet. In fact, compared to today’s palate, 18th folks were not used to such sweet things, so it’s likely that this would be the sweetest thing they would eat all year long. These would make a great addition or finish to a nice period meal and because you can fix them the week ahead of time, they’re a perfect kind of thing you can pull out of the hat and fry these up from something that’s been prepared without spending the 4 hours of boiling them at the event. You should really try these. These are wonderful dishes.
Very nice.
This recipe and many others are available on our SavoringthePast.net cooking blog. We also have an image reference blog of 17th and 18th century paintings and drawings called SiftingthePast.com. Make sure to subscribe to our YouTube channel so you don’t miss any upcoming episodes. And finally, our online catalog and our printed catalog that has hundreds of 18th and 19th century men’s and women’s clothing, historical cooking items, and camping items.
I want to thank you for joining us today as we savor the flavors and the aromas of the 18th century.
If you’re ever in the Fishers, Indiana area, a short drive northeast of Indianapolis, you really should visit the fine folks at Prairie Town — an 1836 frontier village located in the heart of Conner Prairie Interactive History Park. When you do, you may be lucky enough to find sweet Mrs. Curtis making her favorite dessert for her employer, Dr. Campbell. This amazing recipe finds its roots in the late 1700’s. It’s called Parmesan Ice Cream — a very unusual savory ice cream that I think you’re going to love!
Ingredients:
6 Eggs
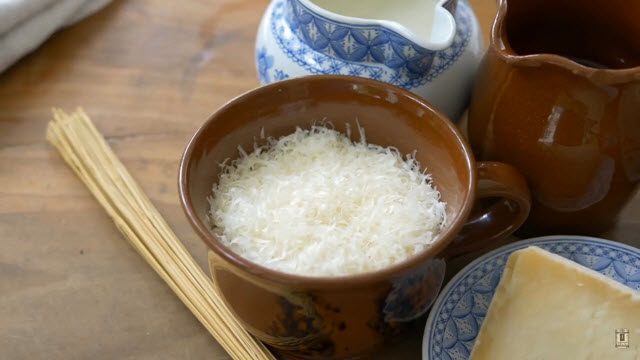
3 oz. grated Parmesan Reggiano Cheese
1 cup of Simple Syrup
2 cups sugar cooked with 1 cup water and simmered until dissolved (If you are using a modern ice cream maker you can use the sugar straight)
2 cups Cream
Salt
Ice
Directions:
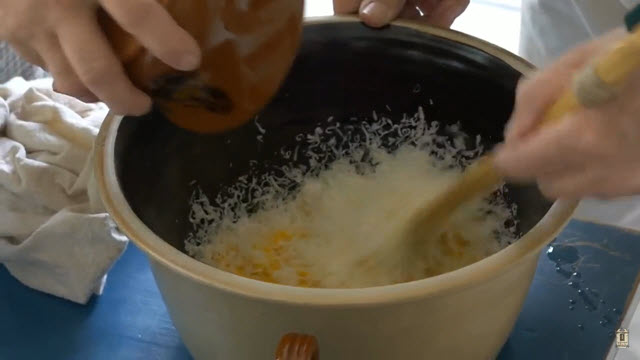
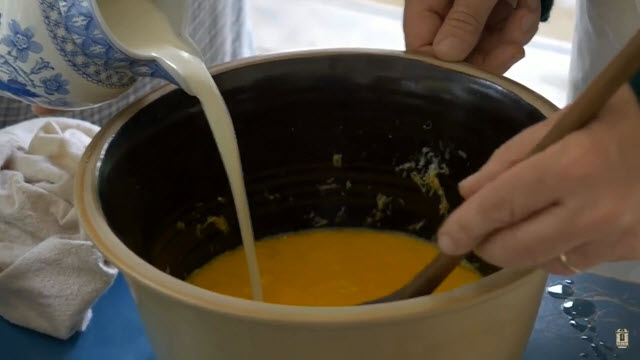
The first thing you want to do is whisk your 6 eggs together. Then add in about 3 ounces of finely grated high-quality Parmesan Cheese.
You to avoid using any of the processed cheeses available in those green cans. For the best flavor, use the real stuff. Next, add in your syrup, or straight sugar if you are using a modern ice cream maker. If you are using straight sugar, don’t worry too much about it dissolving completely because it will dissolve as we heat it up in the next step.
To our mixture we’re going to add 2 cups of cream and stir well.
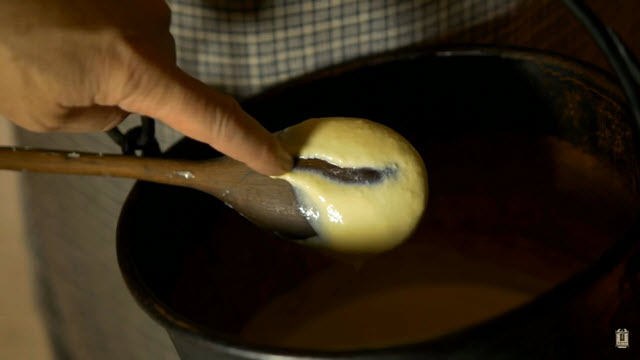
Pour the mixture into a pot and set over over medium-low heat, stirring constantly. Every so often, pull the spoon out and drag your finger across the back.
Once your custard is ready it should leave an open spot on the spoon that doesn’t close up. Remove from heat and allow to cool for about 30 minutes.
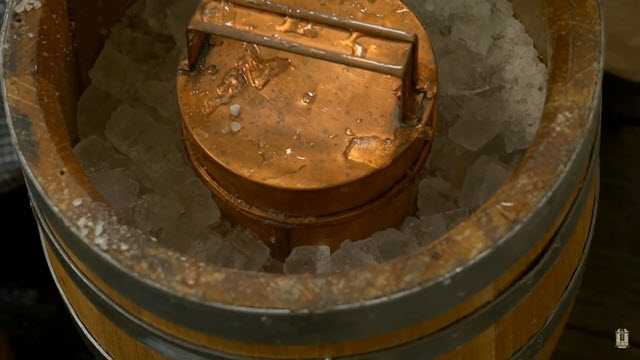
Once your custard has cooled, pour it into your ice cream maker. If you are using a modern ice cream maker, follow the instructions provided with your machine. We are using an 18th-century style sabotiere. Make sure not to overfill your ice cream maker. This recipe came only 1/3 of the way up the side of our sabotiere.
Prepare your ice so that it covers above the fill line of the custard but not so high that it leaks into your ice cream. Layer in some coarse salt as you fill your bucket around the sabotiere with ice. This will drop the temperature of the ice to below freezing. Allow the sabotiere to sit for for about 7-8 minutes, before you churn your sabotiere back and forth in the ice for 10 minutes.
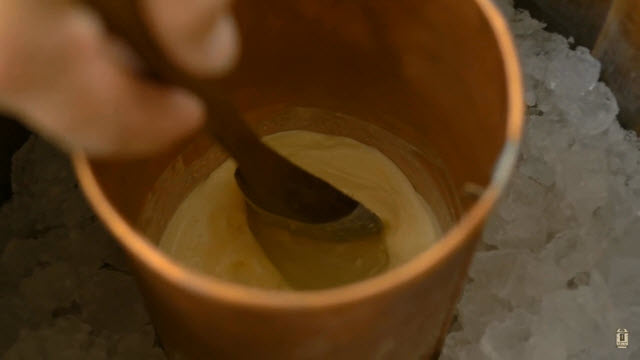
After 10 minutes, carefully wipe off the top and remove the lid. Scrape down all of the iced cream forming around the inside edges of the sabotiere. Close the sabotiere back up and repeat the cycle by letting it set for 7-8 minutes before churning for another 10 minutes.Once again, scrape the sides down the inside, and repeat the process again about three more times, or until the ice cream is at your desired consistency.
Keep in mind that the longer you let it set, the stiffer the ice cream will be, but it may also become difficult to remove from the ice cream maker.
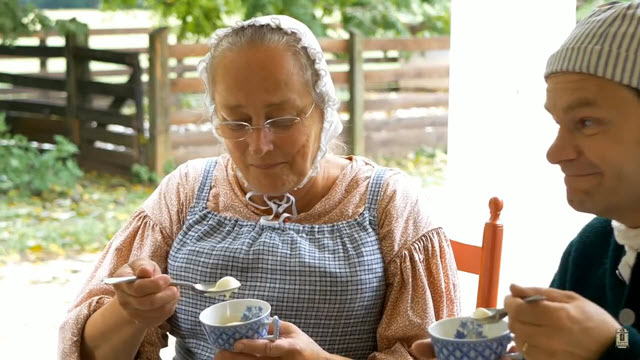
When eating this ice cream, you’ll notice it tastes sweet at first, followed by the salty savory flavor of cheese a little later.
Transcript of Video:
We’re here today at Connor Prairie in Fishers, Indiana. It’s a premier Living Historic site, and we’ve got a wonderful recipe for you. Thanks for joining us today on 18th Century Cooking.
[Jon] I’m here today with Mrs. Curtis and she’s promised to show me this amazing recipe for parmesan ice cream. Now, when I first heard parmesan ice cream, number one, I love ice cream and I love parmesan, but I thought, now wait a minute…
[Mrs. Curtis] The two together (Laughing softly)
[Jon] Tell me about this parmesan ice cream.
[Mrs. Curtis] I think you’ll love it. It’s a savory ice cream.
[Jon] Okay
[Mrs. Curtis] But it has a little bit of sweet and it’s very, very creamy and it’s so easy to go down your throat.
[Jon] I can’t wait to try it. Let’s get started.
[Mrs. Curtis] Alright. Well, to begin the receipt, we have to have 6 eggs.
[Jon] okay,
[Mrs. Curtis] We’ve already tested the eggs so we know that they all sank to the bottom and they’re fresh, so if you’ll begin, let’s break each one. Once these eggs are all in, then we will whisk those. To that, we’re going to add 3 ounces of grated parmesan cheese.
[Jon] If you want the best flavor with this recipe, make sure you use actual real parmesan cheese. Parmesan Reggiano, not any of the processed parmesan cheese that comes in a green can. Don’t even try it with that. You really want the real stuff.
[Mrs. Curtis] Then we’re going to add 1 cup of syrup.
[Jon] Okay
[Mrs. Curtis] The syrup is 2 cups of sugar cooked with 1 cup of water and simmered until it dissolves.
[Mrs. Curtis] To that we’re going to add 2 cups of cream. Stir that well.
[Jon] Okay
[Mrs. Curtis] Now that it’s well mixed I have a pot for that to go into and we’ll put it over the fire.
[Jon] This is ready to go in.
[Mrs. Curtis] It’s just a simple custard.
[Jon] So we’re going to set this over the fire. What kind of temperature are we trying to get to here?
[Mrs. Curtis] I would say a low medium as we’re stirring with a spoon. Every so often we’re going to pull the spoon out, drag your finger across the back, so once it’s ready it should leave an open spot that doesn’t close up. We’ll take it off the fire and we’ll allow it to cool for about 30 minutes.
[Jon] So tell me a bit about this parmesan cheese. Where did it come from?
[Mrs. Curtis] Well, I was thankful that the Zimmerman’s were going down to Cincinnati. This parmesan cheese was shipped in from Europe and made it all the way down to Cincinnati and that Doctor Campbell had requested that I come to make some ice cream for guests, so parmesan being a hard cheese and being very salted, it is well preserved.
[Jon] Oh yeah, long lasting, travels well.
[Mrs. Curtis] Stores very, very well. Now that our cream has cooled down, we’re ready to put it into the sabotiere.
[Jon] Okay, this is our ice cream maker, a sabotiere, and we’re not filling this up.
[Mrs. Curtis] No
[Jon] We just want it only about a third full or a quarter full, but we can put the lid on it now.
[Mrs. Curtis] Put a little salt in on top of the ice.
[Jon] So we’ve already got ice in here?
[Mrs. Curtis] Just a small layer and the salt is going to make that really cold.
[Jon] Okay.
[Mrs. Curtis] And let’s slip that in on top.
[Jon] And now we put some ice around the outside.
[Mrs. Curtis] Right.
[Mrs. Curtis] Plus I mentioned Mrs. Zimmerman has asked me to come down to do this because the Doctor has family coming in and her brother up in Nokesville has an ice house and so he doesn’t have much left but he was willing to share in order for the Doctors Family to have this.
[Jon] Just for this recipe.
[Mrs. Curtis] Yes, but we promised we’d keep him some ice cream.
[Jon] I’ll bet. He better hurry while it’s still cold.
[Jon] So we’ve got the ice all the way up almost to this bottom rim here, now I start turning it right?
[Mrs. Curtis] No.
[Jon] No? We don’t.
[Mrs. Curtis] It has to set for about seven, eight minutes because during that time, it’s really getting the canister good and cold and then once that time has passed you will get ten minutes of churning.
[Jon] I’m rotating.
[Mrs. Curtis] We’re getting close.
[Jon] Okay.
[Mrs. Curtis] What we have to do next is, we’ll wipe off the top, we’ll take off the lid, we’ll do a scrape down because all of the iced cream is forming around the edges.
[Jon] Right.
[Mrs. Curtis] Up close to the sabotiere so we’ll scrape that down so that the other cream can move in and it can continue to freeze.
[Jon] Okay.
[Mrs. Curtis] So now that we’ve scraped down the sides, you can see it’s starting to firm up.
[Jon] Oh yeah it looks good.
[Mrs. Curtis] So we’ll put the lid back on.
[Jon] okay.
[Mrs. Curtis] Not going to work it again yet.
[Jon] Okay.
[Mrs. Curtis] You’re going to let it set just a few more minutes and then you have another ten minutes to churn it.
[Mrs. Curtis] Well, it should be just about finished. It’s been about 3 cycles, 10 minutes to churn 10 minutes in between, so usually about an hour is the amount of time it takes to finish this off.
[Jon] Well, let’s see what it looks like.
[Mrs. Curtis] So let’s see, ah, yes
[Jon] The consistency looks perfect. We could probably let this set and have it stiffen up even further, but then it would be hard to get out.
[Mrs. Curtis] Yes
[Jon] Well, I can’t wait to try this.
[Mrs. Curtis] Go ahead.
[Jon] Okay. It does look good. You get a little bit of the cheese whiff off of it.
[Mrs. Curtis] I never wait long enough to smell it.
[Jon] I can believe that. Whoa, that is really, really good. You don’t get any cheese texture out of it but you get that cheese flavor.
[Mrs. Curtis] Very savory.
[Jon] And it comes in a little later, that cheese. First it’s a little sweet like ice cream and then, mmm, it warms up.
[Mrs. Curtis] The salty taste to it.
[Jon] Oh yeah. Excellent, excellent ice cream. I don’t think anybody would believe parmesan ice cream, it’s amazing. You really have to try it. Well, I want to thank you Mrs. Curtis for sharing this recipe with us. It is amazing. It is wonderful.
[Mrs. Curtis] So glad you enjoyed it. I hope the Doctor’s family enjoys it too.
[Jon] I am sure they will.
[Mrs. Curtis] (Laughs softly) Good.
[Jon] If you get a chance to come here to Connor Prairie, if you’re in this area, you really should come here. This is an amazing site. You will love it, I promise you. Thank you so much for coming along with us as we discover these amazing flavors, as we savor these flavors and the aromas of the 18th and early 19th century.
I want to give a special thanks to all the folks at Connor Prairie and make sure to check out their website. If you’re new to our channel, I want to welcome you. You can subscribe by clicking the button right up here. Also, check out our related videos. Thanks so much for watching.
This recipe was originally a Cheshire Pork Pie from Hannah Glasse’s 1788 cookbook “The Art of Cookery Made Plain and Easy.” We have taken that dish and adapted it for the modern kitchen. You won’t be able to get enough of this deliciousness!
1 ½ lbs. pork shoulder
½ c. flour
2 T. butter + more as needed
1 medium onion, chopped
1-2 tart apples, cored, peeled, and cubed
2 t. fresh ground nutmeg
About 1 t. salt
½ T. black pepper
12 oz. (1 bottle) hard cider
First trim all the fat off your pork and cut it into cubes, then toss it in flour to coat.
In a large cast iron skillet or heavy-bottomed Dutch oven, brown your pork in about 1 tablespoon of butter until some brown is achieved, but don’t cook the pork all the way through. Remove pork into a bowl and set aside.
Next, add the remaining butter to the pan along with your chopped onion and apples. Season with salt, pepper, and nutmeg. Sauté until the onion is nearly translucent.
Next, pour in your cider, scraping any brown bits from the pan, and allow it to come to a simmer for 2 to 3 minutes, then return your pork and any resting juices to the bowl. Cover and let simmer until the gravy has thickened, approximately 30 minutes.
The longer you allow this dish to cook, the more tender your pork will become. This is a dish that you can use any cut of pork and it will become tender by the end.
Transcription of Video:
We’re again here at Conner Prairie, a premier Living History site, and we’ve got another great recipe for you. Thanks for joining us today on 18th Century Cooking.
[Jon] Last week we had Miss Barker and she showed us how to make Rye and Indian Bread. Today, Mrs. Barker is going to show us how to make Pork a la Normand
[Mrs. Barker] That’s what it’s called! You got it right.
[Jon] Okay.
[Mrs. Barker] Now that’s a fancy name for it.
[Jon] Yeah?
[Mrs. Barker] It just really is Pork and Apples in Cider.
[Jon] Okay
[Mrs. Barker] But apparently folks in Normandy, that’s what they eat.
[Jon] Right?
[Mrs. Barker] So a traveler come through, he give me this receipt, that’s what he called it,
[Jon] Right.
[Mrs. Barker] my husband will call it pork and cider. Well, we’ve got us some good hog that’s been about a pound and a half, been cubed up and fat trimmed from it. Some salt and some pepper, and about a half a teacup of flour. A couple of teaspoons of nutmeg, about half a nut, grated.
[Jon] Mmm, yeah
[Mrs. Barker] A medium onion chopped and a nice tart green apple. A little bit ago I put some pieces of fat that I trimmed off the pork into the spider and rendered them off so we’re going to go ahead and take this good hog and I’m going to put it in a dish here, and I’m going to just sprinkle that flour over the top of it and it’ll be more than’ll cover it and that’s alright too, and use your eye and use your sense. You’ve got to cook with your nose and your mouth and your eyes, your ears, all parts of you. Put in what your family likes flavor wise, if they like a bit more salt or pepper, and stir that around so all that flour gets on every piece of that pork, each side of it. Now I’ve got to use my eyes and I need to put a bit more flour there. It should be, not dry, but it shouldn’t be wet. It should be like a paste there. You want to have a bit of dry flour there and then we’ll go ahead and we’ll put this right in the spider.
So once you’ve got a bit of color on that pork, you want to take it out of your pan and go ahead and put it right back in that bowl because all of that extra flour, that’s going to go right back in again and it’ll help you with your gravy.
[Jon] Sure.
[Mrs. Barker] So, the next thing you’re going to do, now if you don’t have enough fat in your fire, go ahead and put a little butter in your spider. There, we’ll just put a bit in, and get a nice sizzle to it, and then if you wouldn’t mind taking them apples and I’ll take the onions. So once your onions and your apples are in and you stirred it around a bit, they start to cook a while, you go ahead and sprinkle that nutmeg right on top of them, mix it around and let them cook just a bit more, just till them onions just come a little bit clear.
[Jon] Right.
[Mrs. Barker] And then once that’s done comes my husbands favorite part.
[Jon] Yeah?
[Mrs. Barker] And that’s the cider. Now if you’ve got your apple trees, why then you’ve got your apples, apple sauce, dried apples, apple pie, dried apple pie, but you certainly put up cider. So once that apple and onion and nutmeg have cooked down a little bit and that cider’s cooked off a bit, you’re going to go ahead and add your pork right back in and all those drippings from that bowl that you gathered up, and stir that around, put your lid back on, then cover it with coals and then just back away and go holler at your children for half hour or more if you want.
[Jon] So it’s ready?
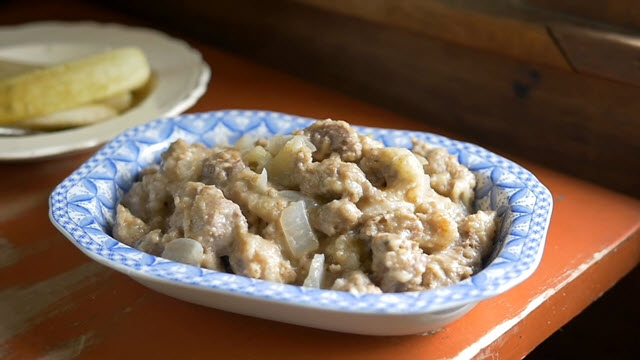
[Mrs. Barker] Now you’re making a face like that and say something like that sir and I understand. Now some folk might look at this dish and say well, it ain’t pretty, but it ain’t always got to be pretty, what matters is the taste.
[Jon] I’m sure it’s going to taste wonderful too.
[Mrs. Barker] I’m certain of it, sir. I’m certain of it. In fact, I’m so certain of it I’m going to go ahead and just give you plenty to taste.
[Jon] Okay. Mmm. Wow, the apple flavor Mmm it’s wonderful, and that pork is delicious.
[Mrs. Barker] Mmhmm. And the more you let that cook, that pork will come more tender and more tender. The nice thing about making any kind of stew is that you ain’t got to have an expensive, high piece of meat. You use your low meat, you use your shoulder, you use something that ain’t gonna have a lot of promise to it until it sits and stews for a bit and all that meat just melts away.
[Jon] Right and even if you have extra the next morning or the next day
[Mrs. Barker] Yes sir, yes sir, although I’ve got a son that’s near twice your size and I don’t generally have extra.
[Jon] I’ll bet you don’t.
[Mrs. Barker] No sir.
[Jon] Well I really want to thank Mrs. Barker for inviting me in to her kitchen, showing me how to make the best darn pork and cider I ever ate and if your ever in the Midwest and you have a chance to come here to Conner Prairie, this is a premier Living History site, right here in the Midwest. Definitely come and check this site out. It is wonderful. Again, I want to thank you for coming along as we experiment here, as we try these different things out of history, as we savor the flavors and the aromas of the 18th and early 19th century.
I want to give a special thanks to all the folks at Conner Prairie. Make sure to check out their website. If you’re new to our channel, I want to welcome you. You can subscribe by clicking the button right up here. Also, check out our related videos. Thanks so much for watching.


 While the men hunted buffalo, the women processed them. Period accounts say that a skilled Metis woman could dismantle up to 10 buffalo carcasses a day leaving very little behind for the wild animals to scavenge. A single bison cow, when processed properly, would produce about 250 pounds of raw meat or about 50 pounds of dried meat. This same cow would also produce about 50 pounds of rendered tallow.
 During the late 1700’s, great buffalo herds extended from just west of the Appalachian Mountains all the way to the Rockies, as far south as what is now Mexico to arctic Canada, but the demand for pemmican put a tremendous strain on the buffalo herd. Today, only about 500,000 bison still live in the wild across North America.
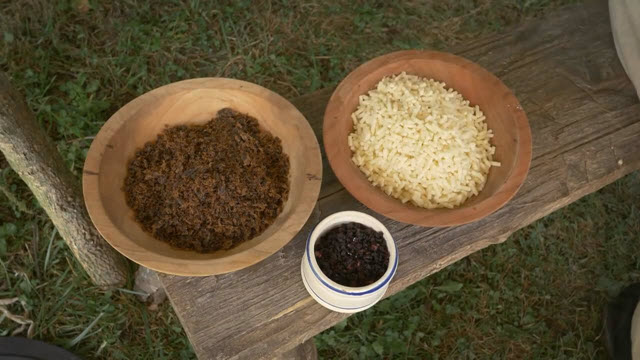


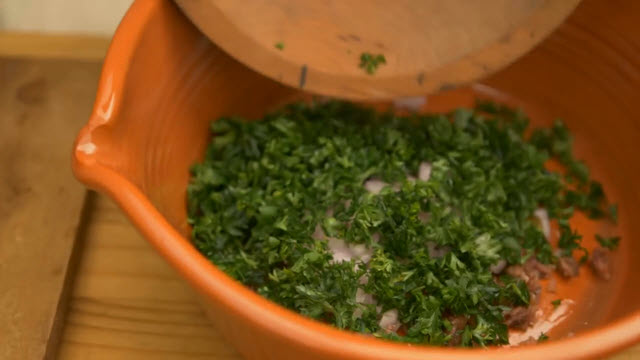 Mince your anchovies and mix with the shallot and parsley. In another
 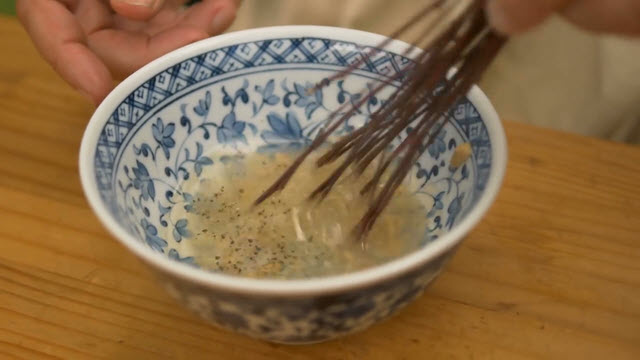 Next, break your chicken up into small pieces or strips and add it to the vinaigrette, completely coating the chicken. Cover your bowl and set aside in a cool place like your refrigerator for about 3 hours.
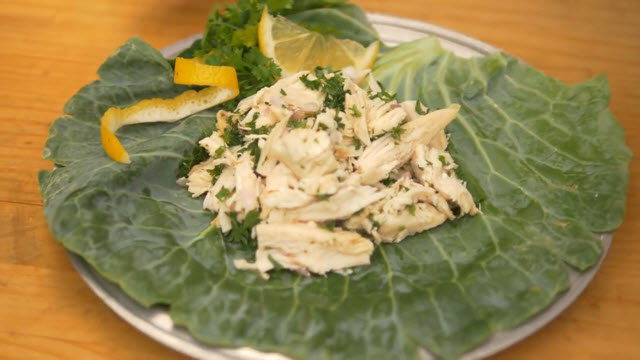


 Preparing this pudding’s going to be very easy. We’re just going to add all of our dry ingredients plus our sweetmeats and mix well. Next whisk your eggs together in a separate bowl then combine your cream and brandy with the eggs. Once those are completely mixed, add them to your dry ingredients. This should make a pretty thick paste.
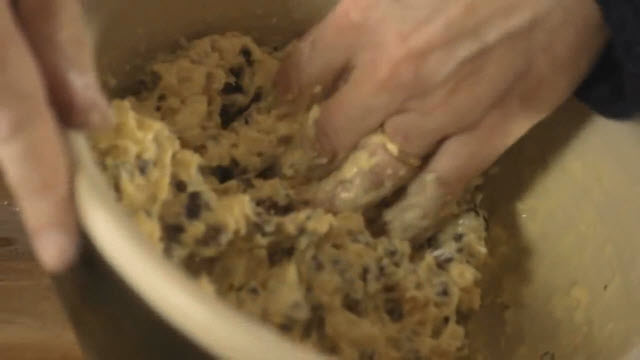


 Prepare your
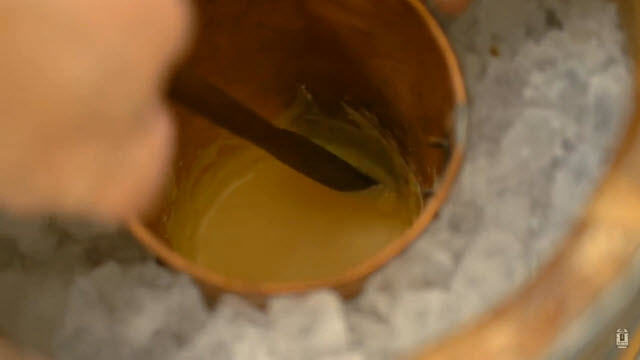

 This recipe was originally a Cheshire Pork Pie from Hannah Glasse’s 1788 cookbook “The Art of Cookery Made Plain and Easy.” We have taken that dish and adapted it for the modern kitchen. You won’t be able to get enough of this deliciousness!
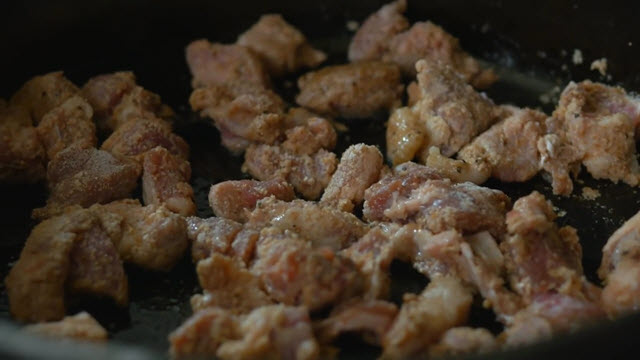 In a large cast iron skillet or heavy-bottomed Dutch oven, brown your pork in about 1 tablespoon of butter until some brown is achieved, but don’t cook the pork all the way through. Remove pork into a bowl and set aside.
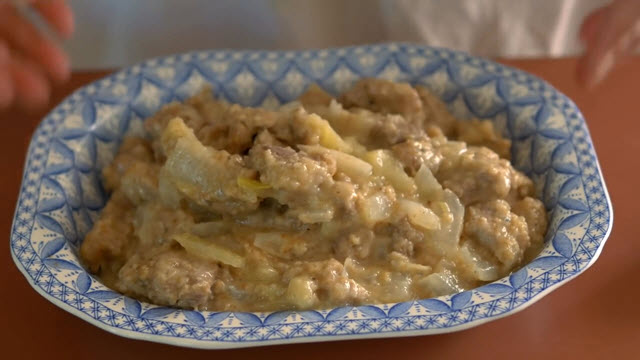 The longer you allow this dish to cook, the more tender your pork will become. This is a dish that you can use any cut of pork and it will become tender by the end.
