American soldiers in the 18th century had several different types of rations.
There were per man per day food rations. This would include a meat component, usually consisting of a pound of beef, three-quarters of a pound of pork, or a pound of salt fish. There would also be a bread component where they were supposed to get a pound loaf, but if that were not available they might get just flour or cornmeal instead.
To round out the daily ration they were given a pint of milk and a quart of beer.
There were per man per week rations. This would include things like peas, beans, rice, vinegar and other items that were not very popular with the soldiers.
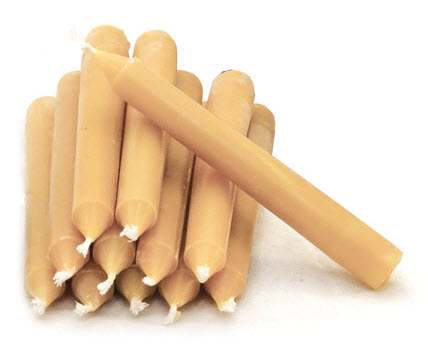
There were per company per week rations. This would include candles, soap, and other items that the men would need that were not food.
Finally, whenever possible, the soldiers would supplement their diet with whatever items could be procured locally from villages, farmers or even the wilderness around them.
Transcript of Video:
Soldiers in the 18th Century, whether they be American, British or French, all had very similar rations. Congress in 1775 established rations for the American soldiers and that ration stayed very similar for 150 years. Let’s take a look at what was included in that ration.
There were several different types of rations. There were per man per day food rations, that each man hoped he would get, there were rations per man per week, and then there were per company per week rations. So the daily ration would include a meat component, usually a pound of beef, or three quarters of a pound of pork, or possibly a pound of salt fish. So another part of the daily ration would be the bread part. Each man was supposed to get a pound loaf of bread per day and if bread wasn’t available then they would possibly be issued just flour, and if flour wasn’t available then they might even get a substitution of corn meal. And to round out this daily ration, they were given a pint of milk and a quart of beer. The per company per week ration included candles, soap, items that the men would need that weren’t food items. The per man per week rations were items that weren’t as popular or common; peas, it might also include beans, rice, or vinegar. Whenever possible, the soldiers would also supplement their diet with whatever items they could procure locally from a local village or from farmers or even from the wilderness around them. So in the following video series we’re going to take all these ration items and we’re going to prepare them in an 18th century fashion.
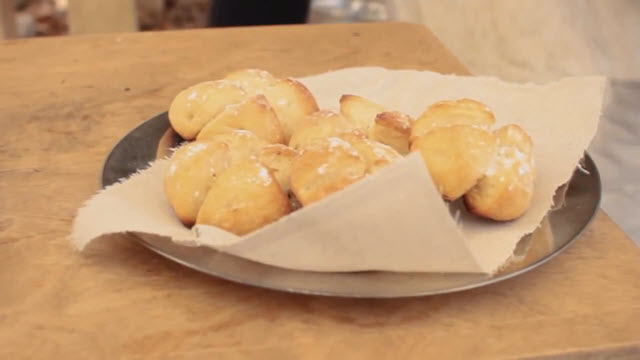
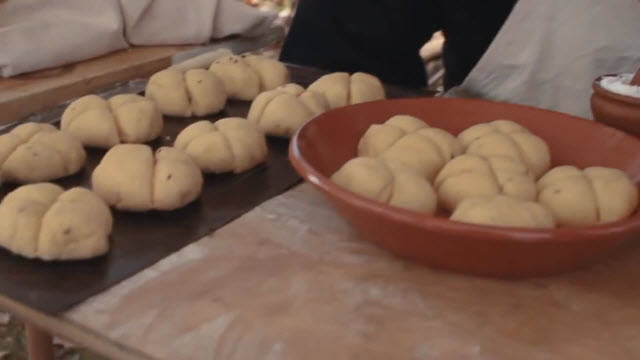
We are going to be making wiggs today, a sweet little biscuit that was very popular in the 17th and 18th century. The term wigg comes from an earlier Dutch word meaning wedge. The loaves were cut into wedge shapes for baking.
½ cup Barm
½ pint Water
½ pint Ale
1 teaspoon Sugar
1 teaspoon dry active Yeast
¼ to ½ cup flour
4 cups fine white flour
½ cup sugar
Caraway seeds
6 tablespoons melted butter
½ cup milk
Powdered sugar
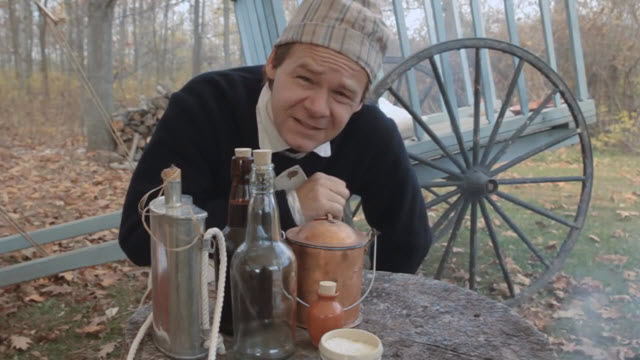
Wiggs are a yeast bread. In the 18th century, the best place for a baker to get yeast was from the brewer. 18th century recipes call for liquid yeast, something a little different from modern yeast recipes. The yeast in the 18th century was either the yeast that was on the foam at the top of the beer barrel when they first start brewing it. It comes out on the foam which is croizen, or there’s the yeast that falls to the bottom after its done brewing and after they bottle the beer off, what’s left in the bottom of the barrel is the yeast that’s left over, the brewer’s yeast or barm.
That would be reactivated with a little bit of sugar and used in bread recipes. Unless you’re a home brewer, barm can be a little difficult to come by, so we’re going to show you how to make an 18th century barm.
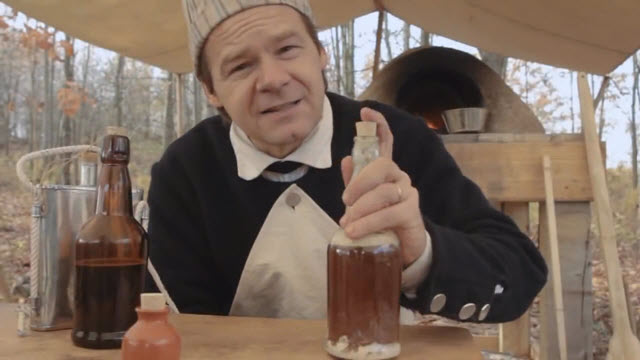
To make your barm, you’re going to need a bottle. Put about a quarter to a half a cup of flour into the bottle and add about a half a pint of water and half a pint of our ale.
If you don’t have access to good home brew ale, you’re going to want to buy some good imported ale. The ale’s going to add a very authentic flavor to your wiggs.
Add to the mixture about a teaspoon of dry active yeast and a teaspoon of sugar, to kick start the mix. Shake the bottle to get the flour mixed up into the liquids and then let it set and prime for about 15 minutes.
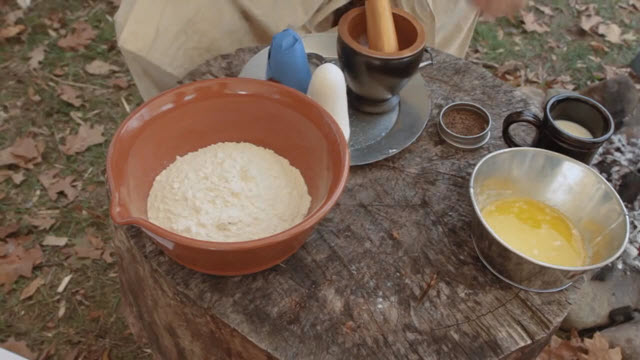
Now, gather together the dry ingredients for the wiggs.
Start off with about 4 cups of fine white flour. Add about 4 ounces or half a cup of sugar and some caraway seeds. Caraway seeds were a very popular flavoring in the 18th century for bread type products.
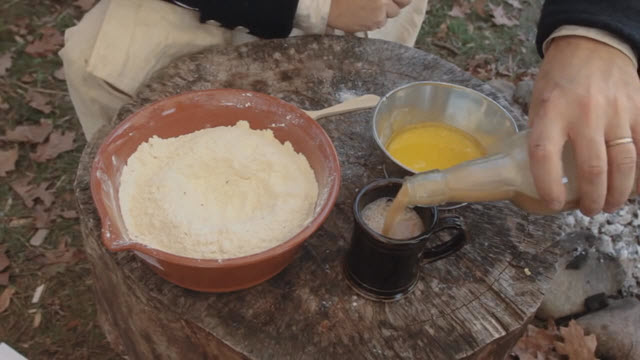
Next, mix together the wet ingredients.
Take about 6 tablespoons of melted butter, put in a half a cup of milk in with that, and now we need our barm. Give the barm a good shake and then you’re going to need about a half a cup.
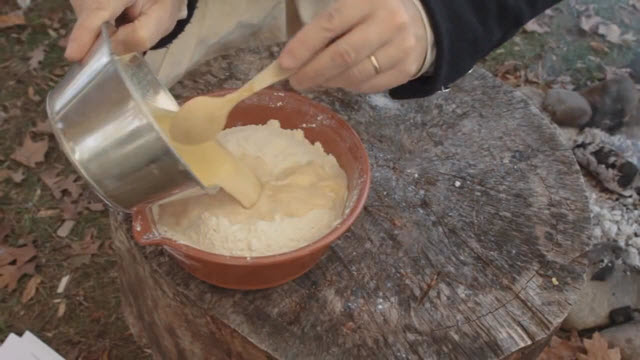
Pour the wet ingredients, into the dry ingredients and then mix it. You want to make sure to mix it well, but don’t over mix it.
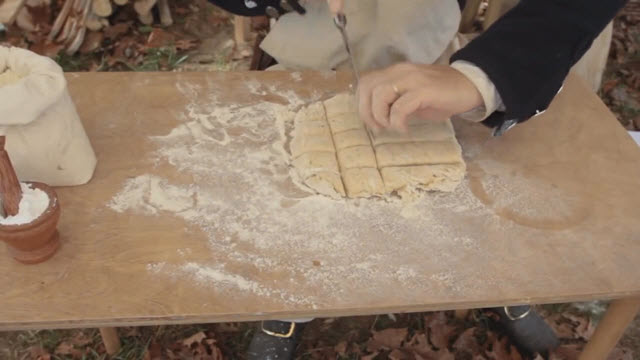
When it’s mixed pretty well, go ahead and turn it out onto a lightly floured surface. Square it up so that you can cut it down into about egg sized pieces.
You want to make sure that you don’t knead this too much or you’ll toughen the dough and won’t be nice and light and fluffy.
Once your dough is in little egg sized shapes, you want to roll them into a little ball. You want to do this very gently, not kneading them up or making them tough. Very gently cradle them into very small round bun shapes.
Once you have your buns, cut them into little wedge shapes, place onto a well-greased cooking sheet, cover them with a cloth and let them rest for about 30 minutes.
Once they have rested, sprinkle them with powdered sugar and bake in the oven at about 400 degrees. Alternately, you can place them in a Dutch oven in a hot bed of coals. If you choose this method, make sure that the coals are all around and on top of the Dutch oven.
As temperatures vary greatly, keep a close eye on your wiggs that they don’t burn.
I’m sure that you will enjoy this 18th century treat.
Transcription of Video:
Today we’re going to be making wiggs. Not the hairy sort you put on your head, but a sweet little biscuit that was very popular in the 17th and 18th century. We’re going to be baking some in our earthen oven and some in a Dutch oven also.
The term wigg comes from an earlier Dutch word meaning wedge. The loaves were cut into wedge shapes for baking.
Because the wiggs were probably fairly expensive, they have a lot of sugar and milk fat in them and they were usually set aside for special events like funerals or for lent, but there’s even one account of a man using them to pay his servants with them.
Wiggs are a yeast bread. Yeast in the 18th century was much appreciated by brewers and bakers. A little bit of yeast and barley malt turns into ale, flour and water and yeast turns into bread. It wasn’t until the 19th century that anyone really understood what was going on with yeast and how it worked.
Bakers needed yeast and they knew the best place to get it was from the brewer. 18th century recipes call for liquid yeast, something a little different from modern yeast recipes. The yeast in the 18th century was either the yeast that was on the foam at the top of the beer barrel when they first start brewing it. It comes out on the foam which is croizen, or there’s the yeast that falls to the bottom after its done brewing and after they bottle the beer off, what’s left in the bottom of the barrel is the yeast that’s left over, the brewer’s yeast. That would be reactivated with a little bit of sugar and used in bread recipes.
Unless you’re a home brewer, barm can be a little difficult to come by, so we’re going to show you how to make an 18th century barm.
We’re going to need a few things to make our barm. You’re going to need a bottle. You’re going to need some good clean water. We’ve got some ale here, and some sugar and yeast. I put about a quarter to a half a cup of flour into the bottle and now we’re going to add about a half a pint of water and half a pint of our ale, and if you don’t have access to good home brew ale, you’re going to want to buy some good imported ale. The ale’s going to add a very authentic flavor to your wiggs.
Now it’s time to add to our mixture about a teaspoon of dry active yeast and a teaspoon of sugar to kick start the mix.
Perfect.
Now let’s mix this up. Get the flour mixed up in our liquids and then we’re going to let this set and prime for about 15 minutes while we prepare the rest of our ingredients.
While our barm is priming, let’s get together our dry ingredients for the wiggs. We’re going to start off with about 4 cups of fine white flour. You’re also going to need about 4 ounces or half a cup of sugar. I’ve got some loaf sugar here, and we’re also going to need caraway seeds. Caraway seeds were very popular flavoring in the 18th century for bread type products. These are actually caraway pods, not seeds.
Now let’s mix our wet ingredients. I’ve got about 6 tablespoons of melted butter, let’s put in a half a cup of milk in with that, and now we need our barm. This has been priming. It’s looking like it’s good and alive. Give this a good shake and then we’re going to need about a half a cup. Okay, here’s our wet ingredients, we’re going to put these into our dry ingredients and then I’m going to mix this up with my hands. You want to make sure to mix it well, but don’t over mix it.
Okay, that’s mixed pretty well, let’s go turn this out onto the table.
Let’s turn our dough out onto our lightly floured surface that we’ve got prepared. Get all the dough out. I’m going to square this up so that I can cut it down into about egg sized pieces. You want to make sure that you don’t knead this too much or you’ll toughen the dough and won’t be nice and light and fluffy.
Now that we’ve cut these into little egg sized shapes, we want to roll these into a little ball. You want to do this very gently, not kneading them up or making them tough. We’re going to very gently cradle these into very small round bun shapes.
Now it’s time to cut these into our little wedge shapes. Just going to slice them.
Okay, now that we’ve got these cut, we’re going to put these on a well-greased sheet, a cooking sheet, and we’re going to cover them up with a cloth and let them rest for about 15 or 20, or actually a half hour. They’re not going to rise, because of the milk fat and everything that’s in them, but they do need to rest.
Well, we’ve let these rest for about a half hour. They haven’t risen, they just rested. They will spring up in the oven when they go in. They’ll puff up when we cook them, but right now they haven’t risen. Next we’re going to sprinkle the tops with some searst sugar, which is, in the 18th century terms, a sifted sugar, or as we know it today, powdered sugar.
Your oven temperatures are going to need to be a medium hot oven, maybe about 400 degrees. For extra information about how to use these earthen ovens, make sure to check out the video series where we talk about building and using the earthen oven.
Because there’s so much sugar in these guys you’re going to want to make sure that you have a trivet or maybe some S-hooks to put your tray on, because they are susceptible to burning on the bottom.
There we go, we’re going to let these cook for about 15 minutes. While these are cooking, we’re going to cook some in the Dutch oven.
So, you’ll want to watch these cook because, depending on the heat of your oven, they may only take 5 minutes to cook.
I’ve got the Dutch oven preheated up so that it’s not stone cold. I’m going to get the bed of coals here prepped for the Dutch oven. I want to make sure there’s just a ring of nice hot coals around the outside of the bottom.
Again, it can be difficult to judge the temperature, the exact temperature of your Dutch oven so you’re going to need to check it fairly frequently to make sure they don’t burn.
Obviously they’re just about right. Let’s go ahead and take this off of the fire. I’m going to get them out of here.
These turned out really well. I’m sure that you will enjoy this 18th century treat. Something that you can cook at your next outdoor event. All the things you’ve seen here, the items, the clothing, all these things are available on our website or in our print catalog. Don’t forget to follow us on Facebook.
In our recipe, we’re going to be using salt pork.
This is true 18th century style salt pork, not something like you might find on your grocery store bacon shelf, but a leaner cut hard packed in salt. We’re boiling our salt pork today for about an hour, so we don’t need to rinse it off quite as much as we normally would before using it. We’re going to slice it thin and then season it with a little pepper.
Apples have been enjoyed for centuries by people. “Pippins” is a common name for apples in the 18th century. When choosing your pie apples, if you’re not just picking off a local tree, you want to look for Jonathans or Winesaps, something that’s particularly a pie apple, a tart yet sweet apple that holds together and doesn’t turn to applesauce. What you don’t want is a red delicious apple. Red delicious apples are very 20th century. They’ve been bred for their size and their color, not their taste, and they don’t make a very good pie apple at all.
Peel, core, and slice your apples thin.
In a pie pan, place your bottom pie crust then layer your pork and apples alternately until full.
Once your pie is packed, add some salt and pepper to give it some flavor. Place some butter on top and add a couple of teaspoons of water.
The amount of water you need to add to this pie totally depends on the kind of apple you use. If you use a Mackintosh apple, they’ll turn to something like apple sauce, so you don’t need to add very much water. If you have a firmer crisper apple, you might need a little bit more water.
Place the second pie crust on top to cover it up, then trim and seal the edges. Now cut some vent holes in the top of the crust.
Place in the oven with spacers to keep it from burning on the bottom. This will bake about 10 to 15 minutes depending on the temperature of your oven.
Transcription of Video:
Pies are common fare for everyone in the 18th century. We’re going to bake a couple of pies today using different baking techniques.
Our first pie is going to be a Cheshire pork pie with pork and apples. We’re going to bake it in our oven.
Our next pie will be a mock passenger pigeon pie and we’re going to bake that in our Dutch oven.
Apples have been enjoyed for centuries by people. Apples were popular in the 18th century and today the dish we’re making is called Cheshire pork pie with pippins. “Pippins” is a common name for apples in the 18th century.
In our recipe, we’re going to be using salt pork. This is true 18th century style salt pork, not something like you might find in your grocery store bacon shelf, but a leaner cut hard packed in salt like we’ve discussed in a previous video.
Likewise, we’ve sliced our pippins here and they’re ready to use in our pie. As we make our pie, what we’re going to do is we’re going to put in a layer of pork and then we’re going to put in a layer of apple.
We’re boiling our salt pork today for about an hour. Because we’re boiling it, we don’t need to rinse it off quite as much as we normally would have before using it. We’re going to slice it thin and then we’re going to season it with a little pepper. I’ve got our pie packed up here. Now it’s time to add some spices to it. I’m going to add some salt and some pepper to this to season it well so it’s got some flavor to it.
All these things come right out of our spice kit. A little bit more there. There, that’s good. Now we’re going to put some butter on top that will melt down into our pie here. We’re going to add about 2 tablespoons of water to give it a little bit of moisture.
The amount of water you need to add to this pie totally depends on the kind of apple you use. If you use a Mackintosh apple, they’ll turn to something like apple sauce, so you don’t need to add very much water. If you have a firmer crisper apple, you might need a little bit more water.
So, for pie apples, if you ‘ve got any choice and you’re not just picking off a local tree, if you go to a local grocery store, you want to look for Jonathans or Winesaps, something that’s particularly a pie apple, a tart yet sweet apple that holds together and doesn’t turn to applesauce. What you don’t want is a red delicious apple. Red delicious apples are very 20th century, they’ve been bred for their size and their color and not for their taste and they don’t make a very good pie apple at all.
We’re going to put our second pie crust on here to cover this up, we’re going to trim and seal the edges. Now let’s cut some vent holes and work on the mock pigeon pie.
Passenger pigeons were one of the most populous birds in the 18th and 19th century. There were billions of these birds on the planet. They were almost a scourge there were so many of them. They were very popular and yet you would find them in a lot of recipes. There were so many of these birds that there were reports of flocks that were a mile wide and 300 miles long that would take 14 hours to fly over. There were so many of them they would blot out the sun. Obviously we can’t use passenger pigeons today since the last one died almost 100 years ago, so today we’re going to use as our substitute a Cornish game hen.
We’ve simmered 2 Cornish game hens with onions and then we picked the meat off and put it in the bowl. Now let’s brown up a little bit of flour in some butter.
I’m going to add some stock, let this simmer a little bit. We’ll also season it with a little salt, pepper, and thyme.
By the way, our pie plates here are thrown by our master potter Gary Neater right here in Indiana and they have a lead free food safe glaze.
We’re going to put our pulled meat into a pie crust. We’re going to pour our warmed sauce on top of that, seal it up with the other pie crust, and it’s ready to bake.
There we go. We’re going to bake this mock pigeon pie in a Dutch oven. Let’s talk about these Dutch ovens for a minute. Dutch ovens like this are a specifically 18th century and North American improvement on a 17th century design. The lip at the top is specifically designed to keep the coals from falling off so the coals will stay on the top, and the legs at the bottom keep it so the air can flow underneath and keep the coals alive underneath. We’ve got our Dutch oven preheated. I kind of left it in the fire pit here and it’s good and warm. We have to get our pit ready for this. We’ve got our coals underneath. It’s time to put the pie in. We need to keep the pie off the bottom of the Dutch oven so we’re going to put a couple of S hooks in here to space the pie pan off the bottom so the bottom doesn’t burn.
We’ve got plenty of space around the outside edge so we can reach in there without burning ourselves. Now let’s put the lid on.
Deciding exactly how many coals you want to use is a bit of a matter of judgement. Each person is going to have to get used to that. You need to practice. I put a ring of coals around the top of the lid here leaving the center a little bit open. Same thing at the bottom, there’s a little bit of opening at the very center to not get it too hot. Each one of those is going to be just a little bit different though. Let’s check out our earthen oven and see if it’s ready for the pork pie.
Okay, our oven is all baked down into coals. Our soot is burned off so this is ready to go. You can see about how to use the oven better in the baking bread video. Anyway, I’m going to scrape the coals out and get this ready for the pie.
I’m going to put S Hooks inside this one also to serve as a trivet. I don’t want to burn the bottom.
There we go. We’re going to have to watch this. This one might be a little bit too hot, so we’re going to keep an eye out on it. Let’s put the door on it though.
It’s been about 10 or 15 minutes and I think this is probably ready to go. Take a quick look, whoa! It’s ready to come out. You don’t want it to go too long. Wow, look at that, looks just about perfect.
We’ll I’m sure we’ve left this set long enough. Let’s pull it off the fire and set this aside so it can cool off enough that I can take the pie out of the oven. I’ll take a quick gander here, set that lid aside. There’s a lot of steam in there. Look at that. There you go.
I’m going to let that cool off a minute before we take it out.
I can’t wait to cut these open and try them. They smell really good.
Mmm, these are excellent. Definitely you should try something like this. If this isn’t a normal thing for you, step out of your normal comfortable cooking, get into something like this. Meat pies or something that’s a little bit different. Everybody will enjoy it. All the things you’ve seen here today you can check out and see on our website or in our print catalog and don’t forget to follow us on Facebook.
For this recipe I’ve got about a half a pound of dried peas. We soak these overnight, so they’re going to be ready to cook.
Start out with about a half a pound of beef. Coating the meat with flour and then browning it will help thicken up the stew.
Once our beef is well browned, add it to our 3 pints of boiling stew water and then the peas and boil for 15 minutes.
Once the stew has boiled for about 15 minutes, we’re going to add some potato, some onion and some parsnips, along with some salt and pepper. We’re going to let that simmer for about an hour.
You’ll know this stew is ready when the peas break down and the stew thickens up and that really is a matter of how long you’ve soaked your peas. If you haven’t soaked them at all, this might take 2 or 3 hours, but if you soaked them it won’t take as long.
Transcription of Video:
So today we’re going to take a common soldiers ration and we’re going to turn it into three different meals, a soup, a stew and a hash. The foundation of our stew and our hash, we’re going to use salt pork, and the foundation for the stew, we’re going to use fresh beef. So the salt pork we’re using today is a salt pork that we prepared in an 18th century manner. When it’s time to use the salt pork, you have to soak it. You have to take several hours, soak it in water, change the water out, soak it again, until it’s ready to use. If you don’t soak it several times and get all the salt out, it’s inedible. So, the big difference between a soup and a stew is how much water we use when we prepare it, and the first thing we have to do is to get this water going, get it boiling. I’ve got 6 pints of water starting to boil here for the soup, and I’ve got 3 pints for the stew. Let’s start out with our soup.
While our 6 pints of water is getting ready to boil here, I’m going to brown our salt pork in a little bit of fat.
I’m going to let this set and sear a little bit. Browning this meat first will release a lot of the flavor. So we’re doing this in small batches. If we do too much at once, we can’t get it to caramelize properly. It releases too many juices.
Once your salt pork is browned, it’s time to dump it in your boiling water. If any scum develops on the surface, scrape that off. You’re going to let this boil about 15 minutes.
Now that our soup has boiled about 15 minutes with the meat in it, it’s time to add some other things. I’ve got some carrots here and some parsnips. We’re going to add those. So there’s the carrots, part of our parsnips. From our pocket spice kit, we need to use a little bit of salt and pepper.
Oh yeah, it’s looking good.
It’s also now a good time to add a bay leaf if you’ve got it and we’ve got a little bit of cider vinegar, just a splash or two of cider vinegar will really set this off.
Now that we’ve added these things to our soup, we’re going to moderate the fire a little bit and let it simmer for about an hour.
Now that our soup has simmered about an hour, it’s time to throw in some cabbage if we’ve got it and I’ve also got a little bit of rosemary and thyme. I’ve got a little bundle here that I’m going to throw in. You don’t want to put this stuff in too soon or it’ll destroy the flavors.
Many period recipes for soup like this will call for bread to be cubed up and tossed in at the end, kind of like dumplings.
We’re going to let this simmer for another 15 minutes
For this recipe I’ve got about a half a pound of dried peas here. We soak these overnight, so they’re going to be ready to cook.
So I’m starting out with about a half a pound of beef here. This should go really nicely with our peas. Coating this meat with flour and then browning it will help thicken up the stew.
So now that our beef is well browned, we’re going to add that to our 3 pints of boiling stew water and then we’re going to add our peas. Let’s get this beef in there without losing any of it. There we go. And now we’re going to add the peas.
So now that our stew has boiled for about 15 minutes, we’re going to add some potato, some onion and some parsnips, along with some salt and pepper. We’re going to let that simmer for about an hour.
You’ll know this stew is ready when the peas break down and the stew thickens up and that really is a matter of how long you’ve soaked your peas. If you haven’t soaked them at all, this might take 2 or 3 hours, but if you soaked them it won’t take as long. While our soups and stews are simmering here, let’s start the hash.
Our hash is a fairly simple dish. I’ve got some finely diced salt pork here. I’ve already browned this up with some onion and I’m going to take a couple of parboiled or already boiled potatoes. I’m going to dice these up and mash them. Put them in with that.
We also need to add a little bit of milk to give it some liquid to work with. If you happen to have some allspice, it makes a wonderful addition to the hash. I’m going to form this up into patties and fry it in our frying pan.
Well, there we have all three dishes finished. We’ve got a salt pork soup and the salt pork really has a wonderful flavor. The saltiness balanced out with the other flavors actually extremely good. Here’s our salt pork hash. It may not look great but let me tell you, it is my favorite on the table here, the salt pork, very tender, just the right amount of saltiness, along with the potatoes and the onions, definitely a favorite. So the last dish here was the stew, this is the beef and peas stew and it thickened up rather nicely. The peas add their own kind of sweetness to it. The beef is excellent in here. Any one of these things you will definitely enjoy.
Passenger pigeons were one of the most populous birds in the 18th and 19th century. There were billions of these birds on the planet. They were almost a scourge there were so many of them. They were very popular and you would find them in a lot of recipes. There were so many of these birds that there were reports of flocks that were a mile wide and 300 miles long that would take 14 hours to fly over. There were so many of them they would blot out the sun. However, we can’t use passenger pigeons today since the last one died almost 100 years ago, so today we’re going to use as our substitute a Cornish game hen.
2 Cornish Game Hens
Onions
Flour
Butter
Stock
Salt
Pepper
Thyme
Top and Bottom Pie Crust
Simmer 2 Cornish game hens with onions and then pick the meat off and put it in a bowl.
Now brown up a little bit of flour in some butter.
Add some stock and let simmer a little bit. We’ll also season it with a little salt, pepper, and thyme.
We’re going to put our pulled meat into a pie crust.
Pour the warmed sauce on top of that and seal it up.
We’re going to bake this mock pigeon pie in a Dutch oven. Let’s talk about these Dutch ovens for a minute. Dutch ovens like this are a specifically 18th century and North American improvement on a 17th century design. The lip at the top is specifically designed to keep the coals from falling off so the coals will stay on the top, and the legs at the bottom keep it so the air can flow underneath and keep the coals alive underneath.
To preheat your Dutch oven, simply leave it in the fire pit while making your pie.
It’s time to put the pie in. We need to keep the pie off the bottom of the Dutch oven so we’re going to put a couple of S hooks in here to space the pie pan off the bottom so the bottom doesn’t burn. Make sure you have plenty of space around the outside edge so you can reach in there without burning yourself.
Deciding exactly how many coals you want to use is a bit of a matter of judgement. Each person is going to have to get used to that. You need to practice. I put a ring of coals around the top of the lid here leaving the center a little bit open. Same thing at the bottom, there’s a little bit of opening at the very center to not get it too hot. Each one of those is going to be just a little bit different though.
This will take about 10-15 minutes depending on the temperature of your Dutch oven so keep an eye on it. Remove the Dutch oven from the coals and remove the lid. Allow the pie to cool for a minute before removing from the Dutch oven.
Transcription of Video:
Pies are common fare for everyone in the 18th century. We’re going to bake a couple of pies today using different baking techniques.
Our first pie is going to be a Cheshire pork pie with pork and apples. We’re going to bake it in our oven.
Our next pie will be a mock passenger pigeon pie and we’re going to bake that in our Dutch oven.
Apples have been enjoyed for centuries by people. Apples were popular in the 18th century and today the dish we’re making is called Cheshire pork pie with pippins. “Pippins” is a common name for apples in the 18th century.
In our recipe, we’re going to be using salt pork. This is true 18th century style salt pork, not something like you might find in your grocery store bacon shelf, but a leaner cut hard packed in salt like we’ve discussed in a previous video.
Likewise, we’ve sliced our pippins here and they’re ready to use in our pie. As we make our pie, what we’re going to do is we’re going to put in a layer of pork and then we’re going to put in a layer of apple.
We’re boiling our salt pork today for about an hour. Because we’re boiling it, we don’t need to rinse it off quite as much as we normally would have before using it. We’re going to slice it thin and then we’re going to season it with a little pepper. I’ve got our pie packed up here. Now it’s time to add some spices to it. I’m going to add some salt and some pepper to this to season it well so it’s got some flavor to it.
All these things come right out of our spice kit. A little bit more there. There, that’s good. Now we’re going to put some butter on top that will melt down into our pie here. We’re going to add about 2 tablespoons of water to give it a little bit of moisture.
The amount of water you need to add to this pie totally depends on the kind of apple you use. If you use a Mackintosh apple, they’ll turn to something like apple sauce, so you don’t need to add very much water. If you have a firmer crisper apple, you might need a little bit more water.
So, for pie apples, if you ‘ve got any choice and you’re not just picking off a local tree, if you go to a local grocery store, you want to look for Jonathans or Winesaps, something that’s particularly a pie apple, a tart yet sweet apple that holds together and doesn’t turn to applesauce. What you don’t want is a red delicious apple. Red delicious apples are very 20th century, they’ve been bred for their size and their color and not for their taste and they don’t make a very good pie apple at all.
We’re going to put our second pie crust on here to cover this up, we’re going to trim and seal the edges. Now let’s cut some vent holes and work on the mock pigeon pie.
Passenger pigeons were one of the most populous birds in the 18th and 19th century. There were billions of these birds on the planet. They were almost a scourge there were so many of them. They were very popular and yet you would find them in a lot of recipes. There were so many of these birds that there were reports of flocks that were a mile wide and 300 miles long that would take 14 hours to fly over. There were so many of them they would blot out the sun. Obviously we can’t use passenger pigeons today since the last one died almost 100 years ago, so today we’re going to use as our substitute a Cornish game hen.
We’ve simmered 2 Cornish game hens with onions and then we picked the meat off and put it in the bowl. Now let’s brown up a little bit of flour in some butter.
I’m going to add some stock, let this simmer a little bit. We’ll also season it with a little salt, pepper, and thyme.
By the way, our pie plates here are thrown by our master potter Gary Neater right here in Indiana and they have a lead free food safe glaze.
We’re going to put our pulled meat into a pie crust. We’re going to pour our warmed sauce on top of that, seal it up with the other pie crust, and it’s ready to bake.
There we go. We’re going to bake this mock pigeon pie in a Dutch oven. Let’s talk about these Dutch ovens for a minute. Dutch ovens like this are a specifically 18th century and North American improvement on a 17th century design. The lip at the top is specifically designed to keep the coals from falling off so the coals will stay on the top, and the legs at the bottom keep it so the air can flow underneath and keep the coals alive underneath. We’ve got our Dutch oven preheated. I kind of left it in the fire pit here and it’s good and warm. We have to get our pit ready for this. We’ve got our coals underneath. It’s time to put the pie in. We need to keep the pie off the bottom of the Dutch oven so we’re going to put a couple of S hooks in here to space the pie pan off the bottom so the bottom doesn’t burn.
We’ve got plenty of space around the outside edge so we can reach in there without burning ourselves. Now let’s put the lid on.
Deciding exactly how many coals you want to use is a bit of a matter of judgement. Each person is going to have to get used to that. You need to practice. I put a ring of coals around the top of the lid here leaving the center a little bit open. Same thing at the bottom, there’s a little bit of opening at the very center to not get it too hot. Each one of those is going to be just a little bit different though. Let’s check out our earthen oven and see if it’s ready for the pork pie.
Okay, our oven is all baked down into coals. Our soot is burned off so this is ready to go. You can see about how to use the oven better in the baking bread video. Anyway, I’m going to scrape the coals out and get this ready for the pie.
I’m going to put S Hooks inside this one also to serve as a trivet. I don’t want to burn the bottom.
There we go. We’re going to have to watch this. This one might be a little bit too hot, so we’re going to keep an eye out on it. Let’s put the door on it though.
It’s been about 10 or 15 minutes and I think this is probably ready to go. Take a quick look, whoa! It’s ready to come out. You don’t want it to go too long. Wow, look at that, looks just about perfect.
We’ll I’m sure we’ve left this set long enough. Let’s pull it off the fire and set this aside so it can cool off enough that I can take the pie out of the oven. I’ll take a quick gander here, set that lid aside. There’s a lot of steam in there. Look at that. There you go.
I’m going to let that cool off a minute before we take it out.
I can’t wait to cut these open and try them. They smell really good.
Mmm, these are excellent. Definitely you should try something like this. If this isn’t a normal thing for you, step out of your normal comfortable cooking, get into something like this. Meat pies or something that’s a little bit different. Everybody will enjoy it. All the things you’ve seen here today you can check out and see on our website or in our print catalog and don’t forget to follow us on Facebook.
It was very common for soldiers in the 18th century, especially when they were on the march, to be issued their rations several days ahead of time. They would be issued several days of their bread ration, and because they would be gone for a while, they would likely be given just flour as bread would just go bad. They were also on the march with very little equipment to use as well and all they had was flour and they would have to make some kind of food with it. Today we’re going to make fire cake or ash cake, a very, very simple thing that the soldiers would be able to make with just the flour and a little bit of water.
Flour
Water
Salt (optional)
Hot Coal Bed
Bannock Board or flat half split of firewood(optional)
Large Leaves such as Grape or Cottonwood (optional)
First we’re going to need to have good ashes. We’re going to have to have a good and hot ash bed to work with. The ash bed that you’re cooking on is really important. If your ashes are grey, they’re probably already too cool to do any cooking on.
You want white hot ash, it’s really warm. That’s the kind of ash we’re cooking with. The stuff that’s still white.
If it’s grey, it’s gotten too cold to cook with.
Next, let’s make up our dough. I’ve got a simple wooden bowl here for us to make our dough in, the flour that we’ve been issued, and I’m going to make up 3 or 4 ash cakes here.
If you have any salt, available to you, which the soldiers may or may not have had salt that day or that particular time, but salt will add a lot to the taste of your fire cake, so in this case we are going to add a good bit of salt to it, and we’re going to stir that around while our ingredients are still dry so it will be easy to mix. And now we’re going to need some water. We add enough water to make a stiff paste, and we’re going to start out with maybe a little less than we need so that we don’t go overboard.
If you are going to cook on the bannock board, the dough needs to be a little stickier, because we need to stick it to the board.
It needs to stay there while it’s cooking. Flatten it out on the bannock board nice and thin. The thinner it is the better it’s going to cook.
Our board has two holes in it so that we can prop it up.About halfway through cooking, when the bottom turns brown, rotate the board so that the top can cook.
Your bannock board fire cake is ready to pull off when it’s browned up all over on the outside.
It may be tough to get off, but you should see it’s still a little damp on one side and cooked completely on the other.
If you do not have a bannock board, but you can acquire some large leaves, we can cook our ash cakes another way. Depending on the time of year, different leaves are going to work better than others, but you want a nice big leaf that’s going to protect your cake.
Be aware that the closer to the cake the leaves are, the more of its flavor is going to transfer to the cake, so grape is best. Make your dough into a thin patty, about a quarter of an inch or so, and about the size of the leaves. Carefully wrap your patty in several layers of leaves, because they will slowly burn though. Place the patty in a nice hot section of coals and gently cover with more hot coals.
This will only take about 3-5 minutes to cook, but you will have to use your best judgement, because it is not something you can time. The more experience you gain with this the easier it will be to tell when it is ready to come out. When you feel it is time to remove your patty, gently scrape off the ashes and remove the leaves.
If you feel that it is not done yet but it is still hot, simply set it aside for a few minutes and it will continue to cook a little bit on the inside.
Finally, if you do not have bannock board or access to large leaves, you can just put your cake straight into the coals.
A little bit of ash is known to calm your digestive tract so the ash isn’t going to hurt you a bit. Make your thin patty just as if you are going to cover it in leaves and then simply place it in the coal bed and gently cover with hot coals making sure not to lose it in the fire.
After a few minutes when you feel that it is ready, carefully remove the coals. Some of the coals may be stuck to your ash cake and may still be very hot.
So there you have it. You’ve got the three different kinds of ash cake or fire cake. We’ve got our bannock board cake, the one we cooked right in the ashes and then the one we used the leaves for protection. Definitely very edible, I think I’ll have them for supper tonight.
Transcript of Video:
It’s very common for soldiers in the 18th century, especially when they were on the march, they’d be issued their rations, maybe several days ahead of time they’d be issued several days of meat and then they’d be issued their flour or their bread ration, and because they would be gone for a while they would likely be given just flour instead of bread as that would just go bad and so there they were on the march with not very much equipment to use and all they had was flour and they would have to make some kind of food with it. Today we’re going to make fire cake or ash cake, a very, very simple thing that the soldiers would be able to make with just the flour and a little bit of water.
So what are we going to need to make ash cake? Well, number one we’re going to need to have good ashes. We’re going to have to have a really nice ash bed to work with, good and hot. So we don’t have very much equipment. We’re going to try to do this with three different methods. We’re going to use a simple bannock board, or if you don’t have a board like this, maybe you could just use a half split of firewood that’s nice and flat. We’re also going to use a method where we put leaves around our fire cake or ash cake and so all you’re going to need for that is some large leaves like a grape leaf or a large tree leaf, burdock or cabbage leaves, something like that. And the last method, we’re not going to use anything at all, we’re just going to make our cake and we’re going to place them right on the coals.
So, now our coals are getting really close to being ready to use. Let’s make up our dough. I’ve got a simple wooden bowl here for us to make our dough in, the flour that we’ve been issued, and I’m going to make up 3 or 4 ash cakes here. If you have any salt, available to you, which the soldiers may or may not have had salt that day or that particular time, but salt will add a lot to the taste of your fire cake, so in this case we are going to add a good bit of salt to it, and we’re going to stir that around while our ingredients are still dry so it will be easy to mix. And now we’re going to need some water. We add enough water to make a stiff paste, and we’re going to start out with maybe a little less than we need so that we don’t go overboard. For the ash cakes that we’re going to cook on the bannock board, we’re going to get this to be a little stickier because we need to stick it to the board. It needs to stay there while it’s cooking.
Okay, we’ve got our dough mixed up. It’s nice and the right kind of consistency, a little stiff but still sticky enough to work with and I’ve got this. We’re going to take this one and we’re going to flatten it out on our bannock board, going to get it nice and thin. The thinner, the better it’s going to cook. We need to make sure that it’s sticky enough that it sticks to the board. Our board has two holes in it so that we can prop it up. Let’s put this up by the fire and let this cook while I’m working on the other ones.
Okay, we’ve got the fire banked up a little bit higher on this spot and I’m going to place the board, I don’t want to get it too close so it catches on fire, but I can feel the heat here, that feels pretty good. I’ve got our little stick here to prop it up at an angle, and that feels really good. We’re going to let that cook.
Let’s use leaves for our next fire cakes. I’m going to keep watching that one and make sure it doesn’t burn, but here’s our next fire cake. Let’s take out a dough section here, and we’re going to make it into a patty. We’re not making it as thin as that but, you know, thinish. We’re going to make it in relationship to the size of our leaves. I’ve got here some wild grape leaves and some cottonwood leaves, depending on the time of year, you know, different leaves are going to work better than other ones but you want a nice big leaf that’s going to protect your fire cake, so let’s use our grape leaf on the inside because I want a bit of the taste. It does end up on the fire cake. We’re going to put grape leaves on the inside and then a little extra protection, because the leaves are going to slowly burn through, we’re going to put the cottonwood leaves on, and I’ve got a really nice coal section here, we’re just going to place this right onto the coals. Since it’s got the coals right on top and below it, it’s not going to take that long to cook, 3, or 4, maybe 5 minutes. That’s something you’re going to judge, you’re not going to be able to tell, so it takes a little experience to know when it’s ready to come out. The ash bed is really important that you’re cooking on. If your ashes are grey, they’re probably already too cool to do any cooking on, like this color. This white hot ash over here, it’s really warm, that’s the kind of ash we’re cooking with. The stuff that’s still white. If it’s grey, it’s gotten too cold to cook with.
Our bannock board biscuit looks like it still needs a little bit of time to cook. I’ll have to turn it over pretty shortly, but this one’s probably ready to come out. It’s been about 4 minutes or so. I’m just going to lightly scrape off our ashes from the top and scoop the whole patty out. There it is. Let’s put it on top of this board so we can see how it turned out. There we are. It feels like this one’s just about done. I could have probably left it in about another minute or two but it’s still hot, it’s still cooking so I’m just going to go ahead and set this off to the side where it will stay warm, but it’s still hot so it’s still cooking on the inside.
Our bannock board fire cake over here, you can see it’s starting to brown up along the bottom side so I’m going to go ahead and rotate the board so the other side, the top side of it, can cook. You want to be really gentle when we turn this over so we don’t knock the bread off, and I’m going to tilt this a little bit further because our coals are getting a little bit cooler, but they’re still really warm right there, so it should cook right up.
Well, let’s try our fire cake where we actually put it directly on the coals. If you don’t have good leaves to work with you can just try cooking our fire cake right on the coals. It’s going to char up on the outside but that’s all we have to work with so let’s do it. We’re going to place it right on the coals here. I’ve got a nice hot section of coals and we’ll place it right on there. I’m going to use my tomahawk because this fire is hot. There we go, and I’m going to find some hot coals close by and we’re going to set them on top, lightly and gently bury it in the hot coals. I’m not going to bury it completely. I don’t want to lose it in the fire. I want to be able to see around the edges just a little bit so I can watch it cooking.
Well, it looks like our bannock board fire cake is ready to pull off. It’s browned up all over on the outside so we’re going to go ahead and pull this off the board and put it onto our plate. This may be tough to get off, but this one came off, now you can see it’s still a little damp on that side, cooked completely on that side. I call that done.
Well, our bannock bread’s off, the other one’s out, it smells like our ash cake that’s cooking right here in the coals is probably ready to pull out too, so let’s pull it out with that, dust the ashes off the top. We’ve still got some that are sticking to the bottom, gently, might still be hot coals, so I’m not going to touch them. A little bit of ash is known to calm your digestive tract so the ash isn’t going to hurt you a bit, and it looks really good for cooking right there in the coals.
So there you have it. You’ve got the three different kinds of ash cake or fire cake. We’ve got our bannock board cake, the one we cooked right in the ashes and then the one we used the leaves for protection. Let’s try these out. Definitely very edible, I think I’ll have them for supper tonight. Any of these things you’ve seen here you can see on our website or in our print catalog and don’t forget to follow us on Facebook.
Today we’re going to bake beans. Beans were a common fare in the 18th century both for regular folks and part of the soldier’s rations. We’re going to bake beans in the oven and buried in a pit.
Beans
Salt Pork
Onions
Barbados Molasses or Pure Maple Syrup
Mustard
Pepper
Water
If you are using an earthen oven, let it heat up. We actually suggest you go ahead and bake bread in the oven before you put beans in it. You don’t want it to be too hot.
If you are cooking in a pit, dig a hole in the ground that’s about twice as big as the pot you’re going to cook in and a little bit deeper than the pot so that we can have coals underneath and on top.
Then go ahead and start a fire in the pit.
Soaking your beans overnight is a very good idea. It helps them cook for a lot less time. You also should boil your beans for an hour or two, whatever it takes to get them nice and soft and ready to bake. Dry beans have a toxin in them that causes issues with digestion if they aren’t heated to the right temperature. If they’re baked at a very low temperature, that doesn’t get rid of the toxins.
You need a two quart pot for baking your beans in. If you are baking in an oven, we recommend our new red ware bean pot that you can find on our website. If you are using the pit method, we have our two quart pots with new metal lids for them that will be perfect for this sort of operation. Regardless of the pot you use, be careful when removing the lid as it can stick to the pot if the beans boil over during baking. To avoid this, you can grease the lid before baking, or wipe it down each time you open the pot.
Pour your beans into your chosen vessel and add some salt pork.
You can use authentic style salt pork like we cover in one of our videos. You can also use bacon or salt pork that you find in the grocery store but they’re both rather greasy and fatty, so you would want to cut back on how much you use. If you use authentic salt pork you want to make sure to soak it for an hour or two to reduce the saltiness.
Now add a good big spoonful of dry mustard. Dry mustard is very common; you see it in almost every recipe for baked beans.
You can use about a cup of molasses or a half a cup of authentic maple syrup for the sweetener. Barbados molasses or light molasses is going to have a lot better taste than blackstrap which is very bitter.
You also need about a quarter teaspoon of pepper. You don’t need too much, so don’t go crazy with the pepper. Finally, we need about a quarter to a half a cup of onions. You want to get all this stuff pushed down to the bottom and mixed well.
Now let’s top this up with water. Don’t be afraid to put too much water in. It’s going to bake off so you want to have it topped off with water. While it is baking, check every few hours to make sure there is enough liquid so that your beans don’t dry out too much.
If you are using the oven, you can bake them anywhere from 2 to 12 hours. The longer they bake, the better they will taste as long as you don’t let them dry out.
If you are using a fire pit, you will need to dig out the coals to make room for the pot. You want to make sure you’ve got hot coals on all sides and on the bottom, then you want to have a little rock that you can put on top of the lid to make sure it doesn’t get knocked off. Finally, place hot coals up on top and build a fire over the pit to keep the heat in. You can bake the beans here for 2-12 hours as well but you will still need to check the moisture levels every few hours and continue to bank the fire on top if it dies down too much.
These beans have a flavor that you cannot get anyplace else. They’re really good. Good food is really important. When you are reenacting, the most important part of having fun is having really good food. The public is going to be more interested, and you will have more people wanting to join your group, so I encourage everyone to do more period cooking at events. I think you’ll really enjoy it.
Transcription of Video:
Today we’re going to bake beans. Beans were a common fare in the 18th century both for regular folks and part of the soldier’s rations. We’re going to bake beans in the oven today then we’re going to bake beans buried in a pit.
It was common practice in New England for the village baker to heat up his oven, bake his bread and other items and then at the end of the day everyone would bring their bean pots and they’d put it in the oven and it would stay in overnight to bake the beans. Especially on Saturday night so on Sunday everyone had beans to eat and they didn’t have to work on the Sabbath.
Soldiers didn’t have ovens to work with so they’d have to use whatever they had on hand. We’re going to dig a hole so that we can bake our beans inside of a fire pit, down inside the earth.
We’re looking for a hole in the ground that’s about twice as big as the pot we’re going to cook in and a little bit deeper than the pot so that we can have coals underneath and on top. So while our oven is heating up, I’m going to go ahead and start a fire in this pit.
And while our fires are burning down to coals, let’s talk about beans. Soaking your beans is a very good idea. It helps them cook for a lot less time. You also should boil your beans. Dry beans have a toxin in them that causes issues with digestion if they aren’t heated to the right temperature. If they’re baked at a very low temperature, that doesn’t get rid of the toxins and you need to boil them first.
Well, we’ve had our beans boiling. These have boiled for quite a while. You can boil them an hour or whatever it takes to get them nice and soft and ready to bake. We’re going to use two different methods of baking. We’re going to flavor these two batches in two different ways.
Let’s divide our beans up into our two different cooking vessels. We have our new red ware bean pot that you can find on our website. We also are going to use one of our two quart pots and we have one of these new metal lids for them that are available that will be perfect for this sort of operation. Anyway, let’s get these divided out.
First thing we’re going to put into these, they’re both going to get some salt pork. You can use authentic style salt pork like we cover in one of our videos. You can also use bacon or salt pork that you find in the grocery store but they’re both rather greasy, fatty, so you would want to cut back on how much you’d use. If you use authentic salt pork you want to make sure to soak it for an hour or two to reduce the saltiness.
Now we’re going to put in mustard in both of these. Dry mustard is very common. You see it in almost every recipe for baked beans, and we’re going to need a good, big spoonful in each one of these pots. Both our beans recipes use a sweetener. In this one we’re going to use a molasses, and this one some maple syrup, both of those are very common sweeteners. We’re going to use about a cup. You’ll want to use a Barbados molasses; you don’t want to use blackstrap. Barbados molasses or light molasses is going to have a lot better taste than blackstrap which is very bitter. And for the maple beans, you want to make sure to use about a half a cup of authentic maple syrup. And in both pots, a quarter teaspoon of pepper here, not one of these spoons, or you’ll do too much, so don’t go crazy with pepper. And we need some onions in here. We’re going to use about half of these, maybe a half a cup or a quarter cup of onions. You want to get all this stuff mixed well, pushed down to the bottom and mixed well. Let’s get both of these stirred up.
Now let’s top these up with water. Don’t be afraid to put too much water in. It’s going to bake off so you want to have both of these topped off with water. Okay, there we go, should be enough water. Our fires, both places, look like they’re ready to go. Let’s start with our oven baked beans first.
Our oven’s good and hot. In a previous video we’ve shown you how to build one of these ovens and how to fire it and bake bread in it. We actually suggest you go ahead and bake bread in the oven before you put beans in it. You don’t want it to be too hot.
We’re going to let these beans bake. You can bake them in an oven like this for 4 or 6, 8 hours, even 12 hours, the longer the better and they really start to taste good. You might want to check them after just a couple of hours to make sure there’s still some liquid in there. You don’t want them baking out too dry, you might need to add a little water.
We’ve got to make some room in our fire pit to put this other pot down inside the coals.
You want to make sure you’ve got coals on all side, coals on the bottom, hot coals all the way around each side, then you want to have a little rock that you can put on top of the lid, make sure it doesn’t get knocked off, now we’re going to put coals up on top. We’re going to go ahead and build a fire up on top of this so it’s got more heat.
The beans have been in here about 3 or 4 hours so we’re going to go ahead and pull them out now. They could probably cook a lot longer but let’s get these out of here.
Well let’s take a look. Looks, whoa, they look really good. These have cooked for about 4 hours so they’re ready to eat right now. If we want them to be even better, we can let them cook longer. Another 4 hours or even another 8 hours and they’ll really start to darken up, but these are ready to eat just like this.
These maple beans have been in the embers for several hours. I think they’re done, let’s take them out.
There we have our molasses baked beans and our maple flavored baked beans. Both of these we let cook for quite a while. There’s a lot of latitude here in how long we’re going to bake our beans. They’ve already been precooked when we put them in. They’ve already been boiled, so you know, they’re only going to get softer and better tasting the longer you cook them. We put in the raw salt pork, so you’re definitely going to want to make sure that gets cooked so you want to bake them at least two hours at the very bare minimum. Four hours is good, and all the way up to 12 hours. They’re only going to get tasting a little bit better, you just need to check on their moisture levels occasionally, make sure they don’t get too dry.
Another hint on this, on these bean pots, when you’re using, especially the molasses, they want to boil over and then this molasses stuff gets stuck between the lid of the pot and the body and they can be really hard to get off. You don’t want to break your pot and break the lid, so you want to either grease this lid here so it doesn’t get stuck or you want to make sure to wipe those down when you check on the moisture level.
These beans have a flavor that you cannot get anyplace else. I really recommend you try a couple of these bean recipes. They’re really good. Good food is really important. The public is going to be more interested in food when you’ve got really good food in your cooking. Recruits, if you want people to join your group, really good food is what’s going to bring them in. That’s a really important part and you want to have fun when you’re reenacting and probably the most important part of having fun is having really good food, so I encourage everyone to do more period cooking at events. I think you’ll really enjoy it. On our website you can find all kinds of great period cooking things, equipment and eating supplies. We have a lot of different kinds of clothing, so make sure to check out our online catalog. You can get one of our printed catalogs and don’t forget to follow us on Facebook.
Gingerbread was a favorite treat in the 18th and 19th centuries. Many vendors sold it in the streets and markets. Many believe gingerbread possesses special medicinal properties, so it was even used to treat things like the sniffles.
Mix together flour, cinnamon, allspice, salt, ginger, and pearl ash or baking powder.
In a separate bowl, mix together the melted butter, molasses and water.
Carefully add the wet ingredients into the dry and mix until completely absorbed then turn out and knead until well mixed.
Roll out dough to about 1/8th inch thick and cut into desired shapes.
Place on a well-greased cookie sheet and bake in oven at about 400 degrees for just a few minutes until golden brown.
Aren’t they beautiful? They smell wonderful. Crunchy and spicy. A perfect treat for an autumn day.
Transcription of Video:
My papa is well occupied. He is preparing for the winter months ahead. He’s busy; ergo I thought I would take this opportunity to talk about gingerbread. Gingerbread was a favorite treat in the 18th and 19th centuries. Many vendors sold it in the streets and markets. I think it’s yummy. I have an idea! Let’s make some!
My papa told me never to play with fire, so I’m letting him start the oven. It needs to be a good hot oven. I’ll start with 2 cups of flour, and I’ll add to it ½ teaspoon of cinnamon, a pinch of allspice, a little bit of salt, about 2 tablespoons of freshly grated ginger and finally, I’ll add a ½ teaspoon of pearl ash, but wait, I don’t have pearl ash. Oh dear, what shall I do? I’ll use baking powder instead. Next, in a separate bowl, I’ll mix 2 tablespoons of melted butter with ½ cup of mild molasses and 3 tablespoons of water. Wow, this is really sticky. And now it’s time to mix the wet ingredients with the dry ingredients, and I’ll carefully stir this together until the liquid is absorbed. Then I will turn it out and knead it until it’s well mixed. Next, I’ll roll out the dough until it’s about 1/8th of an inch thick. I’ll use a cookie cutter to make pretty shapes. This one even looks like a flower. And I’ll put them on a well-greased cookie sheet. Some of these cookies I’ll impress with a stamp, that will make a pretty design on the top. And some of them will roll into a snake and cut into little brown shapes. Now it’s time for papa to put them in the oven. He says the oven is about 400 degrees. That’s really hot.
It shouldn’t take very long at all, only a couple of minutes. And here they come.
Many believe gingerbread possesses special medicinal properties, so it was even used to treat things like the sniffles. Aren’t they beautiful? They smell wonderful. We’ll let these cool for a while. Yum, crunchy and spicy. A perfect treat for an autumn day. Maybe you should make some too.
Soldiers in the 18th century commonly had short rations and they would supplement their rations whenever they could. One of the things they would supplement their rations with was pumpkins or sometimes called pompions. Today we’re going to take some pumpkins and cook them in a several different ways.
Pottage Pumpkin
Small Pumpkin
Butter
Milk
Salt
Cinnamon
Prepare a large flat rock in the fire to heat. Cut the pumpkin in half and remove the pith and seeds. Place pumpkin, cut side down on the flat rock and cover with hot coals.
Let bake for 10-15 minutes or until soft inside. Scoop out the soft pumpkin from the shell. While hot, add a bit of butter, milk, salt and cinnamon to taste.
Stuffed Pumpkin
Small Pumpkin
Pear
Salt
Cinnamon
Butter
Cut the top off the pumpkin and remove the pith and seeds.
Dice the pear and add salt and cinnamon to taste.
Fill the pumpkin to the top with the diced pears and add a little bit of butter. Place near the fire and slowly rotate over the next 10 to 15 minutes or until tender inside. Remove the pears and pumpkin onto a dish and add more butter and salt if desired.
Fried Green Pumpkin
Small Green Pumpkin
Butter
Sugar
Salt
Cinnamon
Peel, remove the pith and slice up the pumpkin into bite sized pieces.
Add a bit of sugar and salt and cinnamon to taste to the slices. Warm some butter in a pan then add the pumpkin slices. Make sure to keep the pumpkin moving so the sugar doesn’t burn in the pan. Once the pumpkin has softened it is ready to eat.
Transcript of Video:
Soldiers in the 18th Century commonly had short rations and they would supplement their rations and one of the things they would supplement their rations with was pumpkins or sometimes they were called pompions. Today we’re going to take some pumpkins and we’re going to cook them in a couple of different ways.
So these first two pumpkins we’re going to roast, one I’m going to turn into a pottage, and another one we’re going to stuff with pears.
Let’s start with our pottage pumpkin.
I’m going to take out the pith and seeds. I’ll just scoop those out. Now we’re going to take this flat rock that we’ve had in the fire for quite a while. It’s got a nice flat side to it. We’ll place those down and then heap coals on top of them.
So, this little pumpkin isn’t going to take very long at all to cook up, but in the meantime, while that’s working, let’s work on our other pumpkin.
So I’ve got a pear here we’re dicing up and we’re going to use to stuff our pumpkin with.
So if you’ve got some spices, a little bit of salt and a little bit of cinnamon, it’s the perfect time. We’re going to put these on top of our pears here, and there we go, and mix that up a little bit. I going to take our pumpkin and just cut the top of it off.
Okay, that’s our pumpkin cleaned out. I’m going to take our pear dices and stuff that full. Make it so that it will fill up that cavity. On the very top, I’m going to place some of my precious butter. There we go. And we’re going to place our top back on. So here’s our pumpkin, it’s ready to go, ready to start by the fire. We’ve got it all stuffed, and we’re going to find a place right by the fire and let it bake on one side and we’ll slowly rotate it as it cooks so that it gets evenly cooked all the way around.
So while that pumpkin is cooking, let’s get started on our last one. So, not all pumpkins could be used when they were ripe. There’s one account of a soldier who, coming off the battlefield, finds a pumpkin. He finds it green and he slices it up and fries it. So that’s what we’re going to do with this one.
So with this green pumpkin, we’ve got it sliced up, we’re going to fry it with a little bit of butter and add just a little bit of sugar to sweeten it up. A little bit of salt along with the sugar and pumpkin loves a little bit of cinnamon.
Let’s get some butter in our pan and get that warmed up.
You’ve got to keep these moving while they’re cooking or else that sugar will burn in there, but these have softened up and they look like they’re ready to go.
Very tasty.
Let’s see how our other pumpkin’s doing. These little pumpkins have only been on the fire for ten or fifteen minutes and they look like they’re all ready so we’re going to take them off, and they’re nice and soft on the inside.
So while this is still hot, I’m going to take some butter and melt that in there and then add some milk and it should be ready to go. Maybe a little bit of salt.
It’s really good. A little bit of cinnamon really set it off. Let’s see how our other pumpkin’s doing.
I think our pumpkin is done roasting here. Let’s take this away from the fire to cool just a little bit.
Get all the pears out. See, they’ve been roasting well in there. Okay, well there we’ve got most of it out. If you’ve got it, you might want to add just a little bit of butter, maybe even a bit more salt. It should be ready to go. Three wonderful, simple ways that 18th century soldiers could cook their pumpkin. A pumpkin pottage, a stuffed roast pumpkin, and my favorite, the fried green pumpkin. All the utensils here, all the equipment we used you can see on our website or in our print catalog and don’t forget to follow us on Facebook.
Today we’re doing a carrot pudding out of Amelia Simmons’ cookbook, but this one’s more like, say, a carrot custard.
1 cup boiled, mashed Carrots
5 Eggs
¼ cup butter
¼ cup sugar
1 tsp Cinnamon
Rose Water to Taste (optional)
Whisk eggs and add to carrots. Add butter, sugar, and cinnamon. This is also where you would add the rose water if you are using it.
Pre-butter a deep dish for baking and pour in mixture.
Bake at 350 degrees for at least an hour. Check for doneness when golden brown on top.
Transcript of Video:
In our last episode of 18th Century cooking, we did a carrot pudding. It was a bit more like a bread pudding. Today we’re doing a second carrot pudding out of Amelia Simmons’ cookbook, but this one’s more like, say, a carrot custard.
So let’s look at this Amelia Simmons recipe. It’s very short and simple and she leaves some stuff out, but here it goes, “Carrot pudding, a cup full of boiled and strained carrots, 5 eggs, 2 ounces sugar and butter each, cinnamon and rose water to taste, baked in a deep dish without a paste.” Very, very simple, so let’s get started.
We need about a cup of boiled and mashed carrots. The next thing we need are 5 eggs. I whisked these up nicely. Now we need butter. We need 2 ounces of butter and 2 ounces of sugar. To this, we’re going to add cinnamon, let’s say a teaspoon of cinnamon, just cinnamon to taste we’ll say. The recipe calls for rose water. You know, I really don’t care for the kind of aroma that rose water gives off in the recipes. It’s very common in 18th century recipes, but I haven’t yet acquired the taste yet, so I’m going to leave the rose water out.
She recommends baking this in a deep dish. The amount that this makes is just perfect for a little tin bowl. Make sure you pre-butter it before you pour this mixture in. She didn’t give a baking time for this. I baked mine for about an hour. It might take even a little bit more, but so you’re just going to have to watch it. Go ahead and bake it at 350 degrees.
So this pudding’s definitely very different than the last one. I can’t wait to find out just how different it tastes.
It’s definitely a good bit eggier instead of bready. The sweetness is definitely there. The cinnamon is nice. This is really, really good stuff, and the carrot adds a good bit of flavor, but it doesn’t have any kind of, you know, nasty carrotiness. When I was a kid, I really didn’t care for carrots very much, but this is really, really good.

 American soldiers in the 18th century had several different types of rations.
 There would also be a bread component where they were supposed to get a pound loaf, but if that were not available they might get just flour or cornmeal instead.


 When it’s mixed pretty well, go ahead and turn it out onto a lightly floured surface. Square it up so that you can cut it down into about egg sized pieces.

 Alternately, you can place them in a
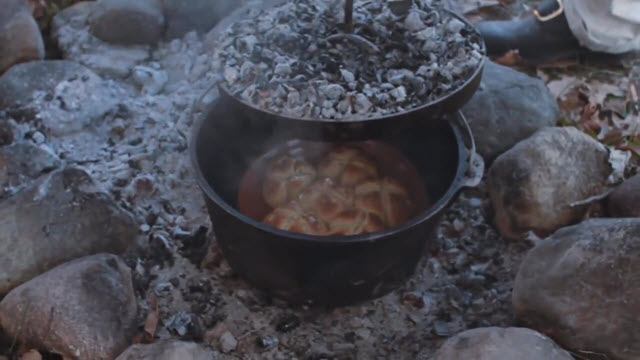


 Apples have been enjoyed for centuries by people. “Pippins” is a common name for apples in the 18th century. When choosing your pie apples, if you’re not just picking off a local tree, you want to look for Jonathans or Winesaps, something that’s particularly a pie apple, a tart yet sweet apple that holds together and doesn’t turn to applesauce. What you don’t want is a red delicious apple. Red delicious apples are very 20th century. They’ve been bred for their size and their color, not their taste, and they don’t make a very good pie apple at all.


 Place some butter on top and add a couple of teaspoons of water.


 You’ll know this stew is
 Passenger pigeons were one of the most populous birds in the 18th and 19th century. There were billions of these birds on the planet. They were almost a scourge there were so many of them. They were very popular and you would find them in a lot of recipes. There were so many of these birds that there were reports of flocks that were a mile wide and 300 miles long that would take 14 hours to fly over. There were so many of them they would blot out the sun. However, we can’t use passenger pigeons today since the last one died almost 100 years ago, so today we’re going to use as our substitute a Cornish game hen.


 About halfway through cooking, when the bottom turns brown, rotate the board so that the top can cook.


 Today we’re going to bake beans. Beans were a common fare in the 18th century both for regular folks and part of the soldier’s rations. We’re going to bake beans in the oven and buried in a pit.


 Soaking your beans overnight is a very good idea. It helps them cook for a lot less time. You also should boil your beans for an hour or two, whatever it takes to get them nice and soft and ready to bake. Dry beans have a toxin in them that causes issues with digestion if they aren’t heated to the right temperature. If they’re baked at a very low temperature, that doesn’t get rid of the toxins.
 Regardless of the pot you use, be careful when removing the lid as it can stick to the pot if the beans boil over during baking. To avoid this, you can grease the lid before baking, or wipe it down each time you open the pot.


 Barbados molasses or light molasses is going to have a lot better taste than blackstrap which is very bitter.
 Finally, we need about a quarter to a half a cup of onions. You want to get all this stuff pushed down to the bottom and mixed well.
 Don’t be afraid to put too much water in. It’s going to bake off so you want to have it topped off with water. While it is baking, check every few hours to make sure there is enough liquid so that your beans don’t dry out too much.

 Finally, place hot coals up on top and build a fire over the pit to keep the heat in. You can bake the beans here for 2-12 hours as well but you will still need to check the moisture levels every few hours and continue to bank the fire on top if it dies down too much.
 These beans have a flavor that you cannot get anyplace else. They’re really good. Good food is really important. When you are reenacting, the most important part of having fun is having really good food. The public is going to be more interested, and you will have more people wanting to join your group, so I encourage everyone to do more period cooking at events. I think you’ll really enjoy it.
 Gingerbread was a favorite treat in the 18th and 19th centuries. Many vendors sold it in the streets and markets. Many believe gingerbread possesses special medicinal properties, so it was even used to treat things like the sniffles.
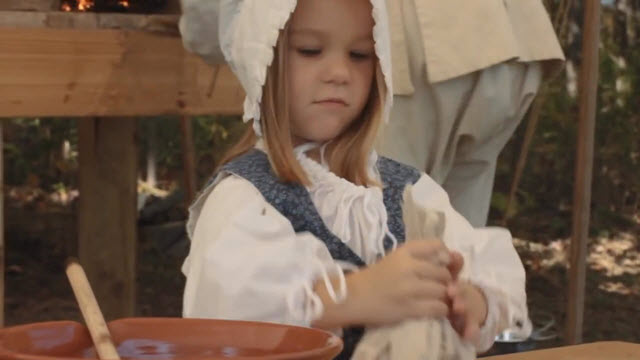
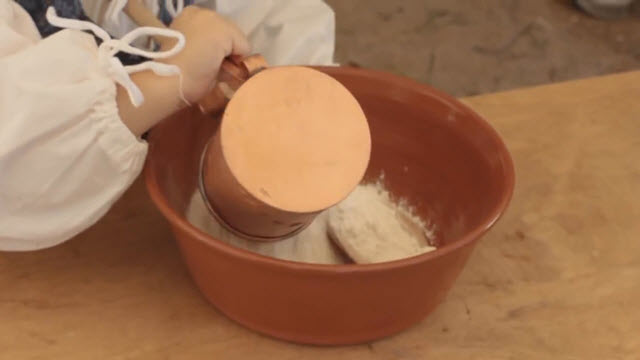
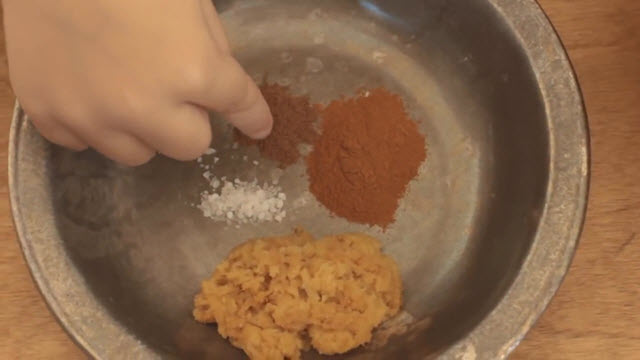

 Carefully add the wet ingredients into the dry and mix until completely absorbed then turn out and knead until well mixed.
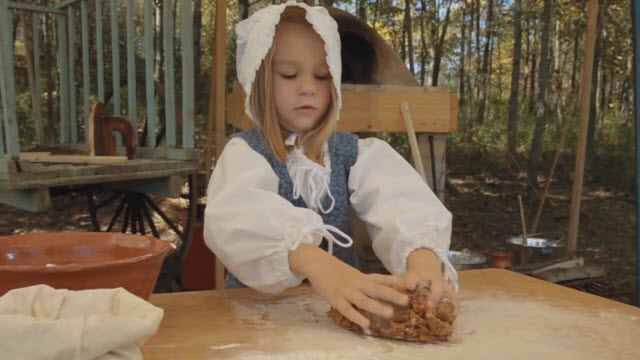
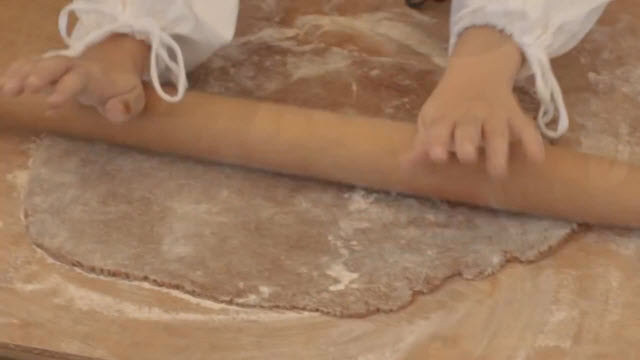
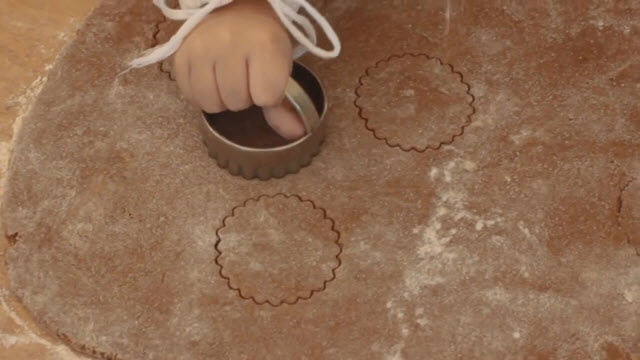
 Place on a well-greased cookie sheet and bake in oven at about 400 degrees for just a few minutes until golden brown.
 Aren’t they beautiful? They smell wonderful. Crunchy and spicy. A perfect treat for an autumn day.
 Soldiers in the 18th century commonly had short rations and they would supplement their rations whenever they could. One of the things they would supplement their rations with was pumpkins or sometimes called pompions. Today we’re going to take some pumpkins and cook them in a several different ways.
 Place pumpkin, cut side down on the flat rock and cover with hot coals.


 Place near the fire and slowly rotate over the next 10 to 15 minutes or until tender inside.
  Remove the pears and pumpkin onto a dish and add more butter and salt if desired.

 Make sure to keep the pumpkin moving so the sugar doesn’t burn in the pan. Once the pumpkin has softened it is ready to eat.
 Today we’re doing a carrot pudding out of Amelia Simmons’ cookbook, but this one’s more like, say, a carrot custard.


