Yellow Flummery

flummery

Have you ever pursued an endeavor full-tilt and headlong, only to discover the brick wall AFTER you’ve regain consciousness?

I hit a brick wall.

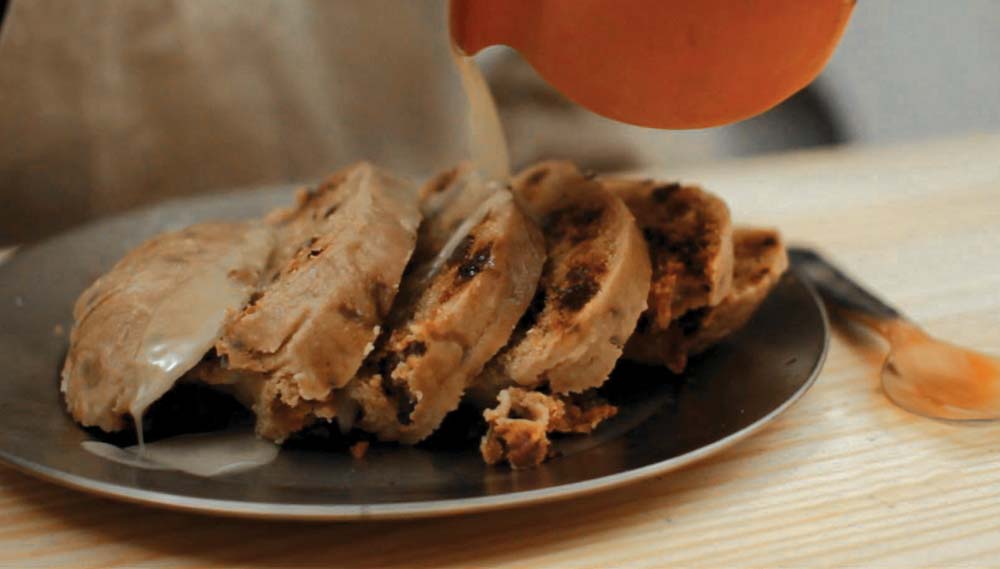
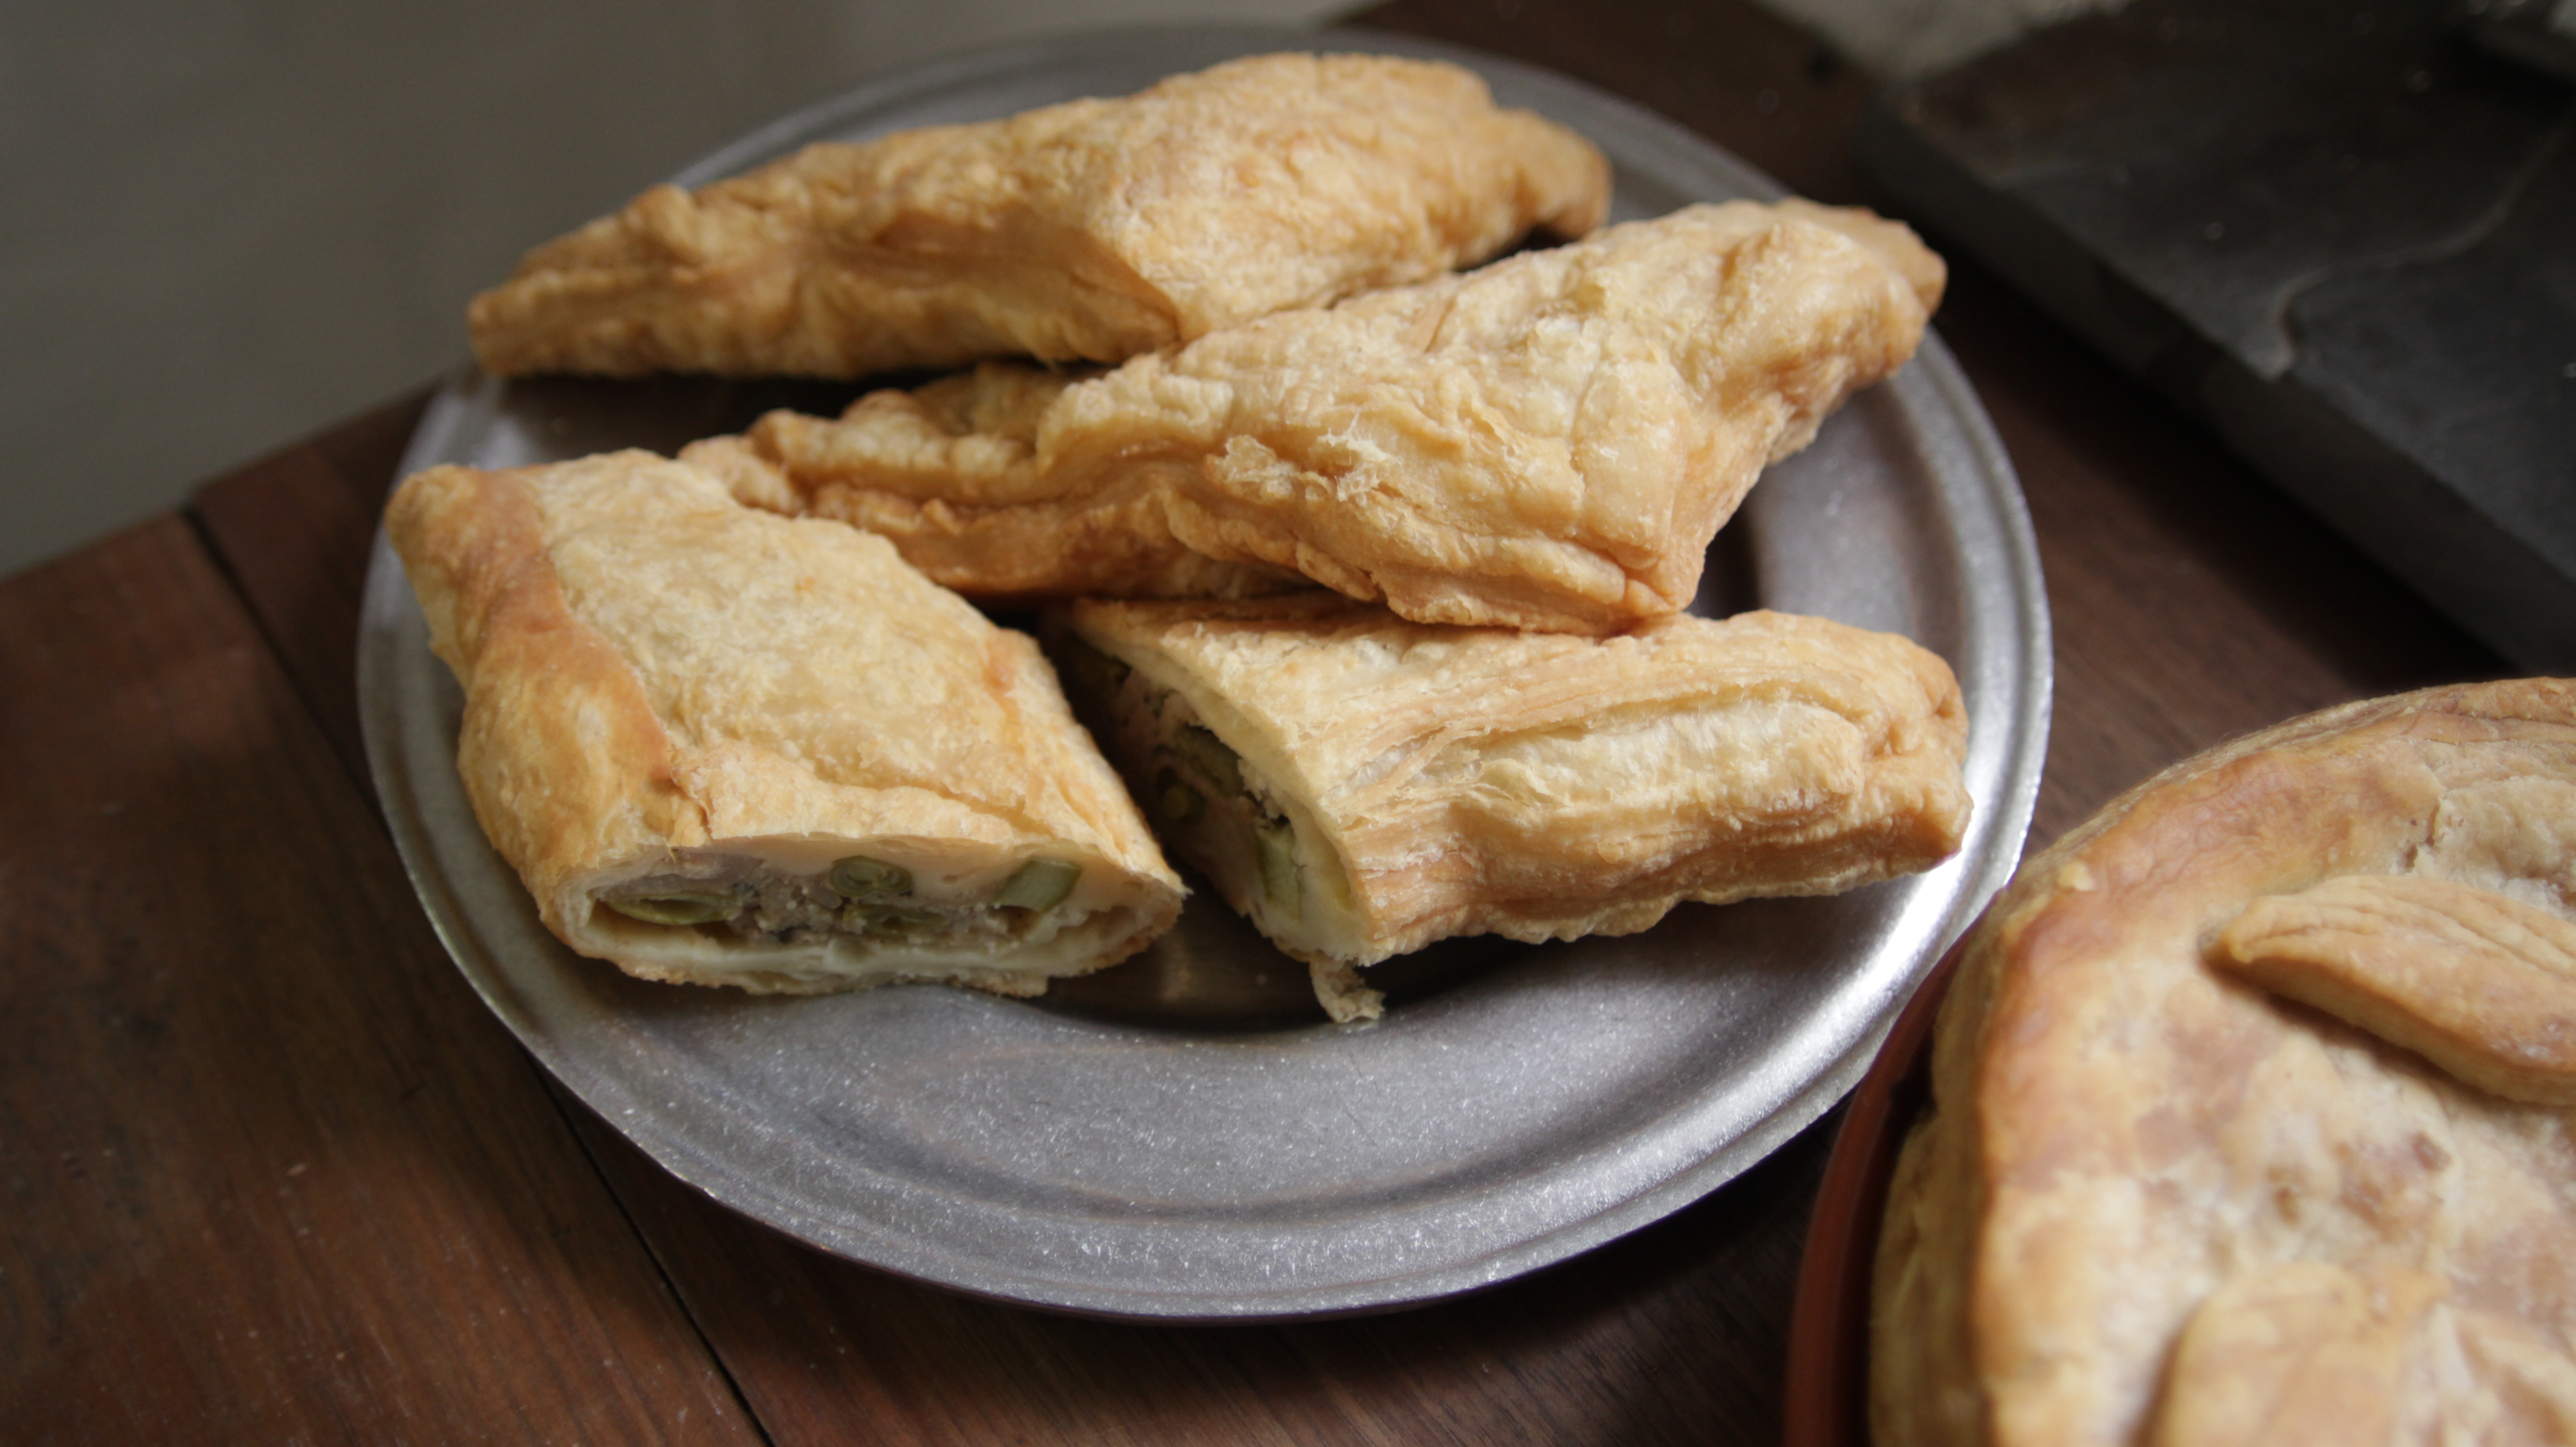
In my recent quest to understand the breadth of lineages in the pudding family tree, I decided to swivel to the lighter side of the table and make a flummery. Flummery was a custard-like “jelly” dessert. It, along with its sweet but often nutty sibling, blancmange, were likely ancestors to our American gelatin and pudding desserts. As use of the word “pudding” broadened to include many sweet desserts, flummery became a part of the family through association…kind of like what’s-his-face, you know, that boy who keeps showing up with your teenage daughter.

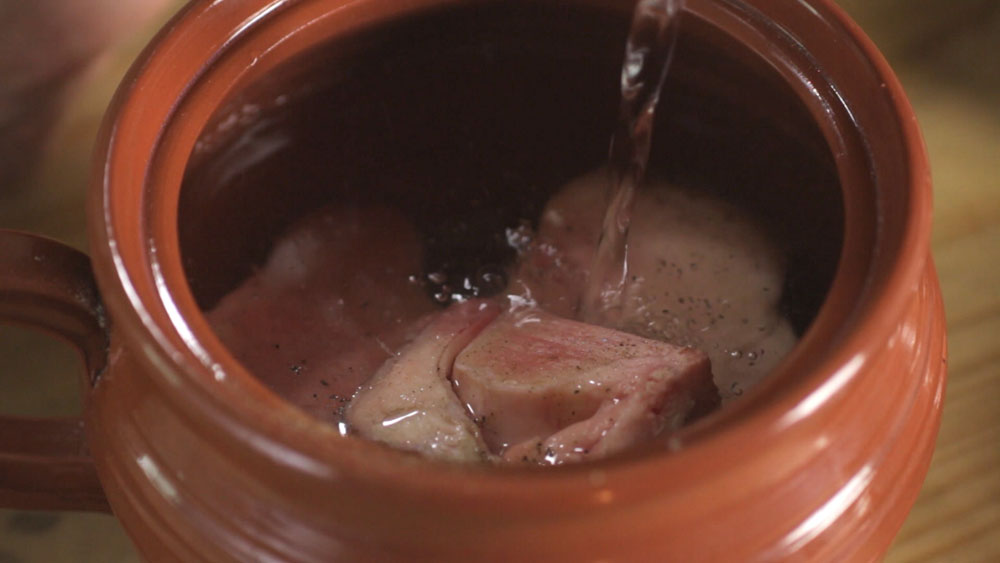
There were basically two methods of producing this jostling delight. Recipes required a stiff gelatin made from either boiled cow’s feet or isinglass.

[conspicuous pause] O.K., please read on.

I have noticed that I can get calf’s feet at my local Hispanic food market, but honestly? The thought of boiling the tar out of a couple of hooves makes me want to…well…”how ’bout if we go out for dinner tonight, Honey?”

I was amused recently when I read a recipe by Hannah Glasse in her book, The Complete Confectioner — originally published in 1760. This recipe was called “Jelly for Moulds.” Here’s the first half of the recipe (the entire recipe is quite lengthy): 

Hmm. I’m not sure why one would be repulsed by a neat’s (ox’s) foot and not by a couple of calf’s feet as well. But thank goodness, I have the option of using two ounces of isinglass instead. So what is isinglass, anyway?

Oh, great. Fish swim bladders.

You see, many if not most fish have swim bladders. A swim bladder is an air-filled internal organ that the fish somehow adjusts to regulate its buoyancy in order to control the depth at which it swims. These sacks are one of the purest forms of collagen found in nature. It was commonly believed in the 18th century that the highest quality and most effectual isinglass came from sturgeons. By the end of the 18th century, Cod had also joined the ranks of donors. Much of the isinglass today is made from the bladders of tropical fish.

But wait, let’s take one step backward: collagen is a protein that makes Jello giggle. It has an amazing ability to bond at a molecular level with disproportionate amounts of water, giving real gelatinous substance to the liquid.

So I have this recipe for Yellow Flummery. It’s from John Perkins’s 1796 cookbook, Every Woman Her own House Keeper (London, 1796) p.397. Here it is:


It’s pretty typical for recipes to call for a ratio of 1-2 ounces of isinglass per quart of liquid. This recipe, regardless of the fish guts, sounded quite delicious. I thought I would give it a try.

Being a casual homebrewer, I knew that isinglass is used today to clarify beer (as is Carrageen or Irish Moss and sometimes even gelatin). So I ordered four or five ounces. I decided to do half batches, and figured I’d need to make this recipe more than once. I realized when it arrived that I had ordered liquid form: way too diluted to make flummery. So I did some more research and found a supplier for powdered form. I ordered the same four or five ounces. Suddenly I’m $30 in the hole with shipping to boot. But hey, I’m excited. I get to try another 18th century recipe, and this once looks good.

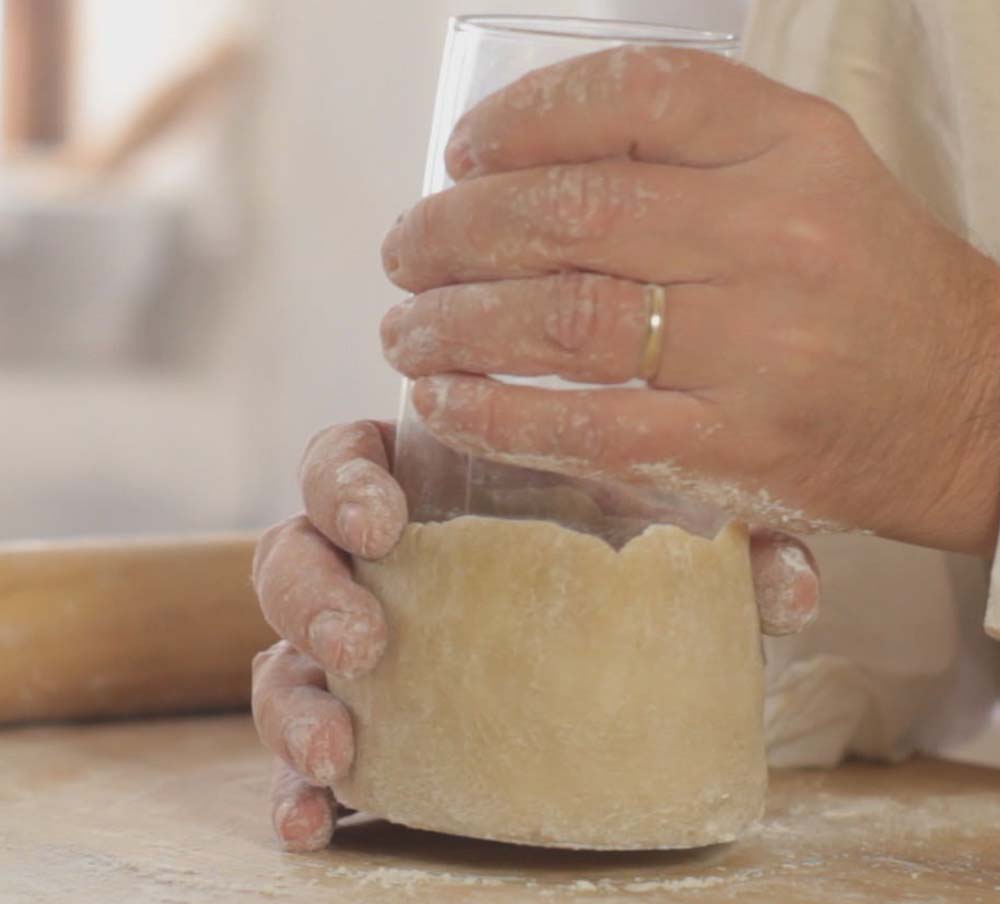
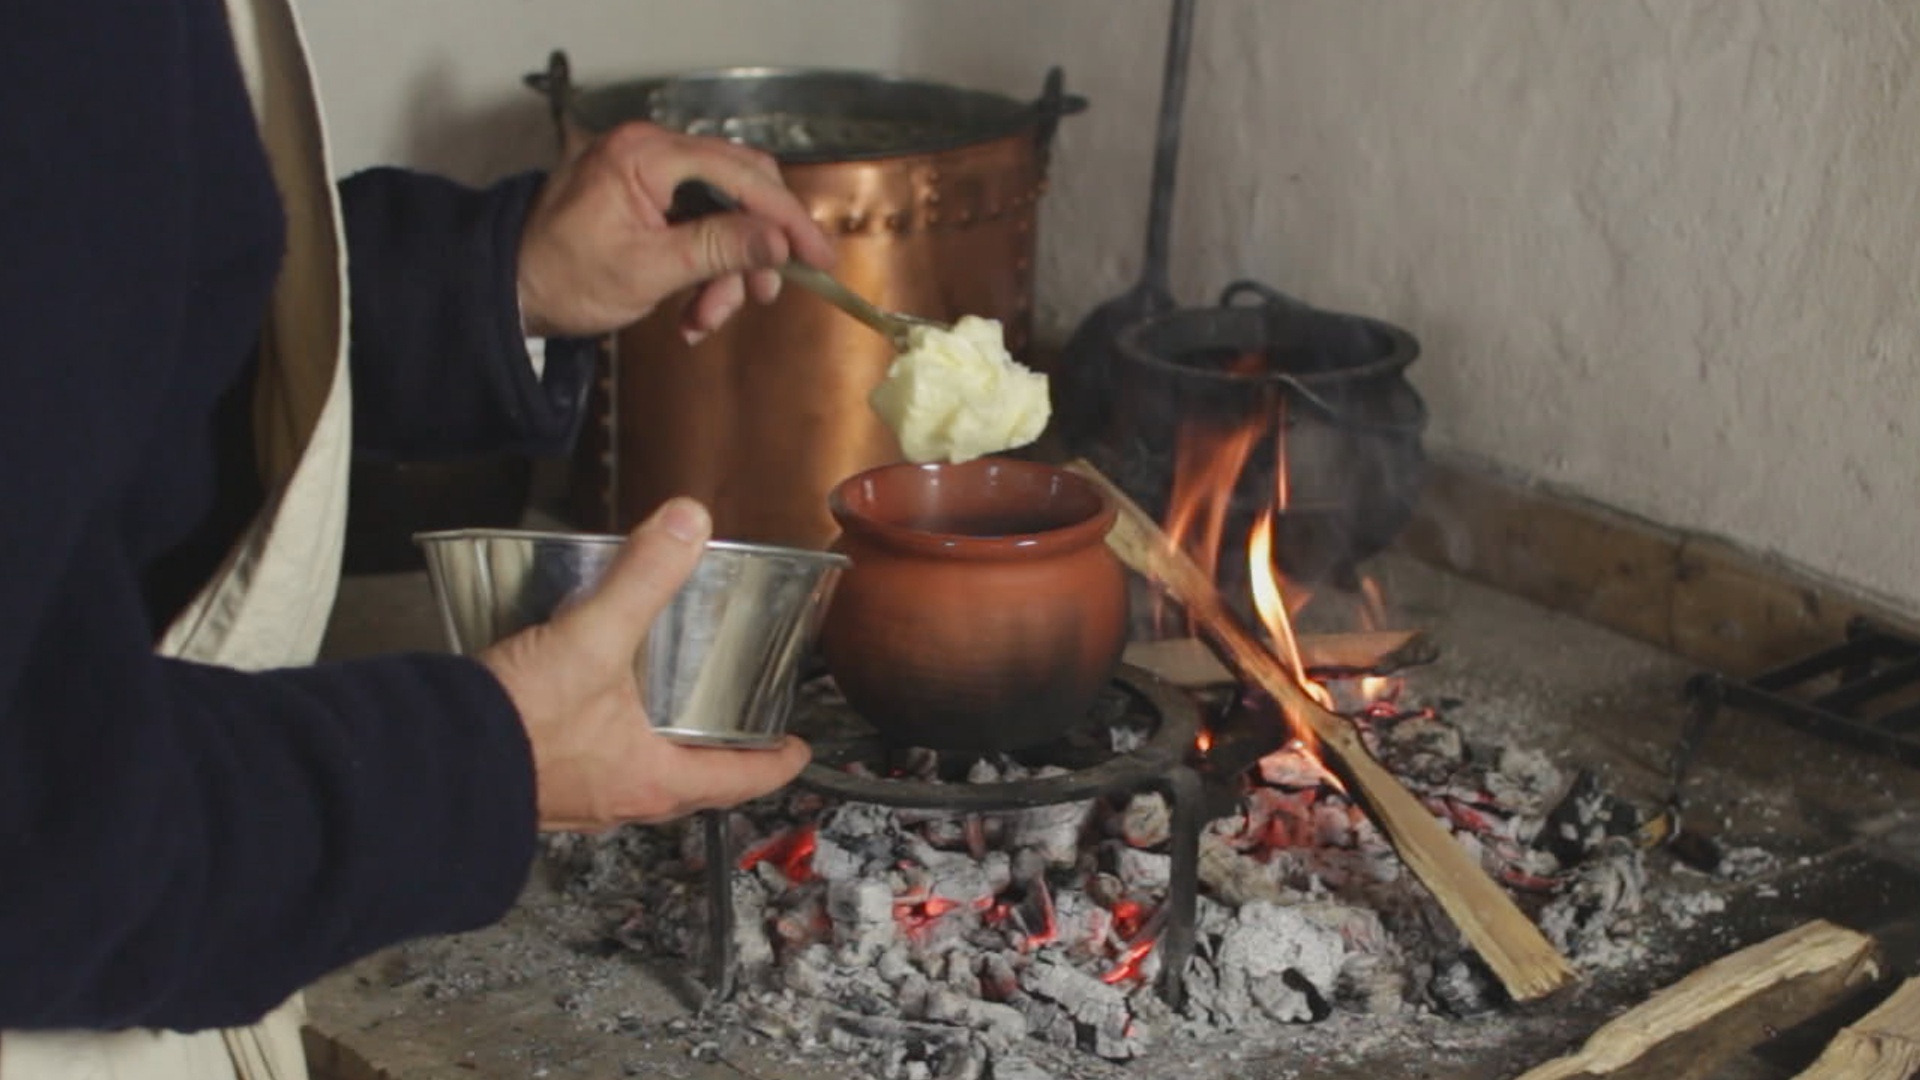
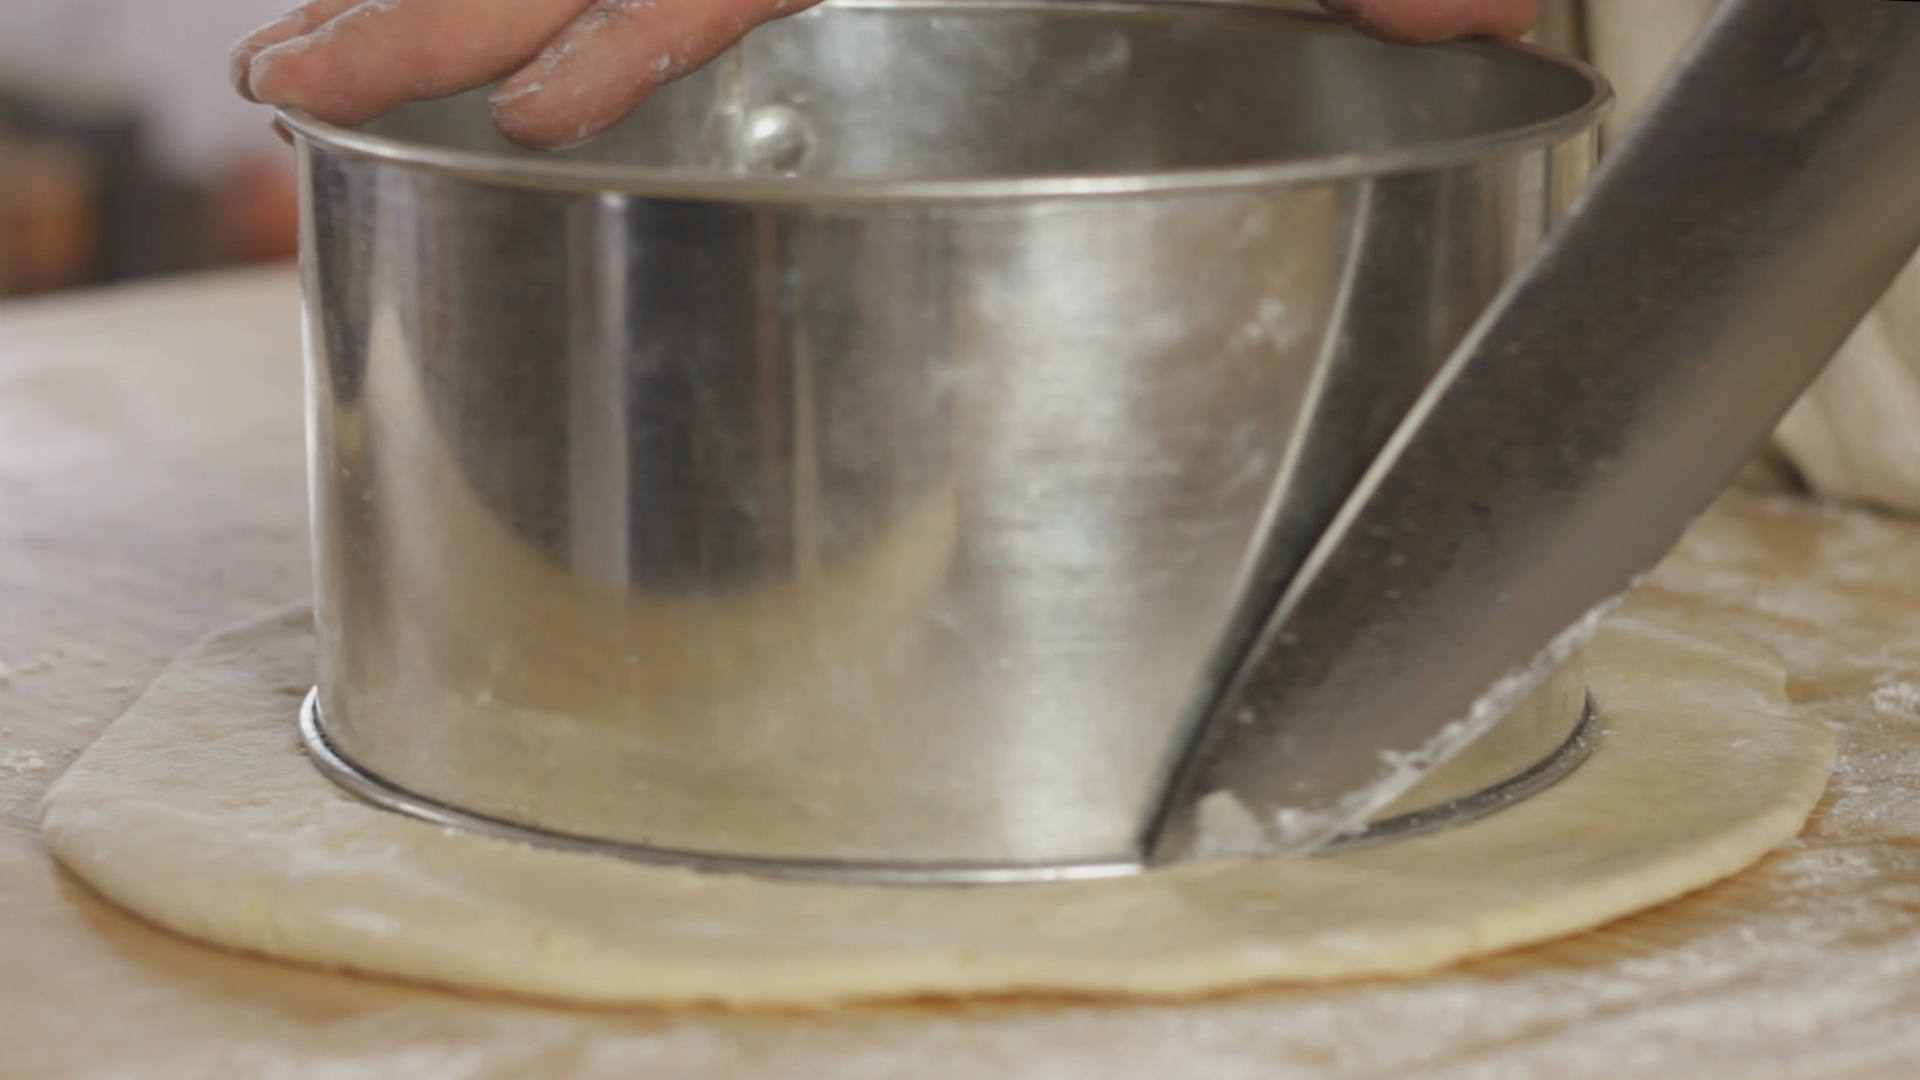
I followed Mr Perkins’s directions to the tee. I even purchased an old blancmange mould off ebay. I was now $60 in. I poured the final mixture of goodness into the mould. I could smell fresh lemon. I thought to myself, “this is going to be good.” I covered the mould with plastic wrap and carefully slid it into my refrigerator. By then it was midnight, so I cleaned up my mess and went to bed.

The next morning, I made a bee-line for the refrigerator. It was still a thick liquid. Disappointed, I put the mould back in the refrigerator, got ready, and left for work. Maybe I hadn’t given it enough time to set.

That evening, I went straight for the mould again. Liquid still. I decided that maybe I had misread the instructions, so I decided to throw this batch out and do it again — this time more carefully.

Same results.

Something was wrong. I decided to take one of my remaining ounces of isinglass and try it with a mere cup of water. What I got was quite different from what I anticipated. I expected a semi-clear gel that I could pull out of my mould, kind of like “Knox Blocks” or “Jello shots” with a slight hint of fish flavor. What I got looked like Elmer’s glue instead — thick, but liquidy, and very opaque white. I was confused.

I’ve been told I’m somewhat of a rare breed. If I get lost, I stop to ask for directions. If I can’t find something at the store, I’ll look for a name tag. I once made the mistake of asking an employee at Walmart where I could find squeezable ketchup bottles. I soon realized I was speaking to a nurse in royal blue scrubs who was simply looking for a new frying pan. It was the name tag that threw me off.

Any way, because I was so confused about my isinglass results, I decided to contact the company that distributed it. I was able to reach a really nice guy named Sam who was considerate enough to listen to me. He was genuinely concerned and said they had never before received complaints about their isinglass. I was quick to clarify that I wasn’t being critical of their product. I admitted I was using it in a fashion for which it was not intended. A Stradivarius, after all, makes a lousy hammer. He shared with me that for brewing purposes, all of the powdered isinglass with which he was familiar, both from his company as well as from his primary competitor (and between the two of these companies, you’ve pretty much got the homebrew market locked up) was cut with citric acid, potassium or sodium metabisulfite (an antioxidant), and silica dioxide (diatomaceous earth).

Now it was making sense.

He also happened to mention that they sold a nearly pure isinglass product (although it was still cut with citric acid), but that it only came in 1-kilo blocks, and that his supply appeared to be running dry. I commented about how our conversation would likely land us both on some secret D.E.A. watch list, and I thanked him for his time and for the information.

So I’ve reached this conclusion: If you want to make flummery, unless you have an uncle who lives in Russia or who fishes the North Atlantic, and who would be willing to send you some sturgeon or cod bladders, the chances of finding pure isinglass to complete the recipe is pretty slim. That means that the only option remaining is…yeah, another recipe that uses calf’s feet jelly. Yum.

So having said all that, may I make one little suggestion? How about if we use unflavored gelatin and keep that little secret to ourselves?

[GASP!]

I know, I know! I’m aware that dehydrolized gelatin was a 19th century invention and is completely wrong for 18th century cooking. But the alternative for most people, with the exception to the few true die-hards who are willing to boil Bessie boots beyond oblivion (and my hat is off to them for doing it), is to let this delicious dish slip silently into eternal extinction. And that would be a shame.

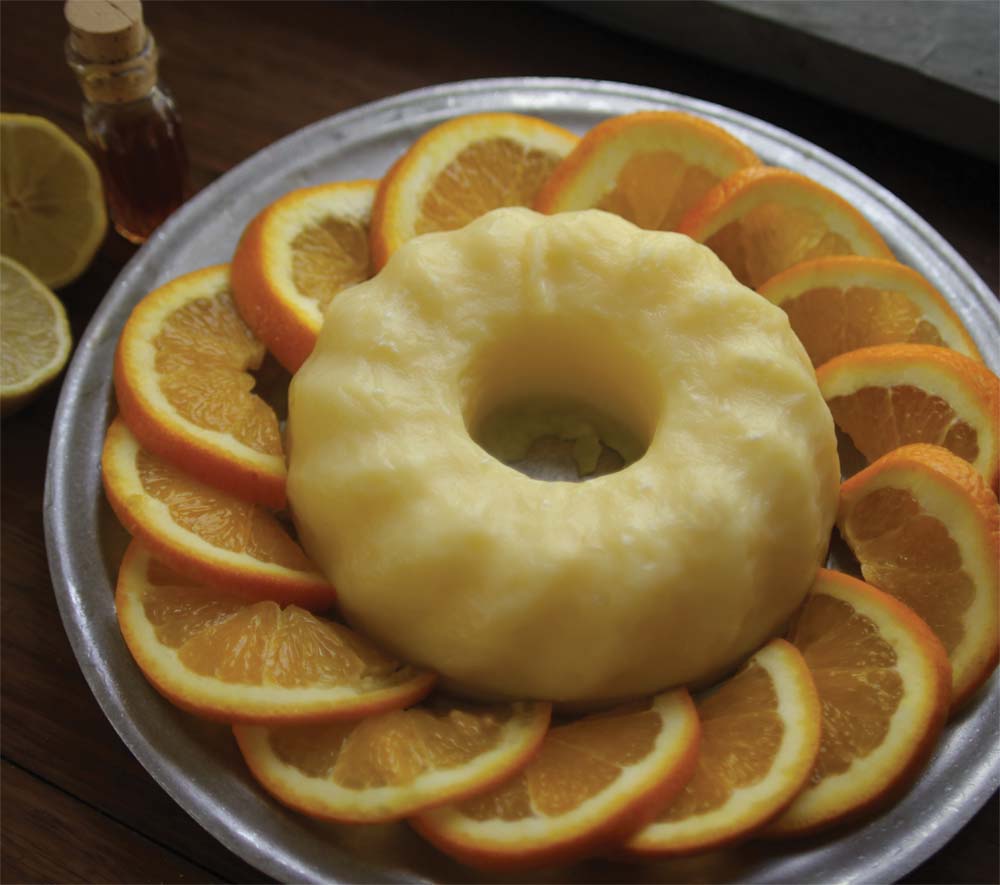
SO! Here is my 2013 take on a 1796 recipe for Yellow (Lemon) Flummery:

Lemon Flummery (2013)
Adapted from John Perkins’s 1796 recipe.

In a large bowl, sprinkle 2 packets of unflavored gelatin over the surface of 2 cups white wine. Set aside for 5 to 10 minutes.

In the meantime, combine in a medium saucepan: 2 cups water, the juice of 2 lemons, 1/4 — 1/2 cup sugar, and 4 egg yolks (well beaten). Use a vegetable peeler to thinly pare the rind of 1 lemon; add this rind to the other ingredients as well. Heat this mixture, stirring all the while, over medium heat until it just begins to boil. Remove it from the heat, and strain it to remove the lemon rind , any pulp from the lemon juice, and any chalazae from the egg yolks.

Combine the lemon/egg water to the wine and stir until the gelatin is completely dissolved. You can tell if the gelatin is completely dissolved by dipping a clean spoon into the mixture. If you see any granules clinging to the spoon, keep stirring.

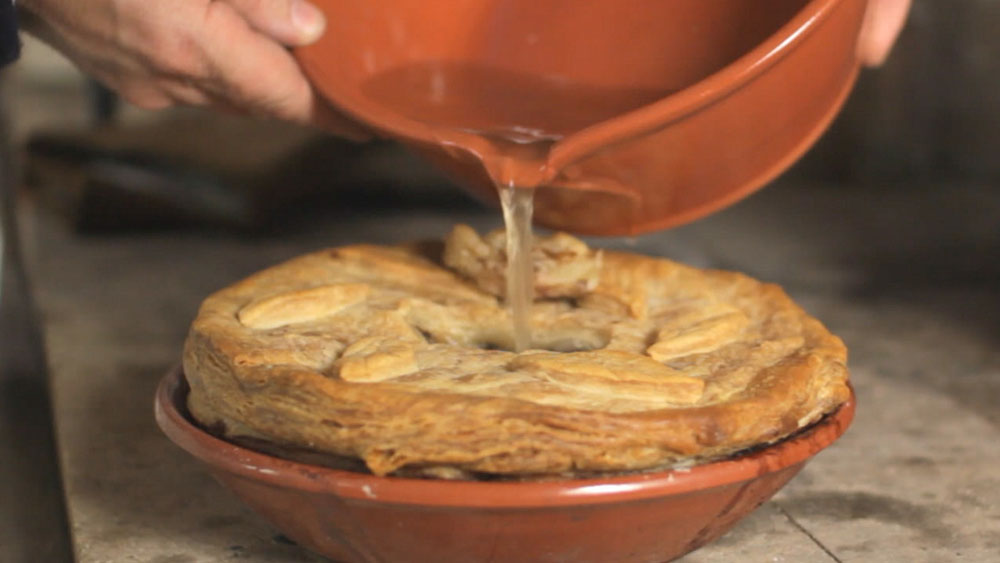
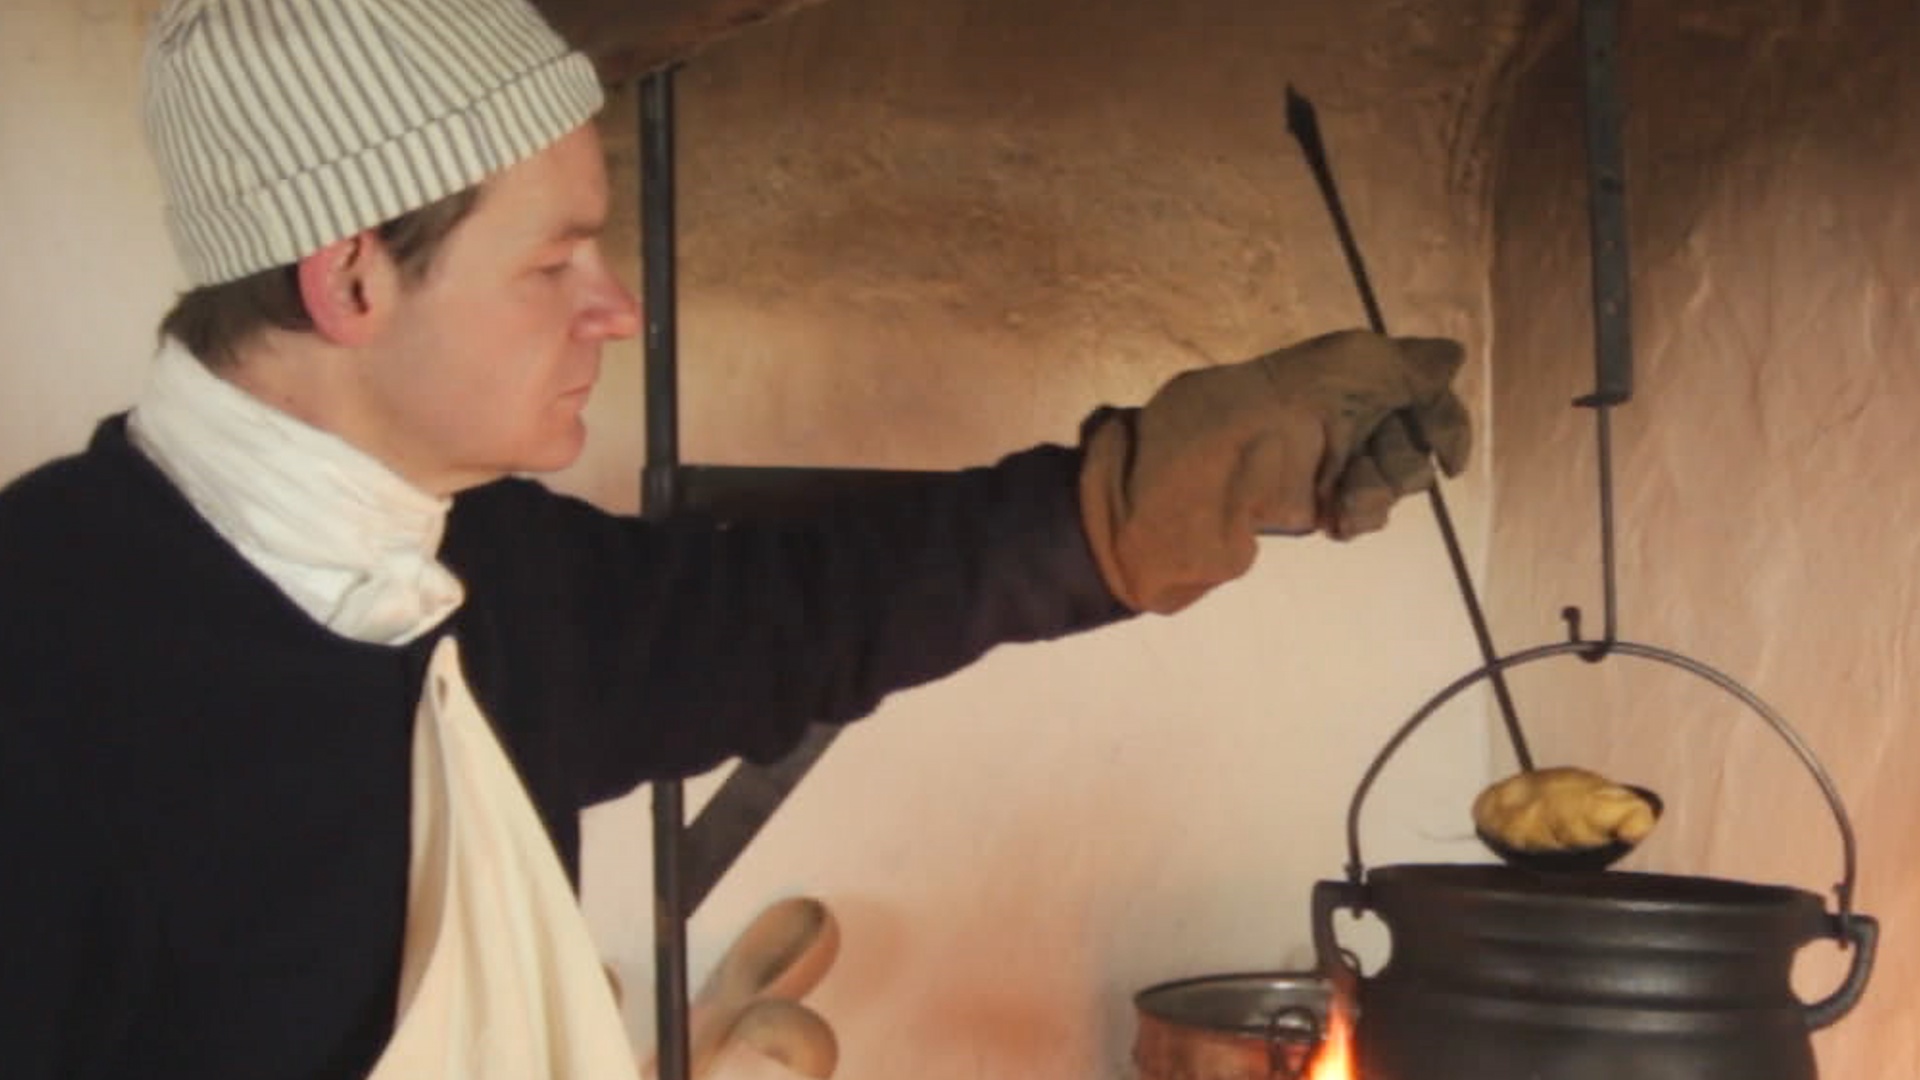
Pour the flummery liquid into a clean mold, and set in a cool place for 8 to 24 hours. (Jas. Townsend & Son sells a Turk’s Hat Mold that is perfect for this.)

To un-mold, set the mold in a bowl of hot water for just a few seconds. This melts a thin layer of the gelatin and loosen the flummery from the mold. Place serving plate upside-down on top of the mold, and in one quick motion, holding the plate and mold together, turn assembly over. Remove the mold.

Garnish with thin slices of orange.

An interesting variation on this recipe is to use 1 cup ver jus and 1 cup water in place of the 2 cups white wine.

Posted in Recipe | 23 Comments

Please Bring Back the Puddings!

pudding2
I recently ran across online portions of an interesting book, edited by Harlan Walker, titled Disappearing Foods: Studies in Foods and Dishes at Risk (Prospect Books, 1995). The book includes an article written by Mary Wallace Kelsey called “The Pudding Club and Traditional British Puddings.” It celebrates a resurgence of the quintessential British boiled pudding.

Where did we go wrong?

Ms. Kelsey’s article prompted me to ask a couple of question: where did we Americans go astray in our understanding of what a pudding is? Pose the question, “what is pudding?” to any American you know, and you’re likely to get a raised eyebrow and a sideways glance as if you’re from a different planet. Anticipated answers will likely include the words chocolate or vanilla, or maybe lemon, pistachio, or butterscotch. You’ll likely be told that it can be found in your local grocery next to the gelatin desserts (usually going by the same brand name). And someone may even tell you that it’s a dessert commonly served at hospitals and all-you-can-eat dinner buffets.

So my curiosity got the best of me and I started to research the topic. I wanted to know if there was some remote historic connection between the virtually extinct boiled pudding and the plastic cups of pre-made stuff Bill Cosby used to hustle to our children.

I’ve concluded there is a connection. Maybe we wren’t wrong after all.

A Brief Pudding History

If one looks at the old recipes for pudding, it rapidly becomes obvious (and many historians and etymologists agree) that the meaning of the term is difficult to pin down. The word appears to find its origin in an old French term describing a blood-sausage stuffed into animal intestines and stomachs (and…um…other…parts) that the Normans brought with them as they invaded the British Isles in the 12th century. A modern direct descendant of these original puddings are the black and white puddings of the United Kingdom and Ireland — boiled, sliced, and often fried up for breakfast.

Puddings really exploded onto the culinary scene around the 14th century when someone discovered that a piece of cloth was a viable substitute for natural casings. Woohoo! No longer did diners have to wait for the next autumn slaughter! Puddings could be made year-round! The pudding bag was here to stay! …At least for the lion’s share of the next five or six centuries.

Puddings were often boiled alongside the meat. They were likewise often served prior to or along with the meat course so that less meat would be required to satisfy hungry appetites.

But as sugar became more widely available, it began to alter the palates of English societies. Even savory dishes, including puddings, were often seasoned with sugar. Eventually, the definition of pudding began to apply to a broader collection of foods that weighed heavily on the dessert end of the table.

A White Pot, with sugar being browned on top with a period salamander

A White Pot with a topping of sugar being browned with a period salamander

There were dozens, if not hundreds of different kinds of puddings: boiled puddings, dripping puddings (e.g., Yorkshire), plumb, marrow, and pastry puddings. There were regional and local puddings. There were bread puddings that used bread crumbs and bread-and-butter puddings that actually used slices of bread (e.g., a white pot). There were apple puddings that we would now call apple dumplings. There were also quaking and custard puddings (e.g., “Flummery”), made primarily of egg and milk with only a fraction of the flour seemingly necessary to hold it together.

Another pudding type was called Blancmange. Different from custard (which is thickened with egg), blancmange is a dairy dessert thickened originally with either isinglass or calve’s feet jelly, and by the turn of the 20th century, with corn starch. There were different kinds of manges, depending on how they were flavored and/or colored. Blancmange colored with cochineal, for instance, was called rougemange, and that colored with spinach was verdemange. It was only a matter of time for some heroic cook to slip chocolate into the equation.

An End to Finger Pointing

Suddenly the debate over which dish has rightful claim to the name falls silent. (O.K., I haven’t heard anyone actually debate this besides myself in my own head.)

It’s a fairly short journey through early 20th century cookbooks to link custards and blancmanges to Bill Cosby. A boiled plum pudding and a dish of instant chocolate pudding are actually both members of the same food-family tree. Think of them as distant cousins, having descended down different evolutionary branches of this broad food category called pudding.

My assumption that we Americans had gone astray in our perceptions was incorrect. Both of these very divergent pudding styles seem to have legitimate claims to the throne. And as far as that goes, there are other modern foods that could chime in as well if they wanted to. Take, for instance, our Thanksgiving turkey stuffing and pumpkin pie. They both started as puddings. And the black sheep of the family — the Christmas fruitcake? You guessed it.

So Where DID They Go?

So going back to Kelsey’s article, my next question is, Why did boiled puddings disappear? Kelsey spoke of their disappearance from British tables, but they were once also very popular in America. Most English cookbooks used in early America were British (or heavily influenced by British cooking). So it’s no surprise to find a plethora of boiled pudding recipes even in those earliest “American” works published in Philadelphia and Boston. It’s interesting to realize, however, that even as American cookbooks began to reflect a distinctively American cuisine through the 19th century, British pudding recipes continued to hold on. It was only in the 20th century that they were finally nudged out of print by various custard and mange-type recipes going by the same name.

I managed to find a remnant bag pudding recipe from as late as 1937 in the Pennsylvania-Dutch Cook Book by J. George Frederick . Frederick reflects public sentiment by calling such dishes “poverty puddings, out of the thrifty colonial past.”

I believe there are several reasons why boiled puddings disappeared off the American culinary landscape. It was a slow death that may have started even at the height of its popularity. First, American colonists relied heavily on corn, as most of the wheat crop grown in North America was exported to Britain. Maize was considered by the British as suitable fare for Yankees. Beyond that, it was animal fodder. (see more on this topic in an earlier video we produced on Early Corn Bread.) The exportation of much of the wheat crop would have naturally limited the primary ingredients for pudding: flour and bread. Some of the earliest distinctions in American cookbooks were made by the additions of Indian Pudding recipes made with corn flour instead of wheat flour.

Another early contributor to the boiled pudding’s demise was likely the development of pearl ash, saleratus, and finally baking powder. These chemical leavening agents appear to have steered preferences away from heavier foods to lighter fare. Frederick mentioned this preference in the opening remarks in his chapter, “Dutch Puddings and Desserts.”

Another contributing factor was advances in kitchen technology. With the continued development of kitchen ovens, it became easier and more reliable (as well as more efficient) to bake than it was to boil. Consequently, as pudding recipes developed in the 19th century, more recipes called for the puddings to be baked or steamed with a water bath rather than boiled.

Another likely factor was simply the amount time required to make a boiled pudding. Full-sized bag puddings typically required boiling times between four and six hours. During that time, cooks had to keep a watchful eye on the pot to make sure it didn’t boil dry, and when additional water was needed to be added, it had to be boiling water so that the cooking time wasn’t extended any longer than it already was. Frustration over lengthy cook times can be felt even in early 18th century cookbooks. The answer to this was hasty puddings.

Hasty puddings were actually a category of puddings. Any pudding that required less time to cook, for whatever reason, can be considered a hasty pudding. For American colonists, corn mush was a common form of hasty pudding. It didn’t take long at all for the corn meal, boiled with disproportionate amounts of water, to thicken up. Other hasty puddings could be made from larger pudding recipes simply by divvying the dough or batter into smaller portions. For instance, the earliest known bag pudding (the “College” or “Cambridge” pudding) soon became the “New College” pudding. These recipes were in essence the same, but the mix of ingredients in the New College recipe was divided into smaller dumpling-size portions and either fried or boiled. The bag was dropped altogether.

And finally, the last nail in the boiled pudding’s coffin was likely the changing public perceptions regarding a key ingredient in most puddings: suet. It fell out of general favor with a society that was increasingly becoming more health conscious. Suet has since been relegated to bird food. Jennifer McLagan has much to say on this matter in her 2008 cookbook title Fat: An Appreciation for a Misunderstood Ingredient.

There were possibly other reasons for the boiled pudding’s disappearance from American Cuisine, e.g. regional and ethnic influences. But these that I’ve mentioned are the most significant.

But Wait! May I Please Have Seconds?

Here is a recipe that might justify a unified grassroots effort to resurrect the boiled pudding back from the culinary grave. It’s called “Puddings in Haste” from Maria Rundell’s 1814 cookbook “A New System of Domestic Cookery”  (originally publishes in 1807). Be sure to watch the video below as Jon prepares this dish.

Puddings to Haste

Rundell conspicuously omits the measure of ingredients. Comparing it to a number of other period recipes, here are our recommendations:

Ingredients:

1 cup dried bread crumbs
1 cup grated suet* 
1/2 cup raisins, chopped, or Zante currants**
grated zest of 1/2 to 1 whole lemon
1/2 teaspoon dried ginger powder (double that if you’re using fresh ginger)
2 eggs plus 2 egg yolks

a little flour for dredging

Directions:

Bring a good size pot of water to a roiling boil.

In a large mixing bowl, mix the first four ingredients together until they are well incorporated.

Use kidney fat, not muscle fat. It makes a HUGE difference!

Use kidney fat, not muscle fat. It makes a HUGE difference!

*DO NOT use hard muscle fat for this! Use true suet (kidney fat). Be sure to read my earlier post on Suet for more information. If you can’t find true suet, you’re better off using very cold diced butter or frozen vegetable shortening than you are using hard muscle fat. If you opt for either of these substitutions, you’ll have to work fast. 

** If you don’t like raisins, try some other dried fruit, chopped fairly small.

Whisk together the eggs along with the ginger. Mix the dry ingredients and wet ingredients together. Divide the stiff dough into equal portions, and form into balls or dumplings about the size of a small chicken egg. Roll each dumpling in flour and lower them into your boiling water.

Boil them for 15 minutes, stirring them on occasion to prevent them from sticking.

After 15 minutes, these little puddings will look soggy and somewhat gray. They can be eaten right away, or you can allow them to sit for a little while and they stiffen up and improve in appearance.

These puddings can be served hot or cold. Finish them up with a sprinkle of sugar, a little honey, maple syrup, or a delicious “pudding sauce” made of equal parts melted butter, sugar, and sack (sherry wine).

There are a number of 18th century recipes that I consider really good…for 18th century food, that is. THIS dish, however, will likely be served at the next party I attend!

Posted in 18th Century Cooking, Historic Cooking, Recipe, Video | Tagged , , | 12 Comments

Preserved Walnuts

walnuts

In preparation for our upcoming wedding, my fiancée, Kelly, and I visited a wonderful cheese shop in Kalamazoo, Michigan this weekend, hoping to explore different cheese options for our reception. The tiny shop was packed with wide-eyed shoppers, and the busy shopkeepers raced back and forth between the cooler and counter with armfuls of carefully double-wrapped cheeses. Samples were generously supplied.

As we savored a delightfully salty aged Gouda from the Netherlands, a creamy Irish white cheddar made with morning milk, and one of my favorites — a smooth and buttery Manchego from Spain, I overheard one patron after another succumb to the will of the expert cheesemongers. “Oooo, I’ll take a pound of that too, please.”

This little store was stocked with everything one could possibly need for the finest cours de fromage.  To customers’ backs was an entire wall of chutneys, crackers, preserves, and dried fruits. It was on this wall that I made a wonderful discovery: preserved young walnuts produced by Harvest Song.

I called Kelly over. I was eager to explain how I have for some time now wanted to preserve my own young walnuts according to the old recipes from Hannah Glasse and John Farley. Before she could make her way against the lines of people, two samples awaited our approval at the counter.

Walnuts, in the 18th century, were often pickled with vinegar, preserved in sugar syrup, or processed into walnut catsup. Generally, young walnuts were used before their shells had the chance to harden. Recipes instruct that the nuts are to be harvested while a pin can still be pushed through them. Most of, if not all of the walnut was preserved — meat, shell, and husk alike, depending on whether they were to be preserved white, black, or green.

These recipes have always captured my curiosity, but in the busyness of modern life, it seems I have routinely either missed the harvest window, or have lacked the week and a half to dedicate to the process. So I was thrilled to find these preserved walnuts on the shelf and was willing to pay the $10.00 price for an 18.9-ounce jar. No preservatives — only young walnuts, cane sugar, and lemon juice. I suppose I could throw in a few whole cloves and let them sit in my refrigerator. That’s about all they’re missing.

Kelly and I squeezed in between the lines to get to our samples. The sweetness was the first thing we noticed…almost cloyingly sweet…but they were a bit earthy too. These walnuts remind me of the flavor of dates…sending my thoughts longingly back to that first bite of aged Gouda. This would be a perfect compliment.

But beyond the flavor, probably the more memorable experience was the texture. How can I describe it without diminishing the surprise? The snap of an excellent refrigerator pickle…the crunch of a freshly roasted jumbo cashew…the pop in my back when my chiropractor finally gives me relief…yeah, that visceral…my attempts seem absurd.

The shop manager noticed our surprise and was delighted in our willingness to try them. I explained my fondness for historical foods. Out of curiosity, I asked if he was familiar with a French cheese that was very popular in the 18th century. I couldn’t remember its name…it started with an “M.” The most peculiar thing about this cheese is how it gains its flavor through the secretions of cheese mites that infest the block.

“Mimolette!” he interrupted.

“Yes! That’s it! Do you happen to have any?”

“No, I’m sorry, sir. You see the FDA has banned Mimolette in the U.S. They won’t allow it through customs. It seems that customs officials don’t like how it comes all covered with bugs! What a shame!”

“Yes, isn’t it…what a shame.”

So to my disappointment (but not necessarily to Kelly’s), there will be no Mimolette at the wedding reception, but I’m thinking a bowl of sliced preserved walnuts will be in order.

While we don’t offer the walnuts here at Jas. Townsend & Son, you can find them in my new favorite cheese shop in Kalamazoo, or you can order them on line. I will shamelessly say that the bowl and knife in the picture above are sold on our website.

If you prefer to try your hand at making your own preserved walnuts, I wish you success in your endeavors. I would love to hear of the outcome. Here’s a recipe from John Farley’s 1800 edition of The London Art of Cookery.


Posted in 18th Century Cooking, Historic Cooking, Ingredients | Tagged , , , | 17 Comments

Ship’s Biscuit Recipes

Lobscouse-jas_Townsend_savoringthepast-1

Many recipes in the 18th century use biscuits as an ingredient in other foods.

Now I’m a biscuit fan. I’ll take mine hot with a dab of butter and a little honey. It just so happens that my bucket list includes the goal of producing lightest, flakiest biscuit I’ve ever eaten…and it’s likely that the more I attempt to accomplish this so I can check it off my list, the more urgent the matter becomes.

cutting round shapes in the bisket doughBut that’s truly beside the point. The old English recipes aren’t referring to the Ol’ Southern variety that utilize chemical leavening agents, i.e., baking powder and baking soda, in order to reach new heights. 18th century biscuits were most often flat and crisp — more like a cookie or cracker.

There were different kinds of biscuits, each with their own texture and method for making. Some recipes called for the dough to be violently beaten with a rolling pin or paddle. This softened the dough and made the finished product lighter. Other recipes required whipping eggs for a long time and then gently folding in the flour. This was actually a early form of leavening. It resulted in a light and spongy texture. Most biscuits, like the simple biscuit, were sweetened with sugar, some, like the ship’s biscuit, were not.

While biscuit recipes differed in ingredients and techniques, the one element that seemed to be common across the board was that they were either twice-baked or baked for a longer period of time at lower temperatures. This ensured their crispiness and also allowed them to be stored for long periods of time. The word “biscuit” is believed to come from the Old French that means twice-baked.

The biscuit I’m focusing on today is the ship’s biscuit — the plainest of them all. The ship’s biscuit usually consisted of just flour and water. They were favored by quartermasters and ship’s captains for their ability to last. They were baked at least twice, sometimes four or five times to drive as much moisture from the crumb as possible. What was left behind was a hard, barely edible puck, that usually required soaking in beer, coffee, milk, water, broth, or wine to make more palatable.

Here are some recipes that utilize the biscuit as an ingredient from Charles Carter’s 1749 cookbook, “The London and Country Cook.”

It could be debated that Carter was referring to a sweetened simple biscuit in this recipe. It’s unclear, however. The addition of sugar to the mix would suggest that ship’s biscuit could be used.

Also, here’s a remedy for the dropsy from the same work:

Another common and apparently popular dish among sailors, depending on the skill of those who prepared it, was lobscouse (a.k.a. Lobscourse, scouse, lap’s course, or lobskous) — a thick and hearty stew of beef or pork, often with root vegetables, that was thickened with crushed ship’s biscuit. Be sure to check out our previous post on how to make lobscouse, and don’t miss the video on lobscouse on our Youtube channel.

Posted in 18th Century Cooking, Bread, Historic Cooking, Recipe, Video | Tagged , | 5 Comments

18th Century Pasties: Addendum

IMG_3057

Here’s an interesting passage from William Ellis’s 1750 book, “The Country Housewife’s Family Companion” (page 65). Ellis speaks of the virtuous timing of slaughtering a “porker” prior to harvest. The scrap pieces of meat could be used in making portable meat pies or pasties for the harvest workers.

“…our Housewife takes [the pieces of meat], and chops them into Bits, about the Bigness of a Pidgeon’s Egg; then peppers and salts them pretty high, for at this Time of Year this is more than ordinarily necessary to be done, because these Pyes or Pasties are to be kept for some Days for being eaten cold. This done, make a regular Mixture of the fat and lean Pieces, if there be not fat Pieces enough, the Pye will eat dry, and if there be too much Fat, it will be apt to make the Harvest-men sick. Now with these fleshy and bony Bits of Meat, several large Pyes may be made, and baked, either in raised Paste, in earthen Pans, or in pewter Dishes, or in the Shape of turnover two-corner’d Pasties, and thus they become a most necessary and convenient Food at this Time of Year, for Farmers Families in particular, because the cold Pyes and Pasties are a portable, wholesome, and satiating Victuals for Breakfast or Dinner.”

For a nice pork pie recipe check out the recipe in our earlier post “A Pork Pie with a Standing Crust.”


Posted in 18th Century Cooking, Baking, Historic Cooking, Pies, Recipe | Tagged , , , , | Leave a comment

18th Century Pasties, Part Two

IMG_2036

As I began my quest to understand the 18th century pasty, I figured the first thing I needed to do was to leave behind all of my modern notions of what they were. I needed to travel light, leaving plenty of room for the period recipes and definitions and between-the-lines clues that I would gather as I combed through my resources. I visited many of the old cookbooks, dictionaries, journals, and magazines, looking for signs leading to a uniform definition, so that I could recommend the historically accurate method of making pasties. Whenever I hit a dead end,  I’d consult the secondary sources for hints that I may have overlooked.

After studying all the souvenirs I collected along the way, I decided to return home, leaving the path for others to explore. I did so not with some sense of defeat, but rather with the somewhat enigmatic conclusion that there simply is no definitive answer…no single historically accurate method of making an 18th century pasty.

pourThe Oxford English Dictionary claims pasties were pies made without a dish. This same definition can be traced back to 18th century dictionaries. Yet, the most commonly published recipes in 18th century cookbooks utilized baking dishes.

The Oxford Companion to Food attempts to delineate between pies and pasties by claiming either a multiplicity or singularity of  ingredients used in each dish. Yet you look across the terrain of period recipes and you’ll find the two terms, pie and pasty, are often used interchangeably (The Country Housewife Family Companion, for example, by William Ellis).

Hannah Glasse recommended the use of a baking dish. William Rabisha, in his 1682 cookbook, “The Whole Body of Cookery Dissected” suggested crimping together two pieces of pastry. Other authors recommended a tin patty pan.

Some pasties were baked. Others were fried (e.g., Charles Carter’s recipe, below, from his 1749 cookbook “The London and Country Cook“).

Pasty crusts were often highly decorated — one of many showpieces that might adorn a multi-course meal. Pasties were also made in a free-form crust to be taken into the field or on a journey to be eaten cold, out of hand. Ellis copies the following pasty recipe from Rabisha:

Rabisha’s Way to bake Brawn to be eaten cold.–Take (says he) your raw lean brawn, that is not useful to collar, and as much fat bacon, mince them small together, and beat them in a mortar; beat a good handful of sage with them; season them with some pepper, salt, and beaten ginger; pour in a little vinegar, and break in a couple of eggs; you may make a cold butter paste in a sheet form, and lay this your prepared meat on it; put in butter, and a few bay-leaves on the top, and so close up your pasty for baking.

(Brawn is any meat suitable for roasting, but often is the breast and/or leg of fowl.)

John Mollard, in his 1836 cookbook, “The Art of Cookery Made Plain and Easy,” includes a recipe for a “Puff for a Journey.”

Given all the variations here, I suppose the Pork Pie I wrote about in an earlier post and that was featured in one of our earlier videos could technically be called a pasty as well.

So which style of pasty is most historically accurate? They all are. It seems the common denominator between all pasties is simply two things: a crust and a meat filling….oops, then again, there were fruit pasties. Ok, it seems there is ONE common denominator: crust.  And that takes us back to the O.E.D. which explains that the word “pasty” can be traced back through the Old French language to words from the ancient Latin dialect meaning, “something made of paste.”

I feel as though I’m walking in circles.

Why all the variations? It could be due to possible regional differences; possibly socio-economic differences as well. I mentioned in my last post that the beloved modern pasties that exist in similar form in insular regions throughout the United States, Latin America, Australia, and South Africa, are culinary descendants of the Cornish pasty of the Cornwall region of England. While the folded-over meat pastry may be the most common form of the pasty today, it appears it was only one of many forms in the 18th century.

Here’s our take on a recipe for a delicious meat pasty from an earlier version of Mollard’s cookbook:

Puffs with Forcemeat of Vegetables

Ingredients:

About 1 pound of veal, coarsely chopped (Beef will also do)
2 ounces Fat Bacon (modern-day salt pork or jowl bacon), coarsely chopped
1 cup each, green beans, asparagus, mushrooms, onion, parsley (all fresh), coarsely chopped
Salt and Pepper
1 cup Bread Crumbs
1 Egg Yolk
1/2 cup Cream

Puff Pastry Dough (see our previous blog post and video on making a puff paste)

Egg Wash

Lard, a sufficient amount for deep frying.

Directions:

Combine the veal and the vegetables in a large bowl, and season with salt and pepper.

fry1Preheat a large skillet or spider and fry the fat bacon for 2 or 3 minutes until much of the fat is rendered. Add the meat and vegetable mix and fry for about 5 minutes. Return the mix to the bowl, add the bread crumbs, and allow to cool for 10 to 15 minutes.

In a separate bowl, mix the egg yolk and cream together. Add this mixture to the meat and vegetable mix, and stir it until it is well incorporated.

spoon1Roll out your puff pastry dough until it’s about 1/8″ thick, keeping it as square as possible. Then cut it into about 6″ squares. Once the meat and vegetable mix has cooled, spoon a portion of it onto the middle of each pastry square.

pinchedge1Brush two of the edges of each pastry square with egg wash, fold the square over the meat mixture so that it forms a triangle, and crimp the edges closed.

deepfry1In a cooking pot or kettle, preheat the lard to about 350-degrees (F). carefully add the pasties, 3 or 4 at a time, and fry for 15 to 20 minutes, or until the crust is golden brown. You’ll want to keep the lard around 350-degrees. Any lower, and the pasties will be greasy. Any higher, and the crust may become golden brown on the outside, but remain doughy on the inside.  Drain on sheets of paper or on a cloth.

done1

Posted in 18th Century Cooking, Baking, Historic Cooking, Ingredients, Pies, Recipe, Video | Tagged , , , , , , , , | 4 Comments

18th Century Pasties, Part One

Puff Paste

Say the word “Pasty” (pronounced “past-ee”), and you’ll likely receive a passionate Pavlovian response from hungry folks from several regions of the U.S. (i.e., Michigan’s U.P., or parts of Pennsylvania, Wisconsin, Montana, and California). Echoes of the lip-smacking cheers reverberate across the globe from distant parts in Mexico, Argentina, South Africa, New Zealand, and Australia. But the loudest ruckus of all comes from enthusiasts in a western region of England; whose fierce pride is expressed through laws and regulations that define authenticity while protecting the tried-and-true recipes of old — making the Cornish Pasty a National Heritage Food (and some would argue, a national treasure more valuable than even the Crown Jewels).

While other forms of hardy meat turnovers exist elsewhere around the world, the pasties so beloved in the regions mentioned above, find their common culinary roots in English cooking.  Food historians tell us that the free-form pasty co-migrated with 19th and 20th-century Cornish tin miners as the tin mines at home dried up and other hard-rock employment opportunities opened abroad.

Pasties have been a popular dish on English tables for centuries. The Oxford English Dictionary claims the earliest use of the word in English literature was in 1300. The OED’s definition of a pasty matches most modern expectations of the dish: a meat filling, enclosed in a crust of pastry, and baked without a dish. I have traced similar definitions at least as far back as 1764. Earlier definitions seem to be a bit more generic or obscure, describing a pasty as “a great pie” or “a pie made with flesh or fruit.”

An 18th Century Pasty with a "Proper Paste"

I think it’s important, however, to try to consider such definitions apart from our modern expectations. For instance, “baked without a dish” could mean the pie used a standing crust instead. But when one examines 18th century pasty recipes, contrary to contemporary definitions, a completely different sort of dish takes shape: most often it’s a meat pie prepared in an earthen dish that is partially lined with a thick puff paste and then topped with the same.

Now that’s not to say that the free-form versions of the pasty are an inaccurate option for historical re-enactors and foodies. I’ll share some period recipes free-form pasties in my next post. But today, I want to give you a typical 18th-century recipe for a beef pasty that uses what some cookbooks called “a proper paste” (I say that at the risk of raising the hackles of many free-form fans).

Our recipe comes from Charles Carter’s 1749 cookbook, “The London and Country Cook.

While most 18th century recipes were for venison pasties, other types of meats were used (e.g., beef, pork, mutton, and poultry). Most period pasty recipes also call for either neck, shoulder, or breast meat (brisket), while a few call for rump or sirloin. The previous cuts are from the front end of the animal, and are usually more flavorful than those from the rear. They are, however, also tougher due to high levels of collagen or connective tissue between the strands of muscle.

Collagen is broken down through slow roasting or boiling. Some of the best modern barbecue brisket can be roasted for 12 hours or more. If you try to roast your meat too quickly, it will turn out too tough to eat. Some 18th century recipes for venison pasties argue against what was apparently conventional wisdom: that one had to be careful not to overcook venison. To the contrary, these recipes claim that when it comes to pasties, you can’t overcook the meat. I suspect, that is why the pastry crusts on these pies are so extraordinarily thick — up to 1/2″ thick…before it’s baked! One such recipe even suggested covering the thick paste with buttered paper to prevent it from scorching due to the long baking time.

Many period recipes also suggest marinating and aging meat for several days, as well as beating it to a pulp with a rolling pin. This was done to further tenderize the meat. Beef was likely much tougher then than it is today. Most of the meat sold in U.S. markets is aged prior to hitting the store shelves, so we skipped this step…it’s another example of how modern food developments have made exact historic food reproduction difficult, if not in some cases impossible.

Carter’s recipe also uses cochineal — a red dye (“Natural Red 4”) derived from parasitic scale insects living off cacti throughout warmer climates. Carter’s recipe was the only one I found that used this ingredient. We’ve eliminated it from our rendition primarily because many people today are highly allergic to it. If you want to try it, you can purchase it online.

18th-Century Beef Pasty

Ingredients:

1 to 1-1/2 pound Beef, cut into 1-1/2″ to 2″ chunks (we used chuck roast (or shoulder) …in honor of Charles Carter!)
1/2 to 1 teaspoon each, Salt & Pepper
1/4 to 1/2 cup Burgundy wine
3 to 4 Tablespoons Suet, grated or crumbled fine (multiple period recipes suggest using butter instead)

1 Puff Paste (if you need a recipe for puff paste, watch our video or read our earlier post.)

1 pound Beef Bones, cut or broken into chunks
salt and pepper
Water

Directions:

wine

Several hours before you wish to serve your pie, or even the night before, combine the beef, salt, pepper, and wine in a ceramic or glass bowl. Set aside to marinate.

Preheat your oven to 350-degrees (F).

cut

Roll out your puff pastry dough to between 3/8″ and 1/2″. Lay an inverted pie pan on top of your pastry and cut out a circle slightly larger than the pan. In the center of this circle, cut out a hole approximately 2″ in diameter. Save the plug from this hole.

crustTurn your pan back over, and with the larger scraps of pastry, line only the walls (not the bottom) of your pan, keeping the pastry about 3/8″ thick.

decorCombine and roll out the remaining pastry scraps until it is about 1/8″ thick. Cut out your decorations from this piece of pastry dough, and arrange them on the top of your pastry round.

suetFill your pastry-lined dish with your meat mixture. Top the meat mixture with the suet or butter. (If you are planning to use suet, be sure to first read our post on what suet is and what it is not.) Finally, cover the meat with the pastry round, and replace the plug that was cut from the center hole.

bonesPrior to placing the pasty in the oven, place your beef bones into a cooking pot, season with salt and pepper, and pour in just enough water to cover them. This will be placed in the oven and baked alongside the pasty. This will make a lear or thin gravy that will be poured into the pie once it’s done baking. Other recipes suggest placing the bones in a pot over medium heat and simmering the bones until the liquid is reduced by half.

Bake the pasty (and lear pot) for 2 to 2-1/2 hours. If your crust looks as though it’s getting too dark, cover it with paper.

pourOnce the pie has finished baking, remove the center plug from the crust. Strain the lear, discarding the bones, and pour the lear into the hole. Then replace the plug. Allow this to set for about 15 minutes before serving.

Posted in 18th Century Cooking, Baking, Historic Cooking, Ingredients, Pies, Recipe, Video | Tagged , , , , , , | 5 Comments

Standing-Crust Pie Recipes

A Standing Crust (with removable lid)

A Standing Crust (with removable lid)

In my last (rather lengthy) post, I shared a recipe for a large standing crust from Mrs. Frazer’s 1791 cookbook, “The Practice of Cookery.” Rather than leave you standing there with an empty pie shell, I thought it would be good to fill it with a sampling of 18th-century recipes that call for just such a pastry.

Confession: I’ve made only the vegetable pie, but I find the other recipes to be rather enticing. The notes I’ve included beneath each recipe are based on previous experiences.

1. From Sarah Martin’s 1795 cookbook, “The New Experienced English Housekeeper“:

Note: Contrary to this recipe, in that previous post I mentioned as well as in our video on making a large standing crust, we followed the advice of another period cookbook by baking the lid separately on the back of a tin plate.  Also, a fricassee sauce is usually made by first sauteing meat (the word finds its origins in the meanings “to cut” and “to fry”). Our version in the video above is meatless.

2. From the 1774 version of Hannah Glasse’s book, “The Art of Cookery Made Plain and Easy“:

Notes: “Olives” in this and other such recipes are rolled-up pieces of meat. “Collops” are thinly sliced steaks or medallions of meat. The recipe suggests tenderizing the collops by beating them with the back of a knife blade.

Also, if you plan to use suet, be sure it is really suet (kidney fat) and not just hard muscle fat. Both types of fat are called suet nowadays, but they are very different — a difference that was apparently understood in the 18th century. Muscle fat will impart a very “beefy” flavor to the dish, whereas, kidney fat has very little flavor (as long as it’s fresh). Muscle fat will also produce a very greasy-textured pie, whereas kidney fat will result in a more moist and solid (when allowed to cool) texture. Ask your butcher specifically for kidney fat. If you can’t find true suet at your butcher’s shop, you can purchase processed suet on line.

There is a series of posts on SavoringThePast.net that cover the topic of suet. We also have a video on suet on our YouTube channel.

Finally, orange-blossom water can often be found in middle-eastern food marts, or it can be purchased on-line

3. From the 1796 version of Susannah Carter’s “The Frugal Housewife“:

Note: The aforementioned comments on suet apply here as well. Also, beef can be substituted for venison.

4. From the 1800 printing of Hannah Glasse’s, “The Complete Confectioner“:

Note: The exact size of a penny loaf of bread is indeterminable. It varied according to the current market price of wheat as well as the type of flour being used. I suggest starting with any 12 to 16-ounce loaf. Now I realize that is quite a range, but if you think that’s something, one 18th-century “Table of Assize for White Bread”  regulated the size of a 2-penny loaf, depending on the current price of wheat, from between 1-pound, 15 ounces, to a mere 9-ounces.

In addition, while the recipe isn’t this specific, I also suggest using only the crumb of the bread and not the crust. Grating or “chipping” (cutting) the crust off a loaf of bread before using it as an ingredient was a very common practice.

If you try any of these recipes, please let us know by leaving a comment!

Posted in 18th Century Cooking, Baking, Bread, Historic Cooking, Ingredients, Pies, Recipe, Video | Tagged , , , , , , , , | Leave a comment

A Large Standing Crust

A Grand Standing Paste, in the painting "February" by Joachim von Sandrart - 1642

A Grand Standing Paste, in the painting “February” by Joachim von Sandrart – 1642

In earlier posts, I offered recipes for a small standing crust — perfect for individual-serving meat pies, a short crust, as well as a puff pastry. These recipes were versions of the three types of crusts used probably most often in 18th century cooking.  The basic distinctions between these three crust types have to do with the methods employed to make them. Standing crusts were typically made with boiling water, while the ingredients in short pastes and puff pastes were kept cold. In addition, the fat ingredient in a standing crust was melted and completely incorporated, while it was cut in cold into short pastes and laminated between layers of dough in puff paste.

There were many other types of crusts from the English kitchen, but most, if not all, could still be classified by one of these methods; their differences were defined primarily by the ingredients used.

Standing crusts were likely the oldest of the three pastry types. The crust of a standing pie served as its own cooking, serving, and storage vessel. Sometimes these pastries were partially baked before being filled, in which case, the pie’s lid was often baked separately. Other recipes suggested filling the pastry prior to baking. The lids were most often sealed to the walls and a hole was cut in the top of the pie. If the pie was to be served immediately, a gravy was poured through the lid’s hole after baking. As in many cases, if the pie was to be stored for later consumption, the pie was filled with either clarified butter or suet to keep the air away from the pie’s contents. Pies were reportedly kept this way for weeks. When it came time to serve the pie, they were reheated, and the suet was poured out and replaced with a gravy.

When served at the table, the crusts of standing pies were often emptied of their contents just like other serving bowls. The crusts themselves were seldom eaten, but rather either discarded or returned to the kitchen to be used at a later date as a thickening agent in soups and stews.

The recipe I share today is for a larger standing crust from Mrs. Frazer’s 1791 cookbook, “A Practice of Cookery.” There are many 18th-century recipes for standing crusts from which to choose. This recipe, however, is a bit unique in a couple of ways: first, it makes a smaller batch of dough — most recipes were intended to make either a very large pie or several mid-sized pies; and second, this recipe is fairly specific regarding the measures of ingredients, whereas most recipes depended greatly on the cook’s experience and ability to judge whether the proper texture and consistency had been reached. This unusual clarity found in Mrs. Frazer’s cookbook may have been due to the likelihood that the book was written and published both as a reference for household and professional cooks as well as a textbook for her culinary students at Edinburgh.


One caveat: I’ve adjusted the measure of ingredients from Mrs. Frazer’s recipe to make one 8″ to 9″ pie. If I erred anywhere in my interpretation of the recipe, it was in failing to take into account that Mrs. Frazer use of Scots measures instead of English measures. A Scots pound of butter (and this rule applies only to butter) is equivalent to 22 English ounces. So instead of 6 oz. (1-1/2 sticks) of butter as I suggest below, you may wish to use 8 oz (2 sticks) instead. Either way (6 oz. or 8 oz.) the fat to flour ratio falls easily within the range of ratios from the numerous other 18th century standing crust recipes I found.
 

The method I propose in constructing this standing crust is different from that of Mrs. Frazer’s. There were two basic methods of raising a standing crust. I’ll draw upon my experience as a potter to describe both methods.

Jon is using an improvised pastry dolly to raise this small standing crust.

Jon is using an improvised pastry dolly to raise this small standing crust.

The first is what I call a pinch-pot method in which the base and walls of the crust are pinched, squeezed, and pulled from one lump of dough. We used this method (with the assistance of an improvised pastry dolly) in our Standing Crust Meat Pie video. Depending on the type of fat you use (check out my earlier post, “A Pork Pie with a Standing Crust”), you may find it easier to construct the crust while the dough is still warm.

The second method is what I call “slab building,”  where the dough is rolled out and cut into the separate pieces needed to make the final crust (i.e., the base, the lid, and the wall pieces). All of that is done while the dough is still warm. The pieces are then given the chance to cool down completely — even over night. They are then “glued” together using egg white.

This second method seems to offer more control (as well as much less frustration) over the first method. While slab building is a legitimate 18th century pastry technique, is seems to be treated by most authors who mention it as a technique used by lesser experienced cooks.

I embrace my inexperience.

In my experience and opinion, slab building results in a neater, “less vulgar” (as the 18th century culinary critics would put it) finished appearance.

A Standing Crust (with removable lid)

Ingredients:
12 ounces Water
6 oz. Butter,  or 1-1/2 sticks (*See my caveat above)
6 cups All-Purpose Flour
1 Egg
1 Egg Yoke

1 Egg White to be used as a wash during and after construction.

Directions:

butterwater
Put the water and butter in a sauce pan (or pipkin) and bring to a gentle boil over medium heat.

In a large bowl, mix together the flour, egg, and egg yoke.

Once the water and butter have come to a boil, add it to the flour mixture and mix it well with a spoon. Once the dough has cooled down to the point that you can handle it, turn it out onto a floured surface and knead it for about 10 minutes. Cover the dough and allow it to rest for another 5 minutes.

cutting base

Divide your dough into three equal portions. Take the first lump and roll it out in a large circle about 3/8″ thick.  Use a plate or a pan (we used our 8″ Cake Ring) as a template to cut out a circle 8″ to 9″ in diameter. This is the base to your pie. Repeat this with the second piece of dough to form your lid. Any scrap pieces can be worked back into the third lump of dough.

rolloutwall

Roll out the last lump of dough into a strip about 3/8″ to 1/2″ thick and 2-1/2″ wide. This strip should be between 25″ and 29″ long.

Cover your pieces with a couple of layers of cloth, or wrap them gently in plastic wrap to keep them from drying out. Allow them to cool completely, even over night. They will change in texture as they cool.

leafdecorations

Whatever dough scraps remain can be combined and rolled out to about 1/8″ thickness. Cut out or stamp your decorations from this piece of dough.

twistdeocrationsAlso cut some 1/2″-wide strips from this 1/8″-thick dough, and twist the pieces into ropes. Wrap your decoration pieces in plastic or cloth as you did previously with the larger pieces.

eggwash1

Once the pieces has rested for several hours, preheat your oven to 450-degrees (F), and begin construction by placing the base of your crust on a paper-lined baking sheet. Brush egg white on top of the base all along its edge.

trimwall

Set the wall piece on top of the base where you brushed on the egg white. Trim the piece’s end so its two ends meet flush together. Be sure to brush this freshly cut end with egg white, then press the ends together.

decorations

Brush the backs of your decoration pieces and apply them to the outside surface of the base and walls. Be sure to cover the wall seam with one of your decorations. Don’t forget to decorate your lid as well. When you’re finished decorating, brush the entire outer surface with egg white.

rice

Fill your crust with uncooked rice. This will help support the walls while the crust bakes.

Place your lid on a separate paper-lined baking sheet, or use a tin plate like we did.

Be sure your oven is heated to the 450-degrees. I tried this at 375-degrees and was sorely disappointed to find that my crust walls slumped. A number of period recipes offer this same warning. Bake your crust and lid for 15 minutes. You’ll know it’s time to remove your crust from the oven when you begin to see the slightest amount of color on the peaks of your decorations.

halfbaked2Once you remove the rice, your crust is ready to be filled. it can be used for meat pies, vegetable pies, or sweet pies.  The final baking will be done at a lower temperature — around 350-degrees (F), usually for about an hour.

In my next post, I’ll share with you a recipe for Vegetable Pie from Sarah Martin’s 1795 cookbook, “The New Experienced English-House-Keeper.”

Posted in Pies, Recipe | 4 Comments

Parmesan Cheese Tart

  Ok, I am obviously some kind of cheese pie freak, and I admit this is my third cheesecake type recipe in the last couple of months, but you will just have to bear with me.

cheesetart1

In the past, we made a couple of 18th century dishes that were called cheesecakes, but they were very different from the familiar modern cheesecake. 18th century cookbooks seem to have a lot of recipes that are called cheesecake, a few even containing cheese, but most do not come very close to what we now call a cheesecake. This dish comes a bit closer than most, but with a interesting twist: Parmesan.

The recipe is from William Rabisha’s The Whole Body of Cookery Dissected (1682)

To Make a Cheese Tart

This recipe makes quite a large tart so we are going to cut the recipe in half.

Parmesan Cheese Tart

Ingredients:

  • 6 oz Parmesan cheese, grated fine
  • 3 whole eggs plus 3 additional egg yolks.
  • 4 oz of butter, melted
  • 1/2 tsp of powdered ginger
  • 1/2 tsp of ground cinnamon
  • 1/2 tsp of salt
  • 1/2 of a nutmeg, grated (about 1/2 tsp)
  • 3 oz fresh bread crumbs (the crumb of any white bread, crust removed, and pulsed in a food processor will work perfectly)
  • 3 Tbs of sugar
  • somewhere around 2 to 3 cups of heavy cream

Directions:

In a large bowl, combine all the ingredients, except for the cream, and stir with a spoon until well incorporated. Add as much cream as necessary to make a thin batter. The amount of cream needed will vary depending on the type of bread you use. The goal is to have a batter that you can pour — like pancake batter. The cheese and the bread crumbs will make the batter lumpy.

For a savory pie cut back the sugar to 1 or 2 Tablespoons. If you want it a sweeter pie,  add 3, even 4 tablespoons.

Pour the batter into pie pans lined with a short paste. This recipe filled one of our 9″ pie pans with enough left over to fill a tart made in our pewter bowl. You can place optional strips of puff paste across the top.  Finish by sprinkling a little sugar on top just before you place the pie in the oven, or add some sugar after baking and brown it with a salamander or torch.

savoringthepast_cheese tart 5

Bake at 350 degrees for 30 to 45 minutes. Larger pies will take longer than smaller ones. The puff paste will puff up and brown, indicating when the pie is done.

The finished tart has a texture similar to that of a modern American cheesecake but is not nearly as sweet. You can take detect in this cheesecake the subtle bite of the Parmesan Cheese, but it’s not overpowering — perfect for the addition of fruit.

Posted in 18th Century Cooking, Historic Cooking, Pies, Recipe, Video | Tagged , , , | 6 Comments